
Yosemite Valley To Glacier Point: Hiking the Four Mile Trail in Late Fall
From late spring to early fall, Glacier Point is accessible by car, coming with easy access and large crowds. When Glacier Point Road closes sometime in fall, there is just one way to get there: hiking up from the valley floor. However, there is only a short time between the Glacier Point Road closure and the eventual closure of the Four Mile Trail due to ice and snow. In my view, this time is the absolute sweet spot for doing the hike, because you will have more solitude at the top to really soak in the views, temperatures are great for the uphill battle, and the late fall sun casts everything in a beautiful glow (and may create the most stunning surprise along the way, more on this below!). In this article, I'll take you along this uphill climb and share everything I learned on a sunny late November day, including everything you need to know to be fully prepared and have the best experience possible.
This post contains affiliate links. If you book through them, I may earn a small kickback at no extra cost to you, which helps me write free resources like this one — thank you for supporting my blog.
Hiking From Yosemite Valley To Glacier Point: the Four Mile Trail
Scan for map & details
10.3 mi
16.6 km
Distance
3,418 ft
1,042 m
Elevation
Out & Back
Route
The Climb Up: Rainbow Views & Golden Waters
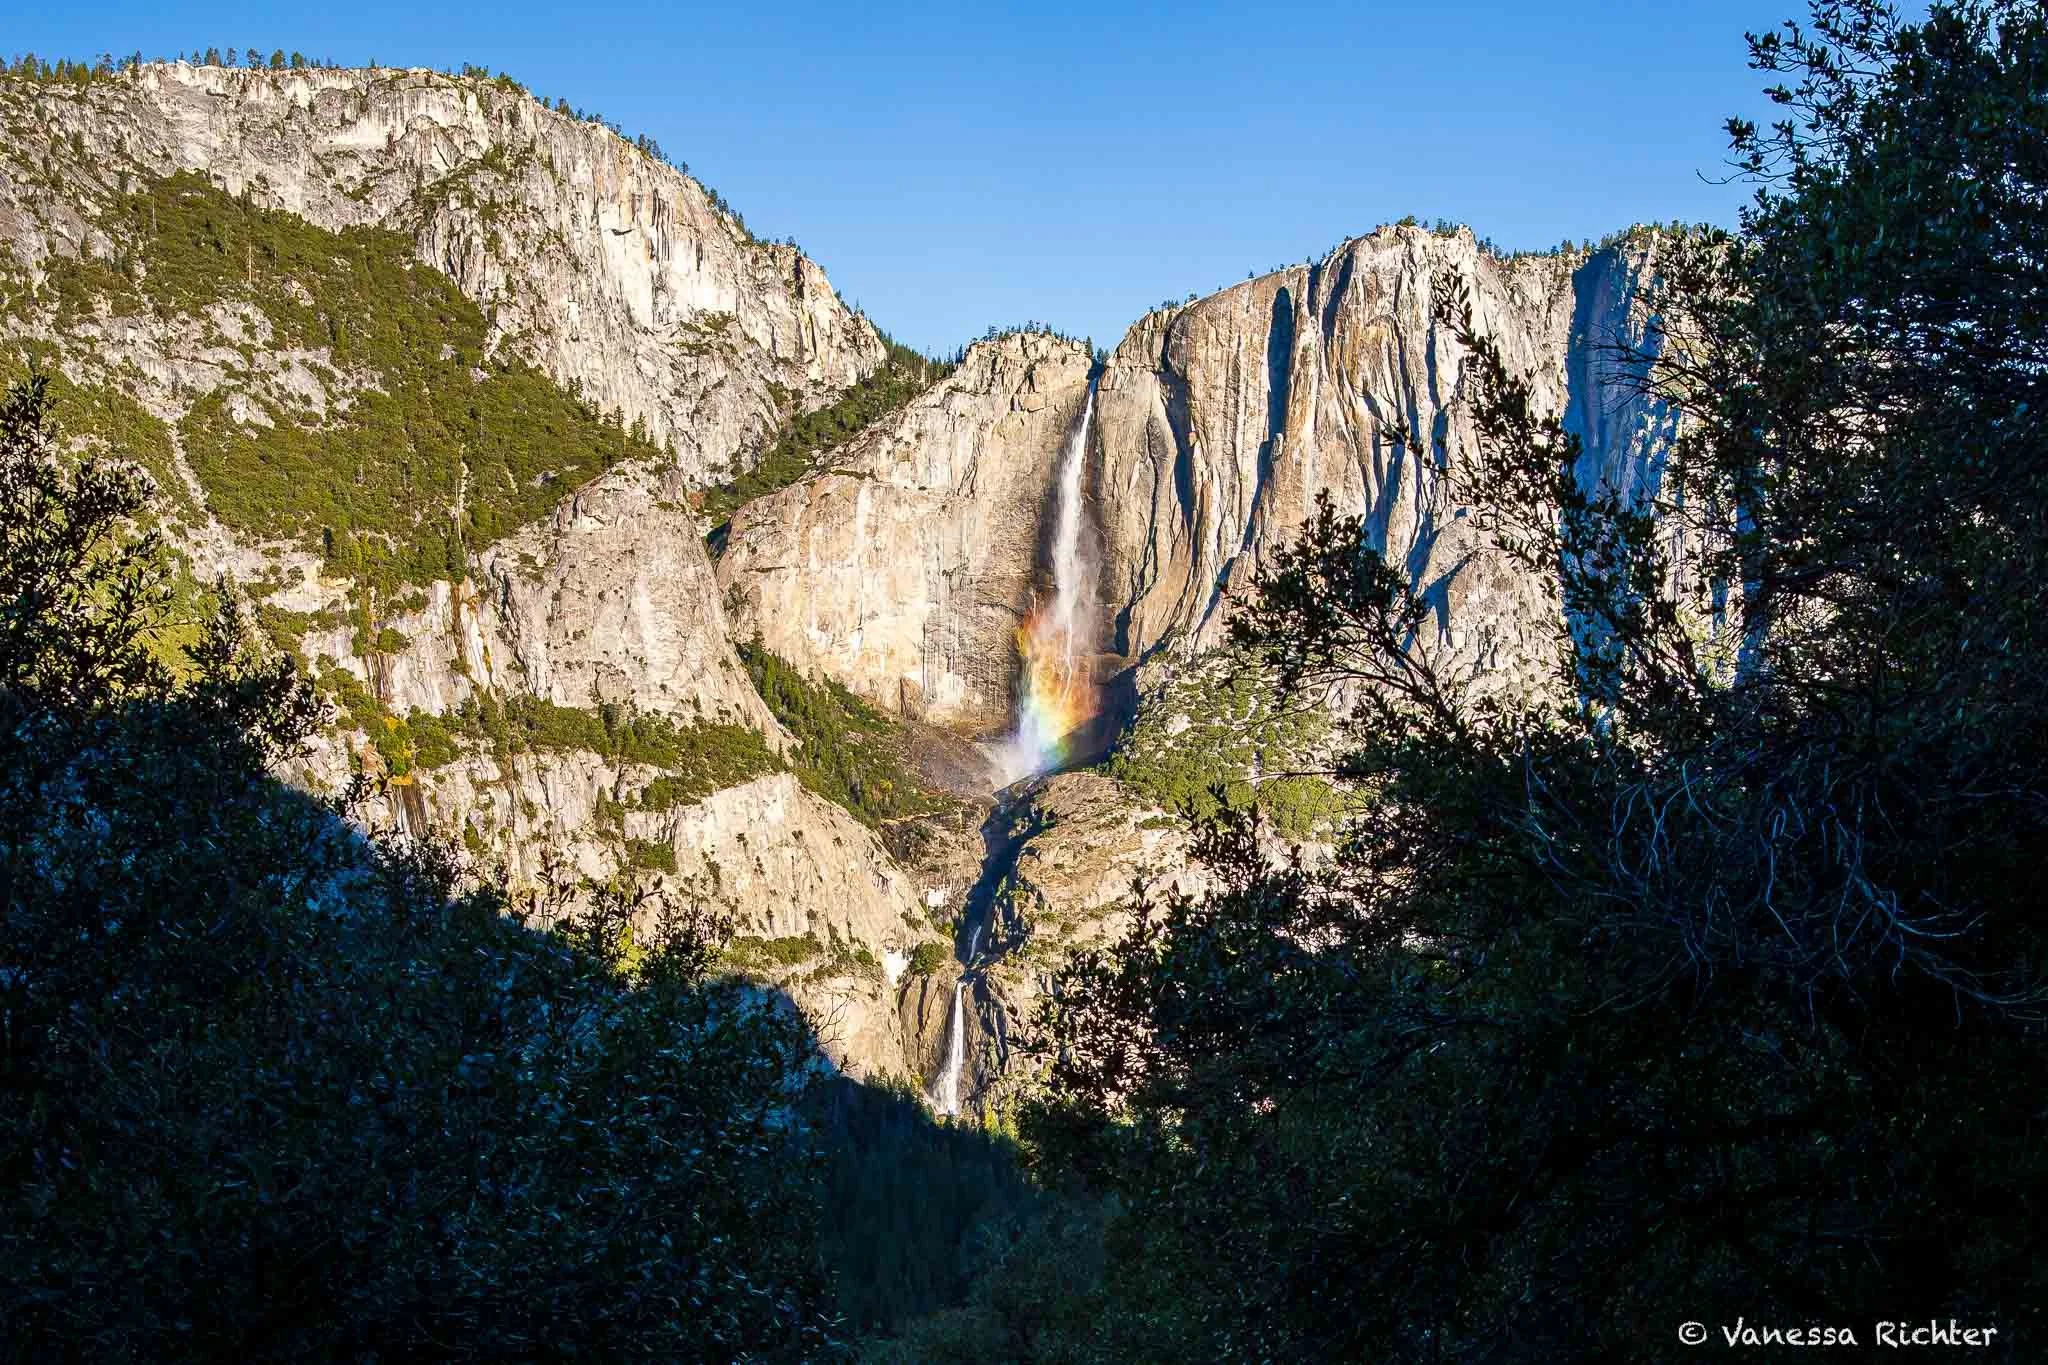
With the barely-risen sun hiding behind the granite ridges of Yosemite Valley, we set off in muted colors and chilly air. It smelled like fall in the best way possible. The parking lot, which looks more like a pull-out and fit only a handful of cars, was almost filled even though it was barely 7:30. Equipped with beanies and many layers to shed, the gravel scrunched satisfyingly beneath our feet as we walked toward the forest and the granite walls. As the trail wound up in mild switchbacks early on, our hearts got pumping just the right amount "to wake us up." While it was still chilly, I couldn't resist getting rid of the outer jacket and letting the air refresh me. With the trail in full shade, we started to get first glimpses of the sun gently hitting the mountains and brightening Yosemite Falls, which soon came into view. I had read before that they'd be visible through a large stretch of this hike, and it was true. What I did not know was that at this time and season, the sun could create such a spectacle. The sun was not just lightening them up, but created a rainbow that looked like it was painted across the mist of the upper Yosemite Falls. I always do so much research (probably more than I should do) on literally anything, but there are ALWAYS the best surprises out on a trail that you aren't prepared for. Sometimes you have to look closely, but in this case, the stunning-ness hit us right in the face.
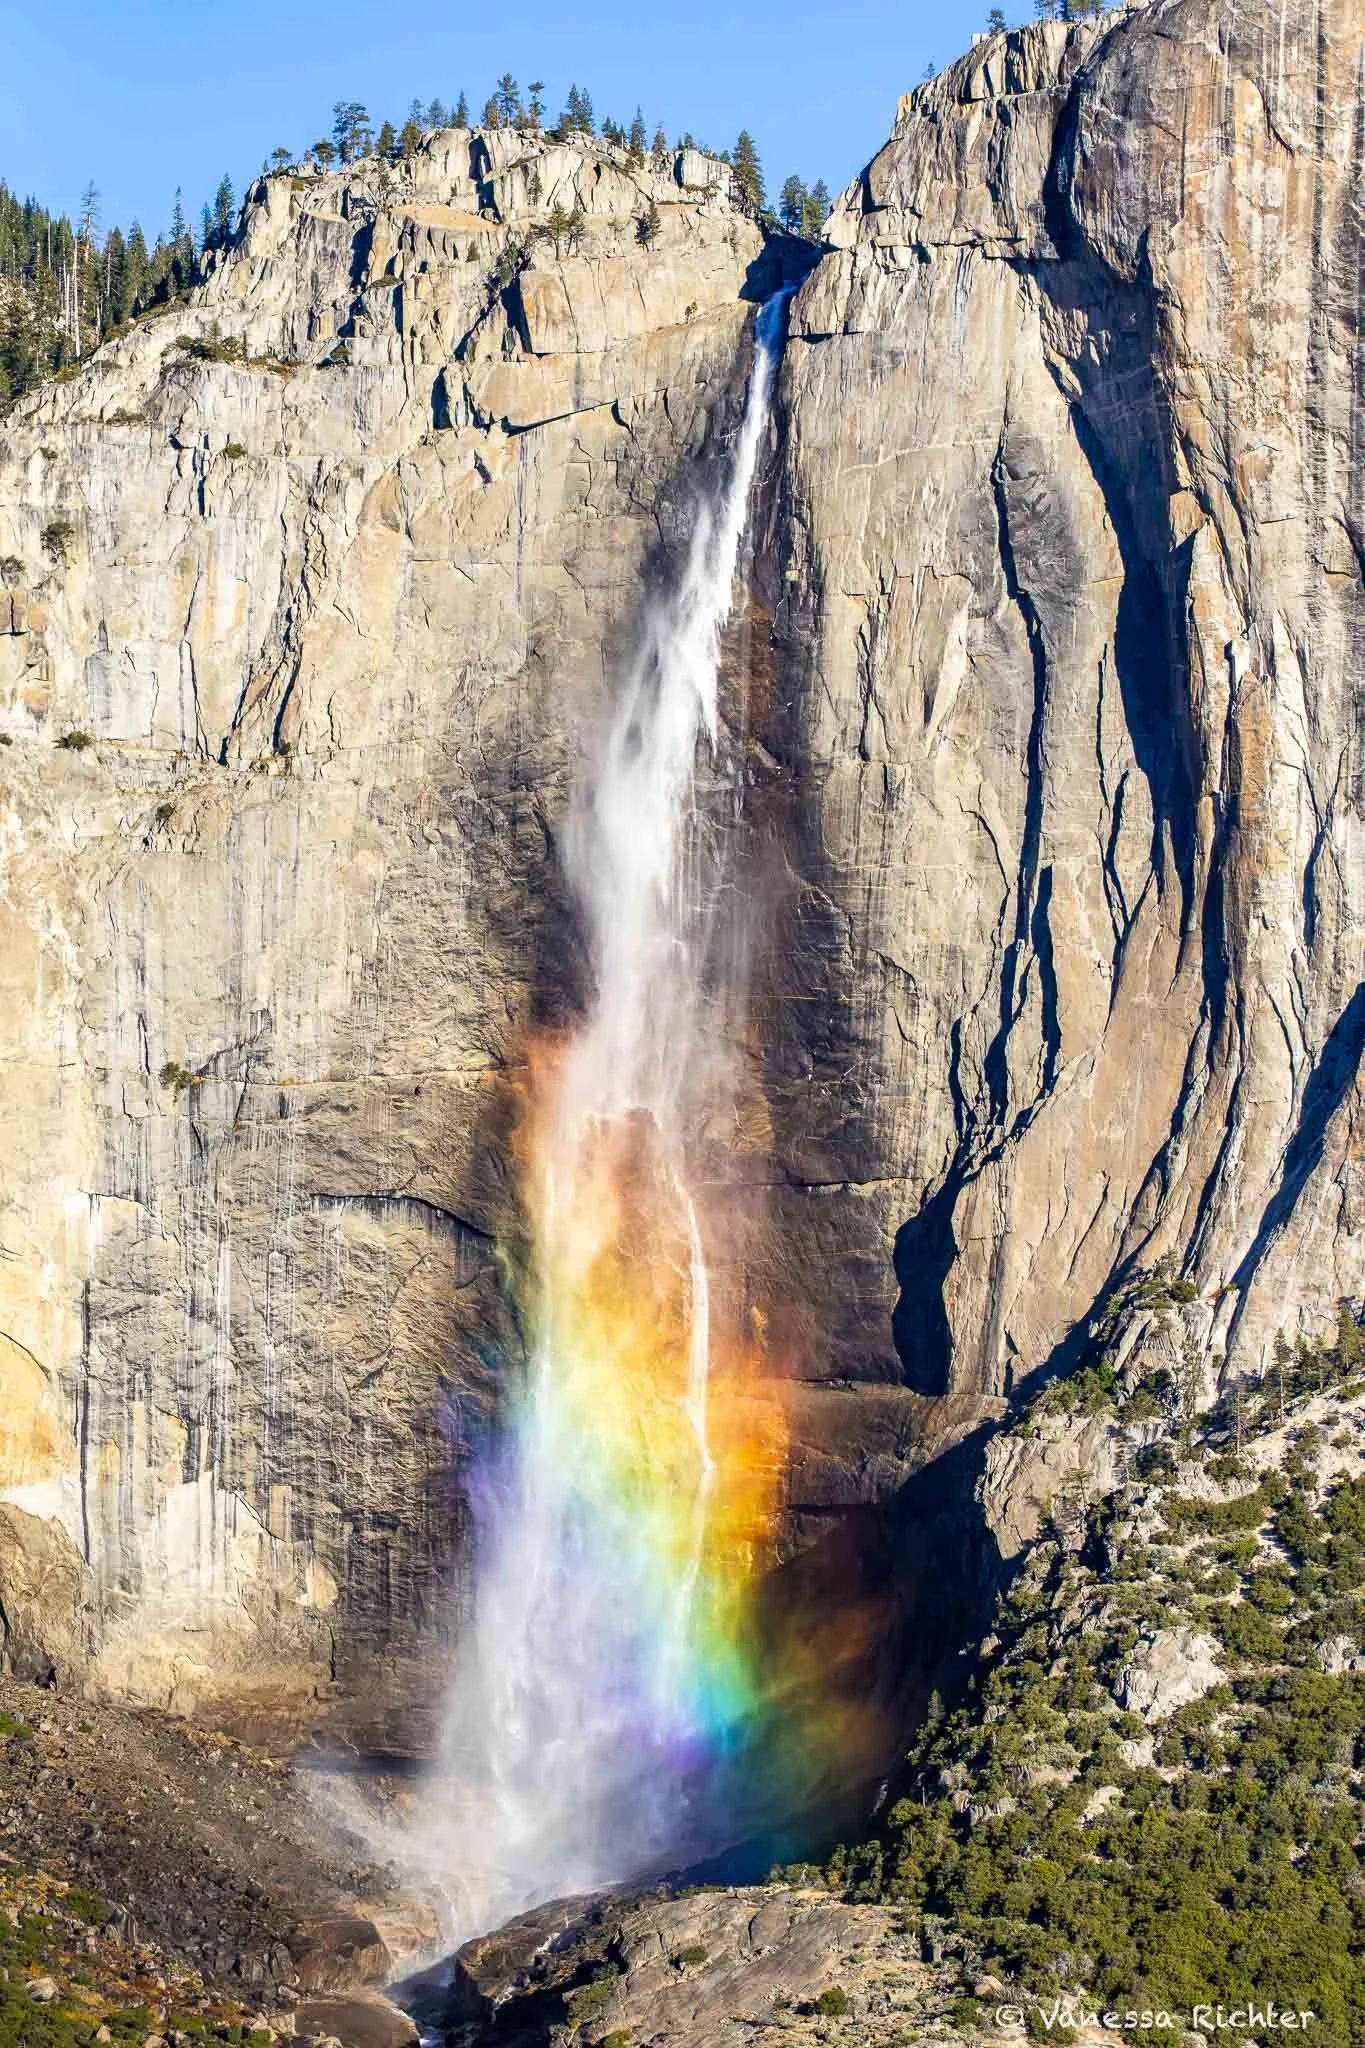
Upper Yosemite Fall Rainbow*
I took this picture around 8:30 in the morning from the Four Mile Trail. I used a telephoto lens to capture it, so the falls appear closer than they actually are from that vantage point (but you'll see them well enough with your bare eyes). Both Upper and Lower Yosemite Fall are visible from there.
*By the way, if you like the rainbow photo as much as I do, you can shop for this picture and others in my Etsy shop. I'm also happy to take requests for photos that are not yet in the shop! Creating the listing takes time, and on Etsy, photography is just drowning in a sea of listings, so it's hard for me to gauge interest at this point. Also, let me know if you'd rather have an unframed version at a lower price point and things like that. Just drop me a message.
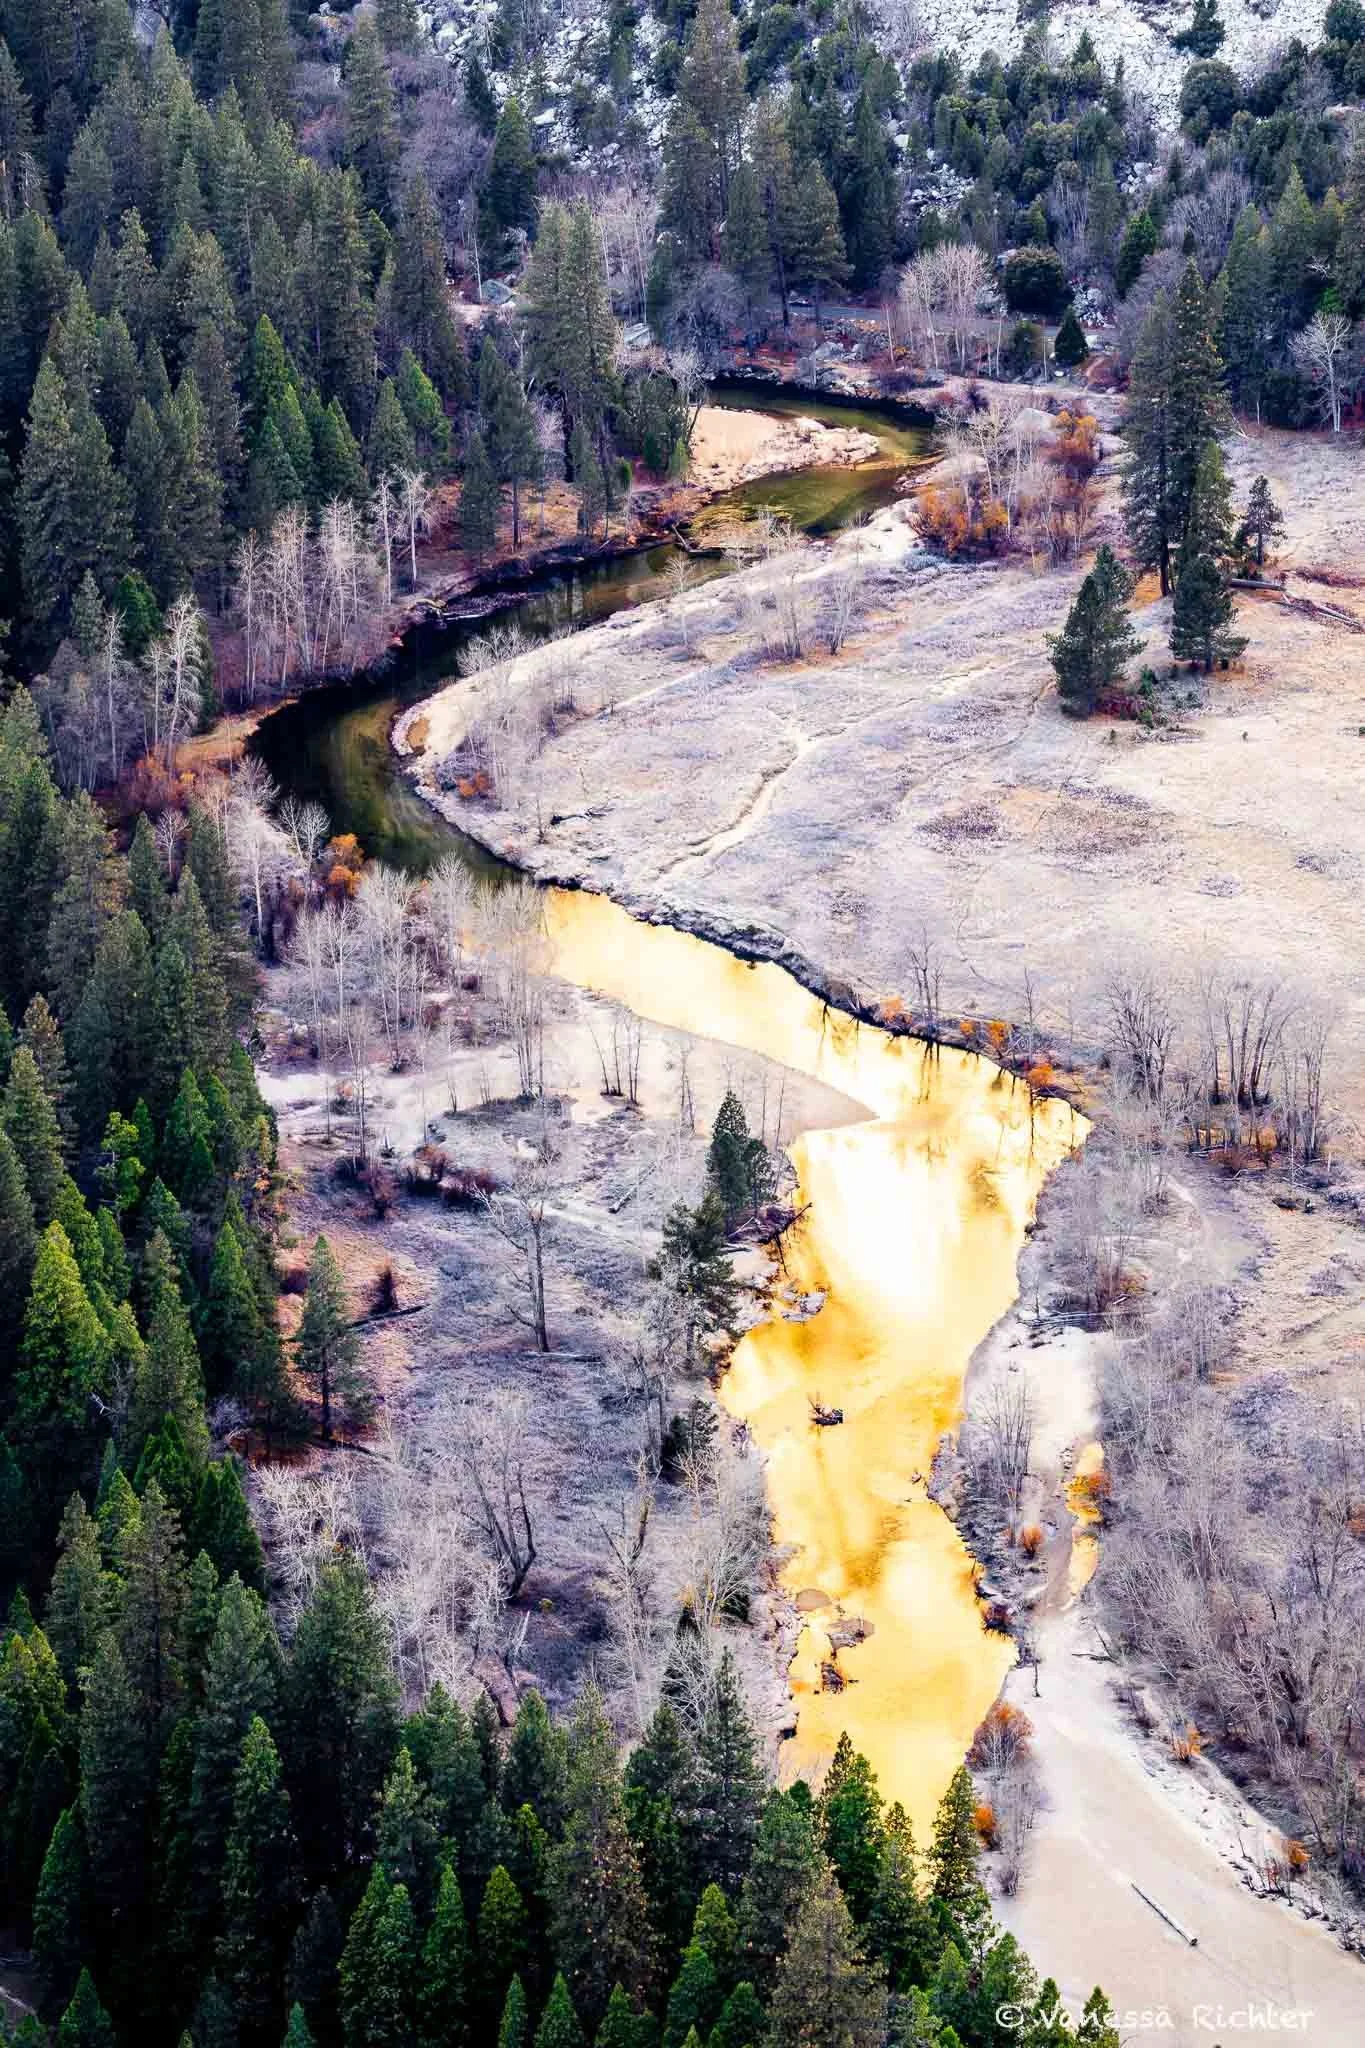
Merced River in golden morning light
Just a bit later, we also got a pretty amazing view of the Merced River from the trail, and the sun was doing everything in its power to make it glow golden while reflecting the mountains like a mirror. I found this a beautiful contrast with the meadows still covered in the pale white frost and the evergreen trees framing the river bank.
At A Glance: The Merced River
- The Merced River's source is located on the south side of Mount Lyell at 13,114 feet.
- A variety of native, endemic, and rare plant and animal species, like the threatened limestone salamander, depend on the habitats the Merced River shapes along its way.
- Human use along the Merced River dates back millennia, from Indigenous peoples to today.
- On its way down to lower elevation, the Merced drops into Nevada Fall, then Vernal Fall, and into Yosemite Valley (see photo above).
- From there it flows to the Central Valley, where the New Exchequer Dam creates a reservoir, Lake McClure. While the dam produces zero-emission energy and supplies farms with water , together with smaller dams downstream, it also alters the ecosystem and threatens native fish populations. For example, in 2022, a stretch of the lower Merced River ran dry, leading to fish being stranded and dying in the riverbed, water quality issues for humans and other species alike, and a degraded ecosystem overall.
- A proposal by the Merced Irrigation District to raise the New Exchequer Dam spillway and increase storage capacity has drawn pushback because the raise would elevate the level of Lake McClure and, thereby, inundate as much as a quarter mile of the lower Merced Wild and Scenic River as it enters the reservoir. Since this part is federally protected, this protection would need to be rolled back — something that Friends of the River and the Upper Merced River Watershed Council say would be unprecedented in the National Wild and Scenic River System, with the potential to pave the way for federal protection rollbacks elsewhere.
Sources: Yosemite Conservancy · U.S. Fish & Wildlife Service · Merced Irrigation District · Upper Merced River Watershed Council · Friends of the River · Friends of the River — Dry Rivers
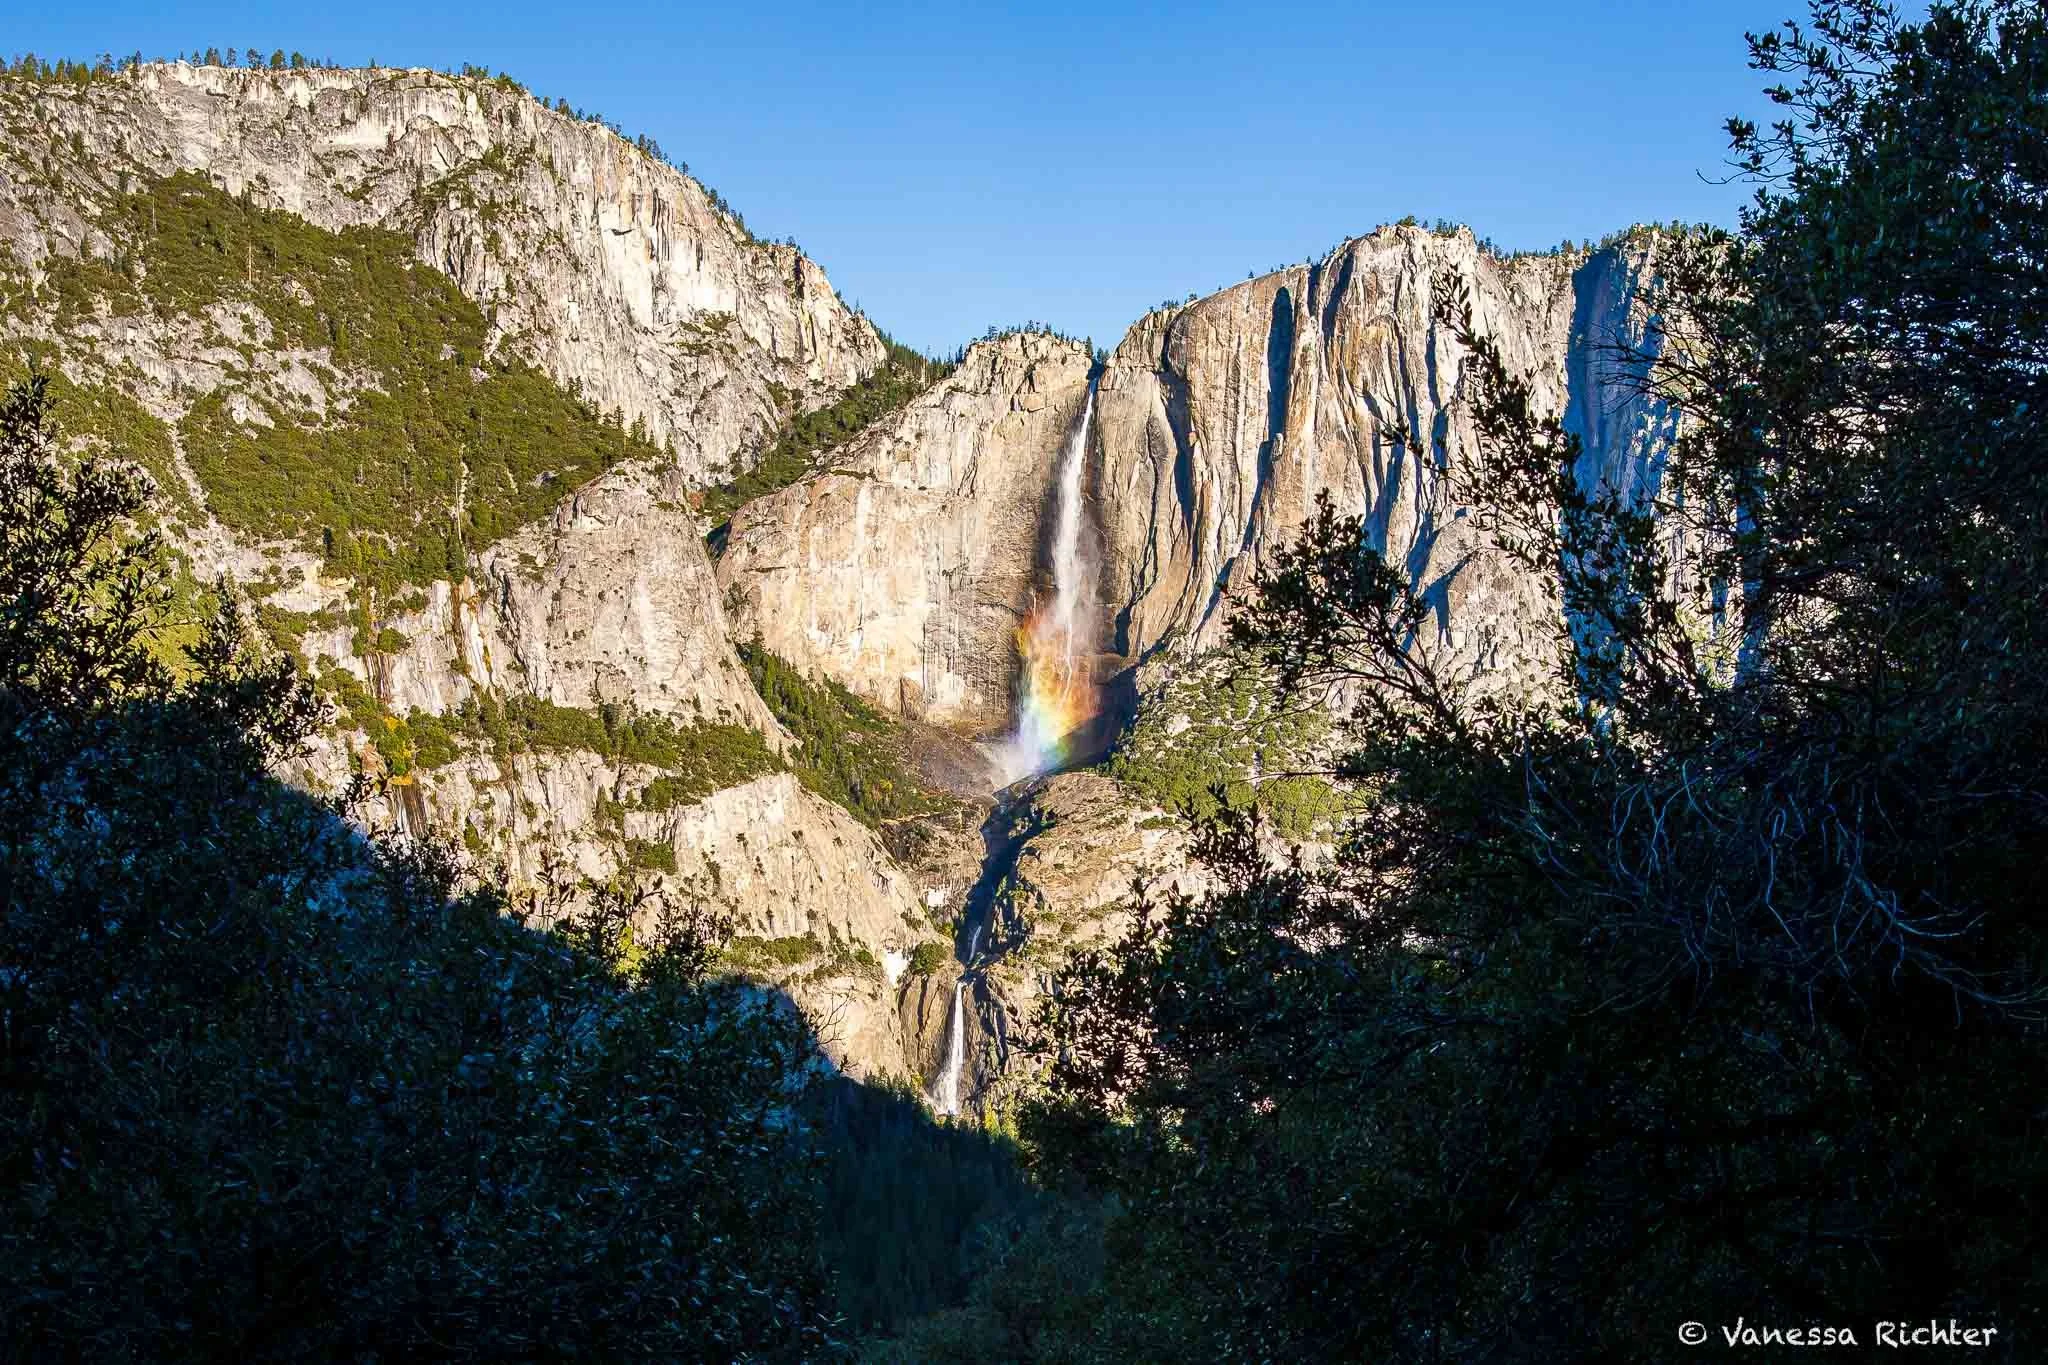
The full view of Lower and Upper Yosemite Fall taken from the Four Mile Trail.
With the excitement that the golden river and the Yosemite Falls rainbow had given us, the never-ending switchbacks to the top felt doable. Switchback after switchback after switchback, we made our way up slowly, but steadily. While the ground was dry for the longest part, as we got close to Glacier Point, the rocky dirt turned into polished ice. The last snowfall had happened probably days ago, and there were only leftover patches in shaded areas. But that made it even trickier, with hiker after hiker polishing the icy crystals onto the dirt, making it perfectly slippery. We strapped on our microspikes, punching the pointy metal wedges into the white and continuing like none of it was there.
At The Top: Distant Waterfalls & Dusted Mountain Peaks
When we reached Glacier Point, it was an odd feeling. We had been here before when the road was open, with the bustle of people swarming around. Now, the benches were empty, the displays seemed to be whispering to be finally looked at, and the low stone walls, usually full of people sitting or standing in the summer time, were just existing.
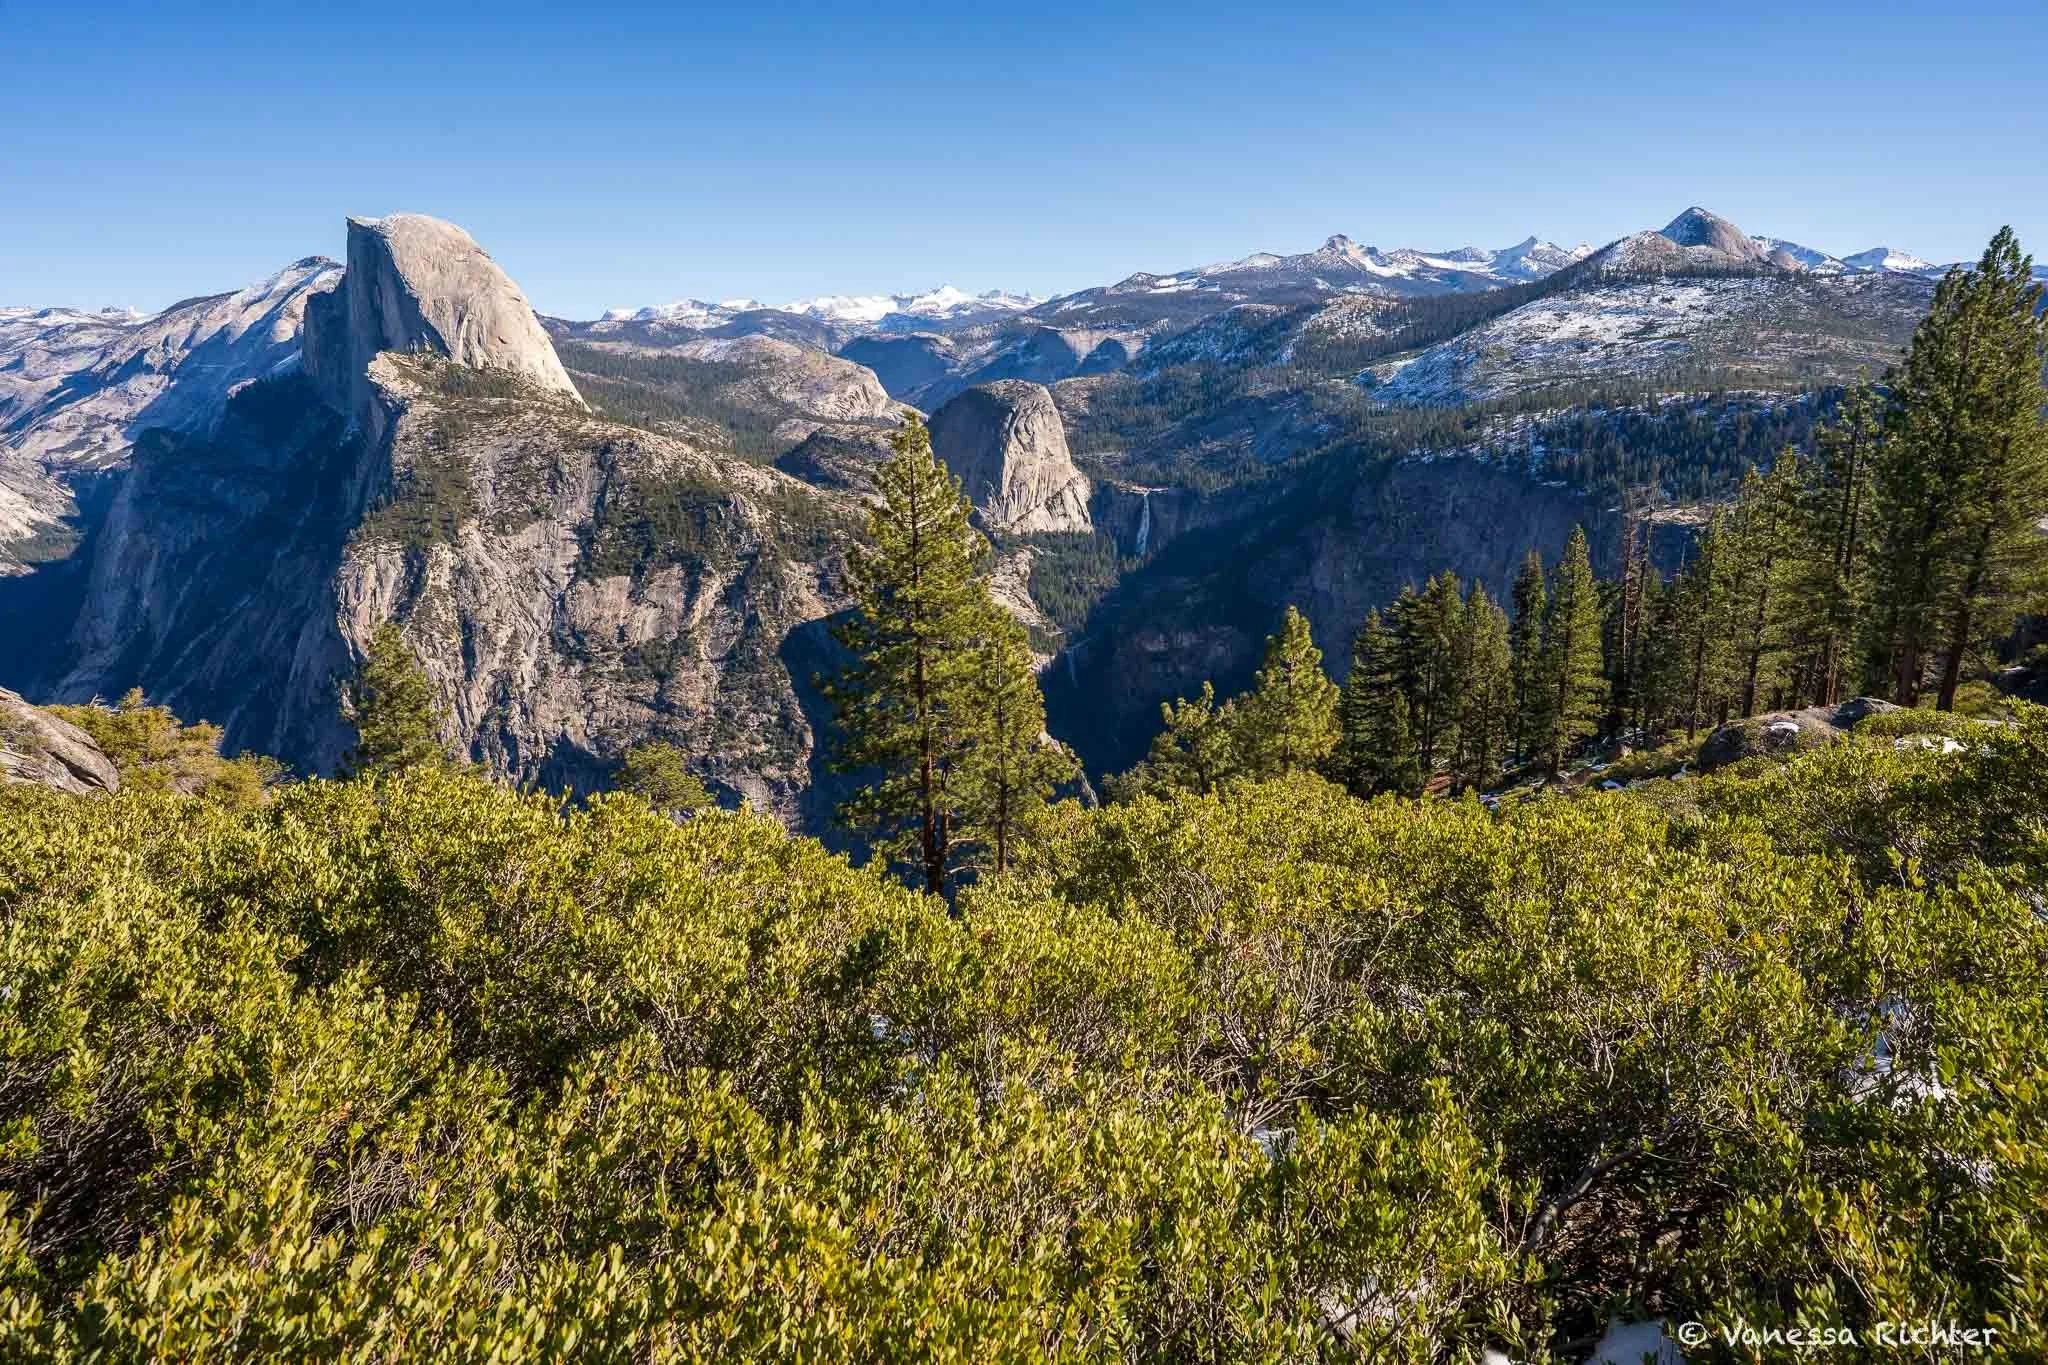
View from Glacier Point: Half Dome to the left and Nevada Fall (upper fall) and Vernal Fall (lower, smaller fall in the center).
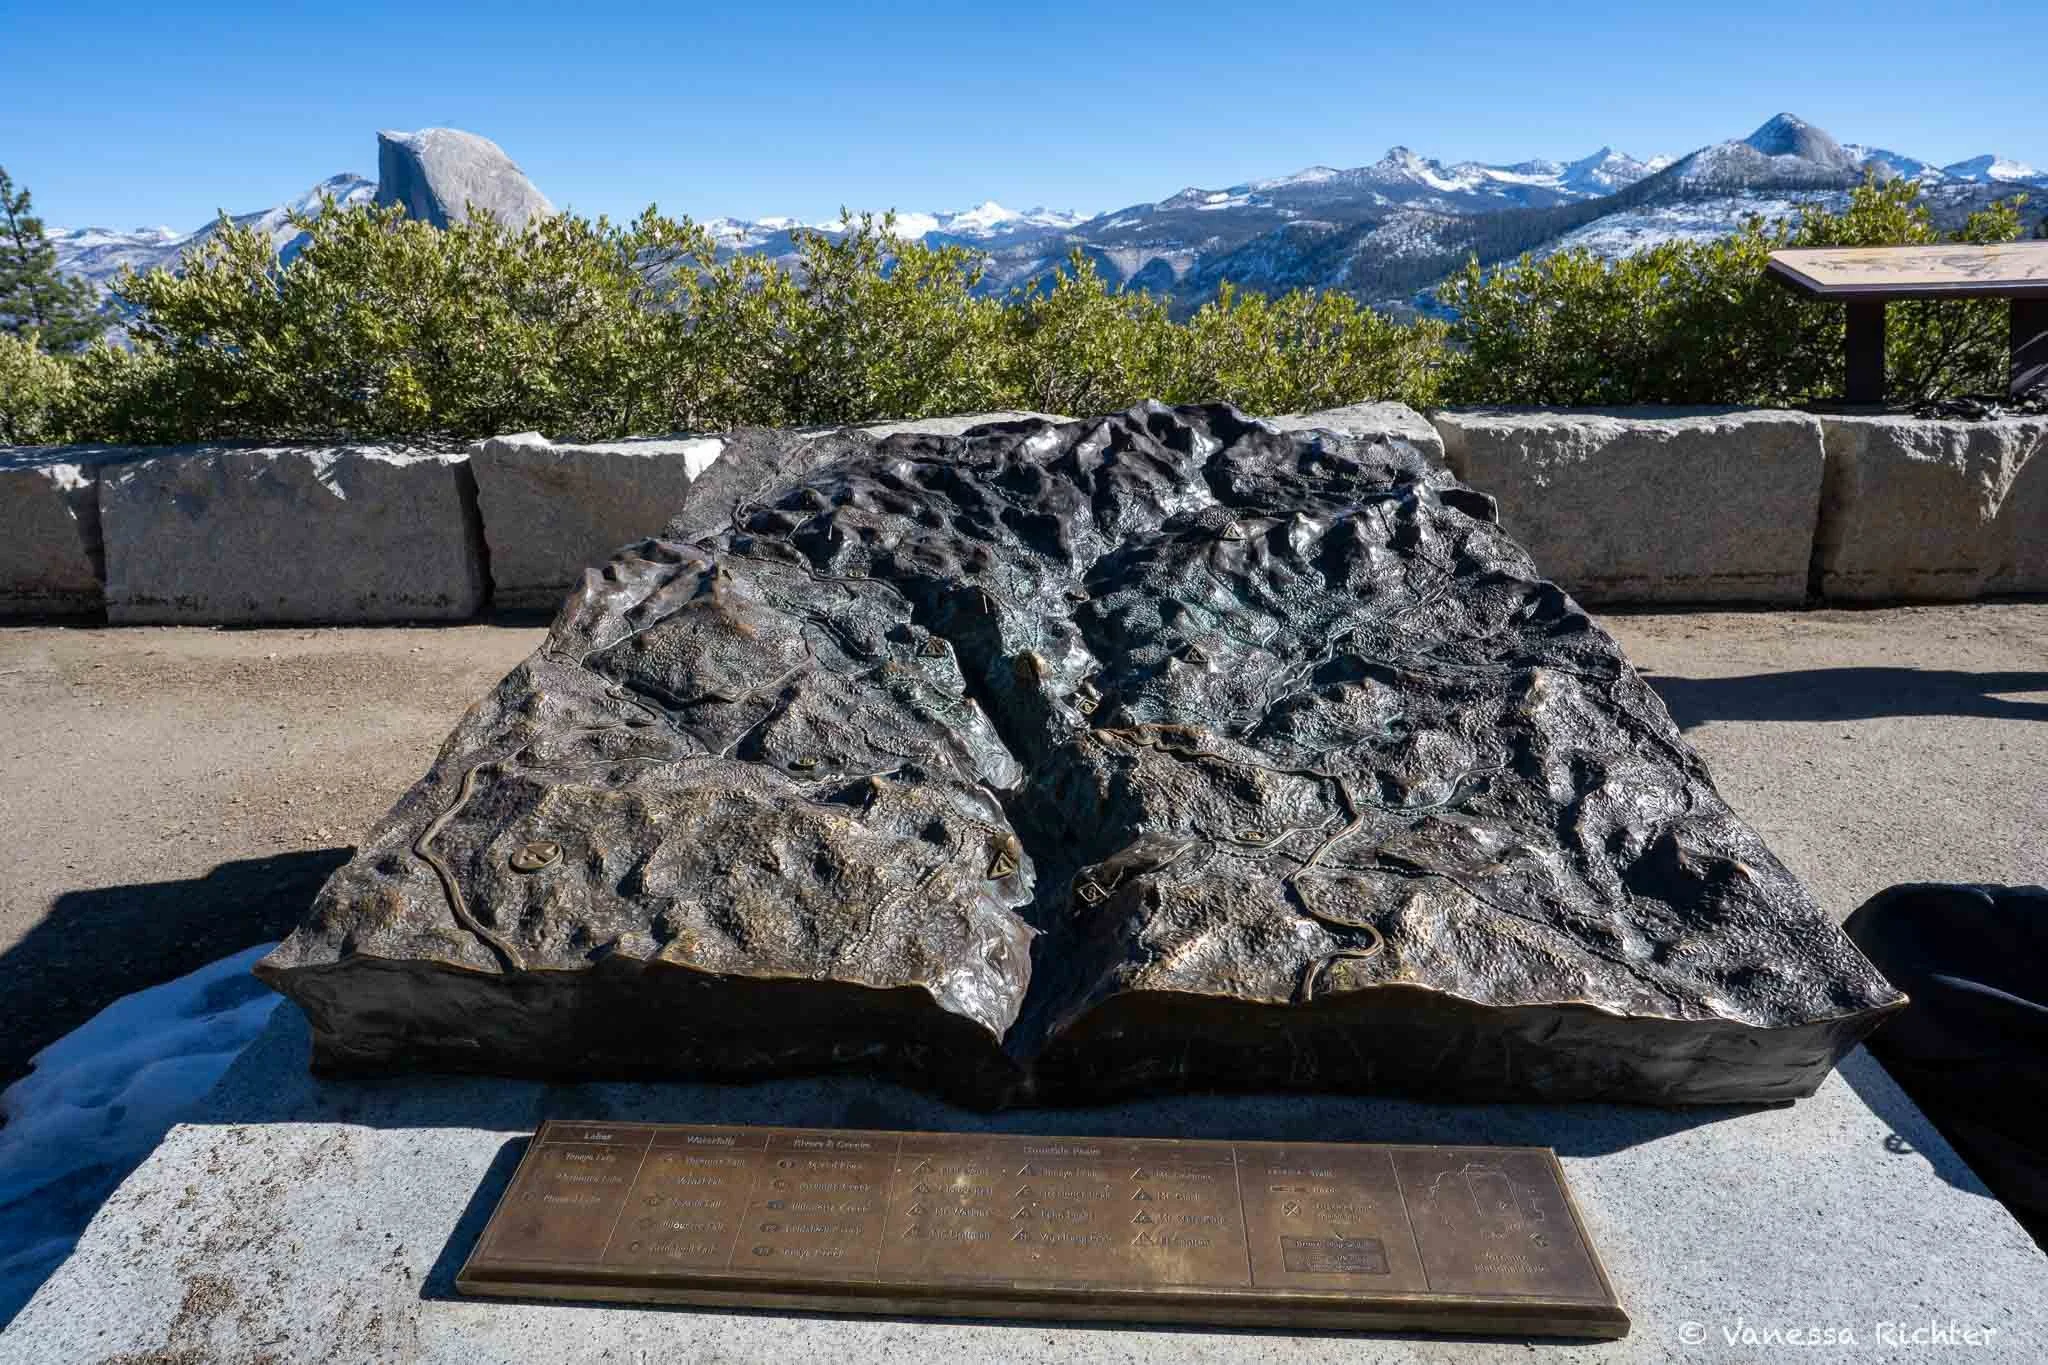
You'll also find a relief map that helps you figure out what you're looking at. It was great to actually have time to study it intensely with just a few other people around.
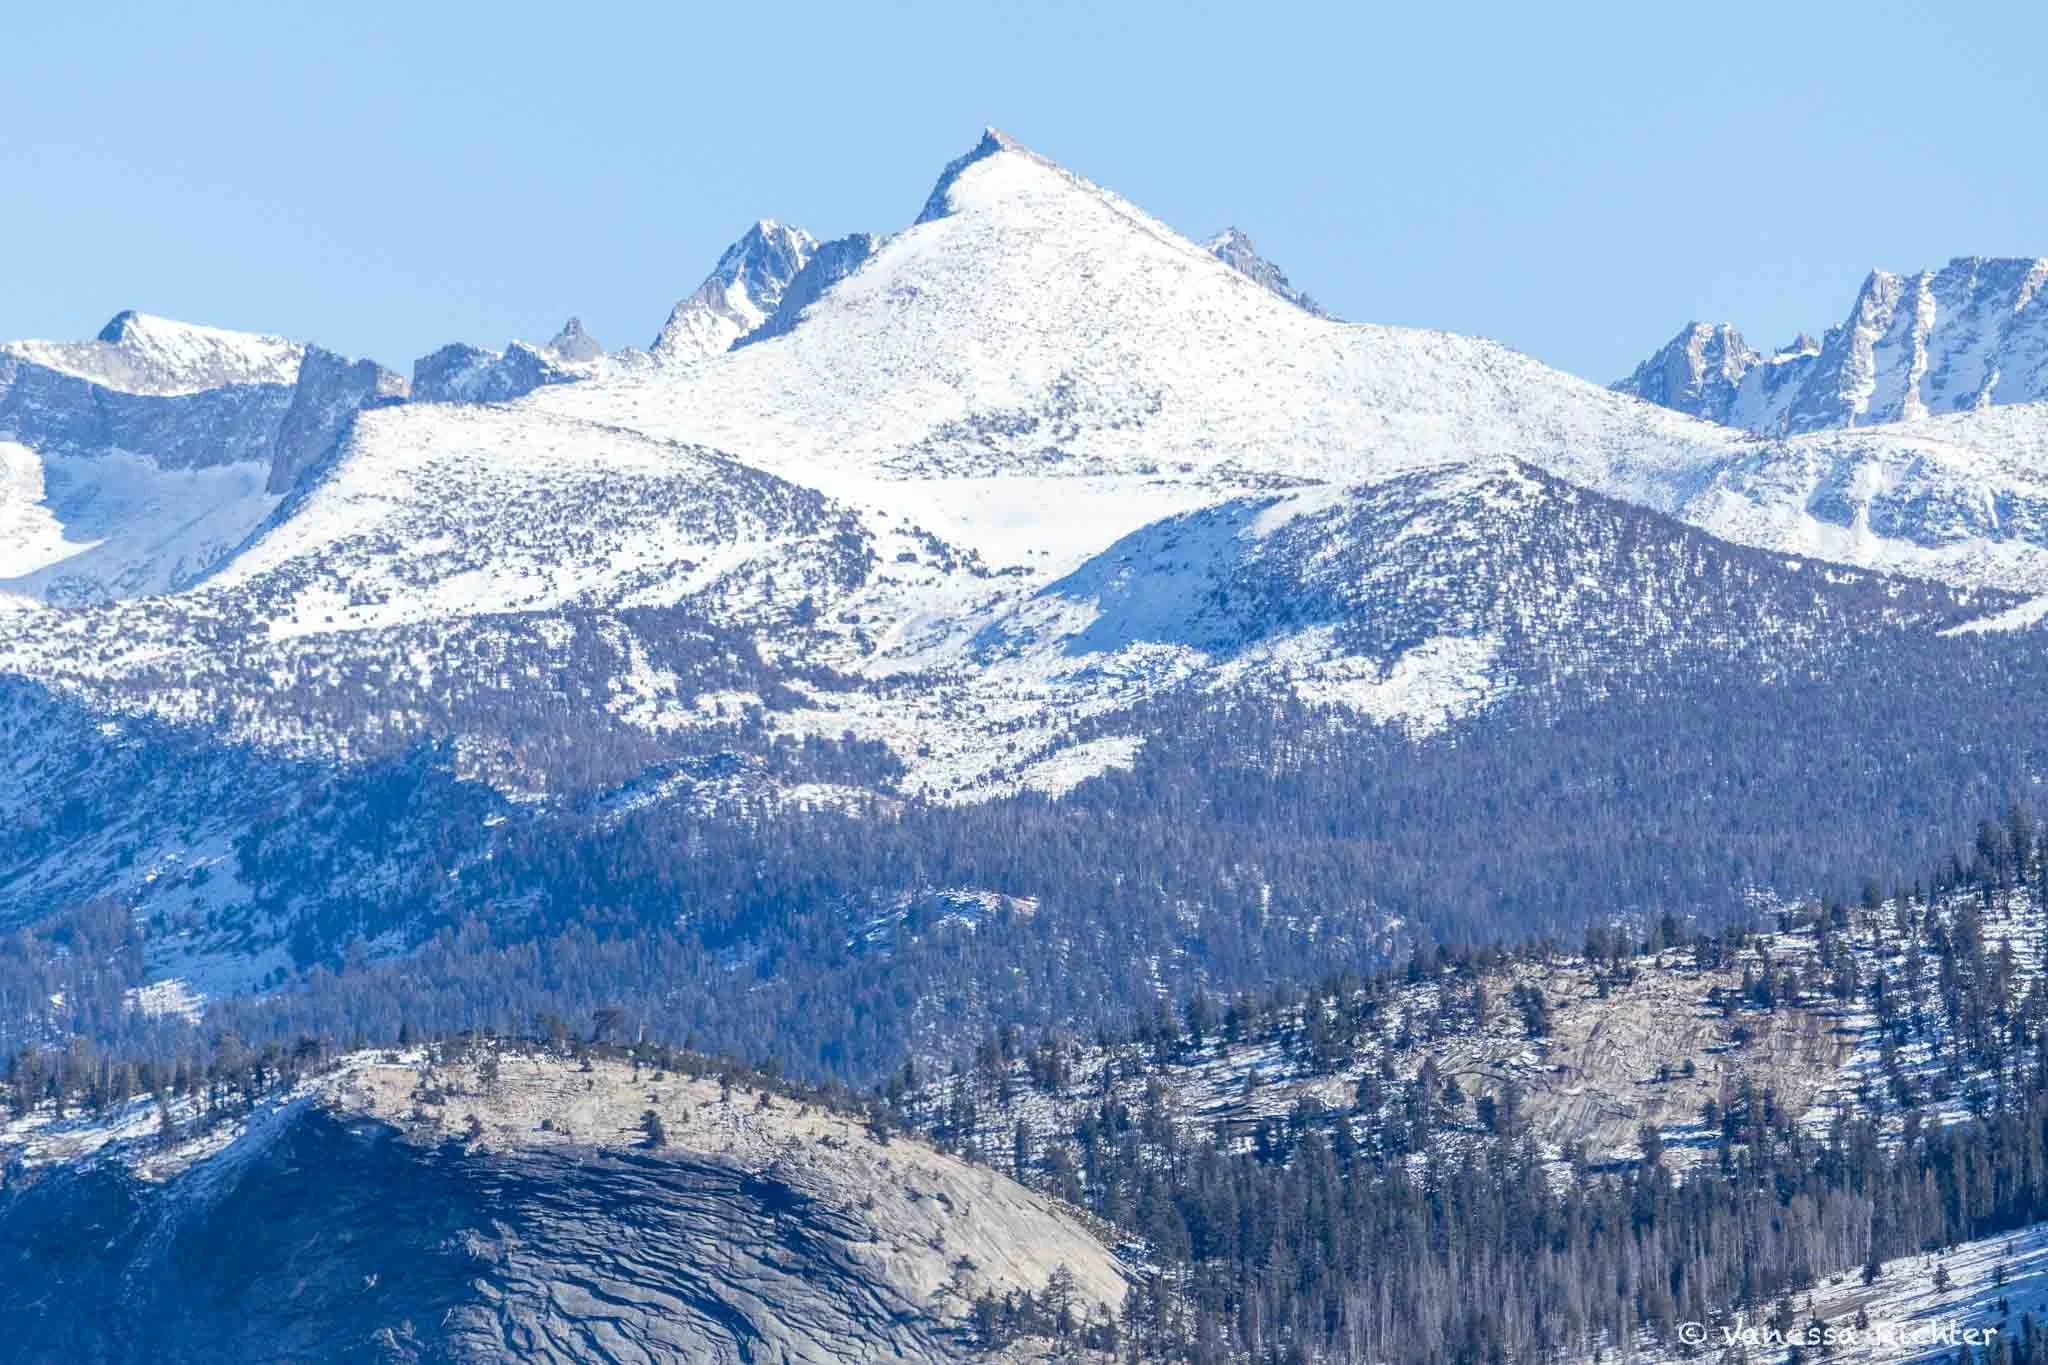
Taken with a telephoto lens: just the tallest mountains were dusted in snow. Can you spot this mountain peak in the full Glacier Point panorama? (Scroll up, it is visible in both pictures above this one.)
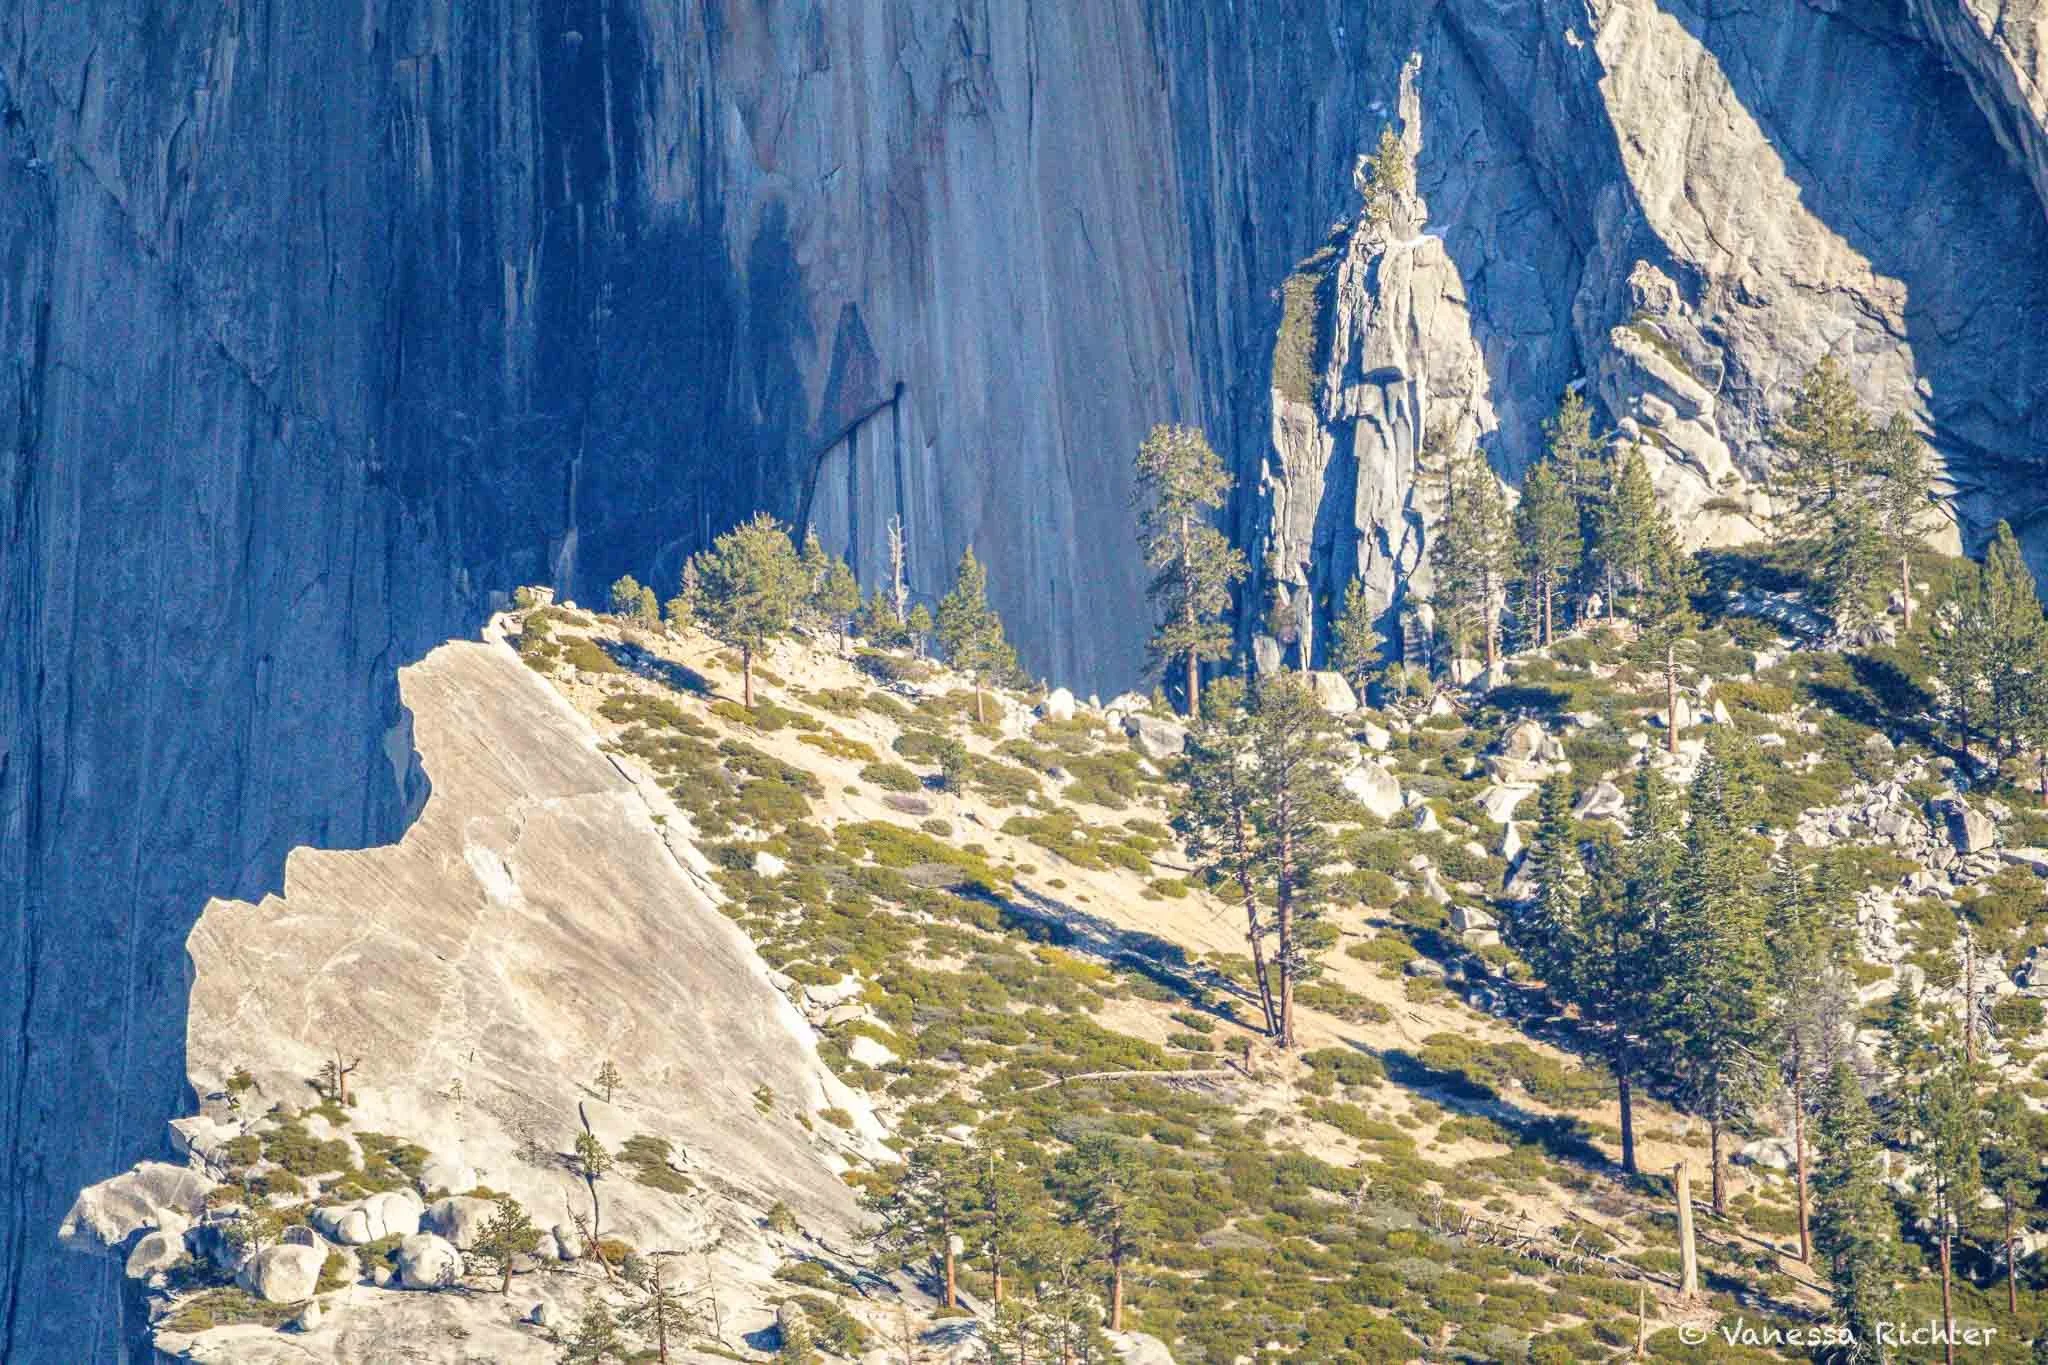
Another telephoto shot of some distant details: I find it so amazing to see how what looks like a sheet of pure granite has enough soil and cracks for even large trees to take root, some right to the top. The shaded mountain face in the background is the sheer wall of Half Dome, rising to its iconic rounded summit.
We spent at least an hour at the top, just soaking in the views from all the perspectives, studying info tables, eating lunch, and just breathing in the crisp mountain air.
Well rested, we started the climb down, which turned out to be in ways more demanding than the way up. With 3,418 feet of elevation gain and 5 miles already in, the constant downhill started to grind at the knees at some point halfway down. While the golden river and the Yosemite Falls rainbow had stopped their show and the midday sun cast a harsher light onto the landscape, the views were still incredible, and we stopped every once in a while to take it all in. Before the memories had even settled, I already knew on the trail that this would be one of those special hikes to remember.
🌿 The Naturalist's Kit
Turn a hike into a treasure hunt — the closer you can look, the more you know, the more there is to find.
Everything listed here is gear or apps I use and recommend. Some of the links below are Amazon affiliate links, which means if you find a recommendation helpful and buy through my link, I receive a small commission at no extra cost to you. This is what makes free resources like this possible. If you liked my article and something here ends up in your pack, using my link is the best way to keep this kind of content going.
👁️ Beyond the Naked Eye
🔭 Ultra-Compact Binoculars
My absolute essential on literally every hike, or pretty much anywhere I go. My go-to choice is super compact and lightweight — I don't even waste a thought about whether to bring them. I always do (if I don't forget them, because I am a headless zombie sometimes).
🔎 Magnifying Loupe
Super small and easy to forget you're carrying it. Granite might look uniform from a distance, but up close it's a mosaic of quartz, feldspar, and mica crystals glinting in the light.
📖 Apps & Books for Nature ID & Trail Planning
The best plant and wildlife ID tool out there. Photograph anything you can't identify, and the app suggests what it is based on your location. The community then confirms or corrects it. It is also a great way to contribute to citizen science, so the data can be used for research later. Free.
Open iNaturalist →Made by the Cornell Lab of Ornithology, Merlin identifies birds by listening to their song in real time. Get your phone out on the trail and watch it name the birds singing around you. Make sure to download the bird pack for your region before you head out. Free.
Open Merlin →My go-to for finding and planning hikes. The free version gives you trail maps, reviews, difficulty ratings, and live GPS tracking while you have signal. AllTrails+ (paid) adds offline maps, wrong-turn alerts, and more detailed map layers. Check the recent reviews before you go for current conditions.
Open AllTrails →John Muir Laws' Sierra Nevada guide is THE field guide to use. I love the details, format, illustrations and organization of the guide. I find it so much fun to just take a break on a hike and figure out what's around me.
Get The Laws Field Guide →In case you're interested in my full hiking gear setup, I've linked it here.
Know Before You Go
Hike Essentials
- Bring crampons/microspikes. The trail may be dry at the valley floor, but there is a good chance you'll encounter snow and ice further up. When we hiked, there was not a tiny bit of snow in the valley and the mountain peaks appeared barely dusted in snow, but in some shaded places closer to Glacier Point, there were several stretches of pure ice. This is especially tricky without spikes, as the trail is not flat and switchbacking.
- When snow and ice conditions become more difficult and dangerous, the trail may only be accessible up to Union Point (about 3 miles in) until they close it entirely.
- Check trail conditions before you head out — every year is different. While the trail was open with just a few icy stretches when we hiked in late November, it may already be closed or just partially accessible at the same time of the season in another year! Check the NPS current conditions page, and for recent hiker reports, AllTrails.
- Start early. We secured one of the last parking spots at 7:30 in the morning (probably better on a weekday — we went over Thanksgiving weekend). The light is just so much more beautiful and soft in the morning, and this is also the time of day when the sun hits Yosemite Falls at the right angle to create a rainbow! While it may be pretty cold in the morning, it can still heat up during the day.
- It is a steady uphill. If you have known troubles with your knees, keep in mind that everything you go up, you have to go down when your legs are already tired from the uphill. I do not typically have knee problems, but I definitely felt them, not in a good way, at some point going down!
Access Roads & Where to Stay
- At this time of year, with potential snowy road conditions, I'd recommend sticking with the lower-elevation entrance roads.
- Make sure your car is equipped with the right tires for potential icy conditions. You may be required to carry snow chains depending on conditions. Best to have them with you even if there is no snow in the forecast.
- Ideal: Highway 140 from El Portal. The lowest-elevation road of all entrances, so it stays safe and open the longest. El Portal is the closest town along this road, but there are only limited accommodation and food options. I've stayed at the Yosemite View Lodge in El Portal before and think it's a good option. In normal traffic, it's about 30 minutes to the trailhead.
- Second: Highway 41 from Oakhurst. This is where we stayed for this trip, which wasn't an issue with no snow in the forecast. From there, you'll need about an hour and 15 minutes to the trailhead. We chose this over El Portal because we wanted to stay at the Sierra Sky Ranch again, a place we fell in love with on a prior visit. It's just super cute, with the coziest mountain chalet vibes, including a crackling fireplace in the common area. I usually prefer camping when visiting Yosemite, but in the colder season, I'm also all in for cozy and warm.
- Another option: Mariposa, the nicest town close to Yosemite in my view, at a similar distance to the valley as Oakhurst. It has plenty of food options and places to stay.
- Trickiest if there's snow: Highway 120 from Groveland. We typically avoid that road from late fall to early spring.
- Camping is still possible in the valley in winter. Come prepared for cold nights. Reserve on Recreation.gov.
Read On

Follow the Adventure
Latest on the Blog
Looking For Something?

Mono Lake is one of the oldest lakes in North America — likely more than 760,000 years old and possibly over a million years old. For all that time, Eastern Sierra streams have been pouring in, carrying salts and minerals down from the mountains. With no outlet for roughly the past 80,000 years, water can only leave through evaporation, and the salts stay behind. A handful of species have evolved to thrive in exactly these conditions, and they do it in staggering numbers. I'll share how to best explore this special lake, plus all the details about its existence and the life it supports that make it so fascinating beyond its beauty.