
San Francisco to Colorado Road Trip Through Utah & Nevada (Late Spring Guide)
This post contains affiliate links. If you book through them, I may earn a small commission at no extra cost to you — thank you for supporting this blog.
What could be more breathtaking than a road trip from California’s rugged Pacific coast across Utah’s deep red deserts to Colorado’s rushing mountain rivers in late spring? Imagine yourself traversing the vast, sun-scorched deserts along the ‘Loneliest Road in America’, gazing into the universe under some of the world’s darkest skies, hiking the tallest sand dunes in the Northern Hemisphere, and admiring turquoise alpine lakes while looking down at bone-dry deserts stretching endlessly below.
In this article, I’ll take you through my absolute favorite outdoor adventures on a three-week road trip spanning from California’s Coast to Utah and Nevada’s wild landscapes, and Colorado’s Rocky Mountains.
So, settle in, grab a cup of your favorite beverage, and let’s start planning your next adventure!
Table of Contents
The Adventure Begins & Some Personal Words
More than 2,500 miles and an abundance of different landscapes, climates, and experiences lay ahead of us when we started our trip across the American West from San Francisco to Eastern Colorado on a perfectly sunny day in late spring. We aimed to travel at just the right time when the heat in the deserts was still bearable, while the snow at the lower elevations of the Colorado Plateau (which is still pretty high) had begun to melt enough for the landscapes to become visible beneath the many feet of snow that had fallen during winter.
I was born and raised in Germany, but the moment I pitched my tent into the vast landscapes of the North American West, listening to the sounds of the wild at night, I couldn’t feel more at home. Many years passed between that first moment and the day I called California home. Years in which it didn’t even occur to me that I would one day live in California. However, the day eventually came. At the time, I felt excited but afraid that actually living on the American West Coast would change the magic I felt when being in these landscapes. That it was, after all, just the difference between being on vacation and living somewhere. That Germany felt dull to me because I grew up there, knew the country, and just couldn’t appreciate what I was used to anymore. (Writing this, I want to emphasize that I am fully aware that living in a safe, free, and wealthy country is a privilege, and I feel bad for saying this! Yet, I felt like this.)
And yes, I can confidently say now that — surprise, surprise — being on vacation and living somewhere IS different, but the difference hasn’t taken away the magic and awe I still feel. The urgency I once felt to spend my vacation days hiking in faraway places that I could only reach by plane is gone, and instead, the car packed with camping gear from bottom to top, driving me directly from my home to the most awe-inspiring places, is all I need. There is so much biodiversity and ecosystem diversity no matter which direction you go from San Francisco.
Heading East from the Pacific coast is definitely one of the best choices if you love deserts and mountains and are looking for a raw, diverse, and exciting adventure. Even if you stayed in your car, simply driving through the unique landscapes from the California coast to the mountains of Eastern Colorado would leave you in awe. However, in my view, the best way to explore the world is by stepping out onto the trails and immersing yourself in the wild! With that in mind, here are my top 11 national parks and outdoor activity recommendations for a three-week trip from California across Utah and Nevada to Colorado.
Please Note: I do not focus so much on all the amazing places that you could see within California in this article, since this trip was planned from a perspective of someone (my husband & I) living in California. For this two to three week long trip, our focus was on quickly venturing beyond the radius that we are able to cover in a weekend. Please check out the my other articles on California adventures for more on this beautiful state!
San Francisco & Beyond (California)
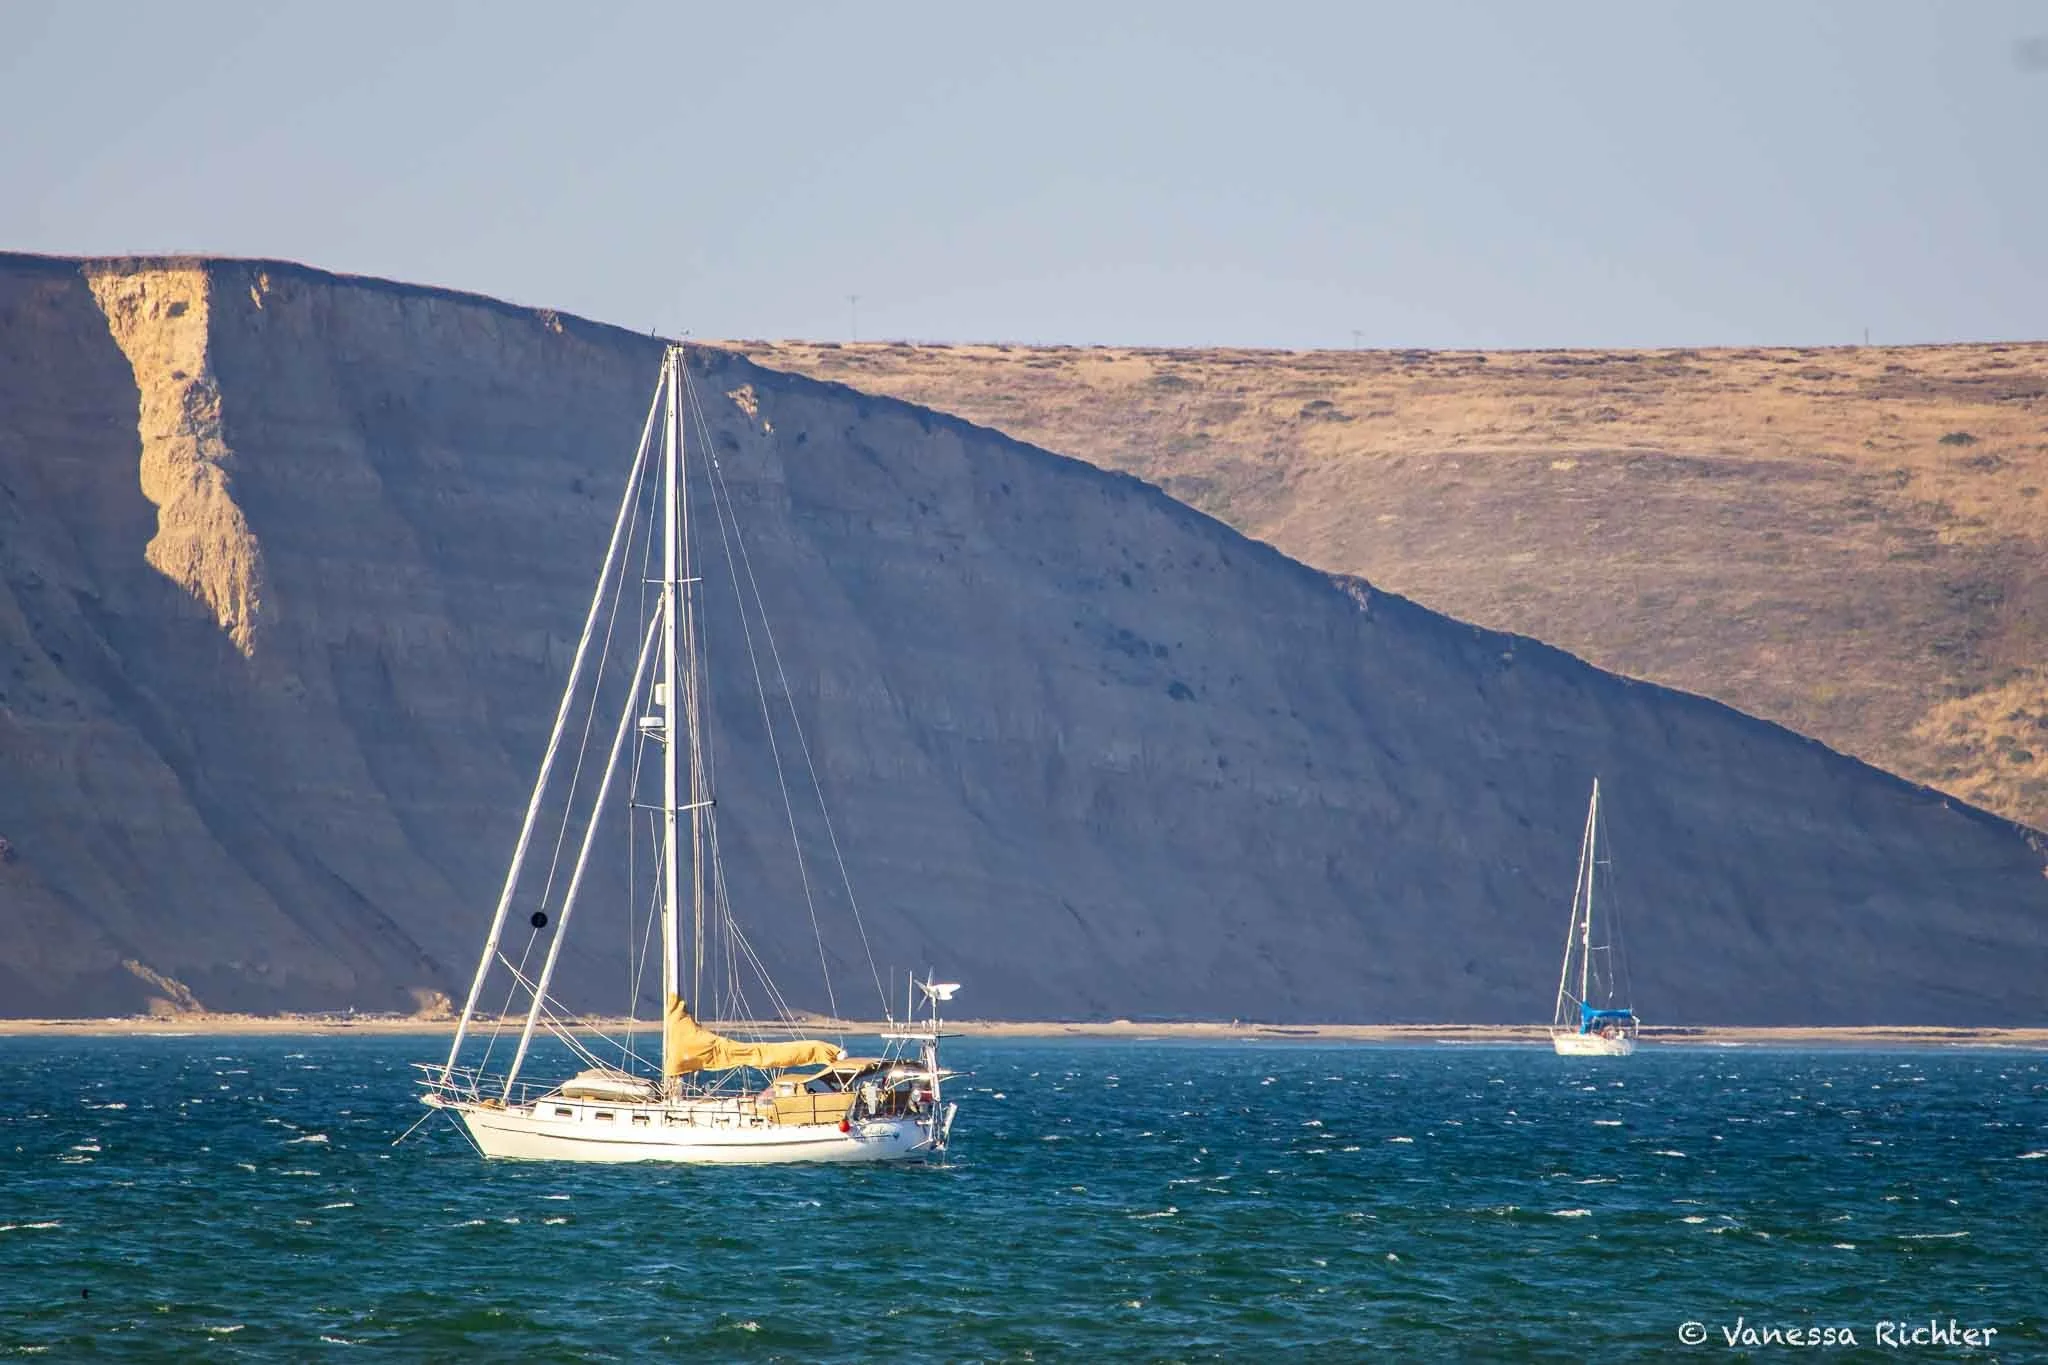
Hiking along the Pacific Coast, with its rugged shoreline, gazing into the ocean waters, and spotting whales, dolphins (with some luck & depending on the season), or other marine life, is truly magical. In my view, there is almost nothing more soothing than this.
We began our journey in San Francisco, and I'll share recommendations for exploring the coast from there. However, travel times from other southern locations, such as Monterey, Santa Barbara, or Los Angeles, to eastern Colorado across Utah and Nevada, are similar.
That said, as noted above, I want to emphasize again that this article focuses on Colorado, Utah, and Nevada. So, if you're not from California or haven’t explored the state much yet, I highly recommend checking out more California destinations in addition to the coast. Depending on your route, consider visiting Lake Tahoe, Yosemite National Park, Mono Lake, or Death Valley National Park, just to name a few.
Having said that, let’s dive into my favorite natural places to explore at the Pacific Coast in and near San Francisco.
Oh, and if you start your journey there & you’re not a local—don’t forget to explore the city. San Francisco is full of beautiful architecture, landmarks, outdoor activities, and an endless supply of incredible food.
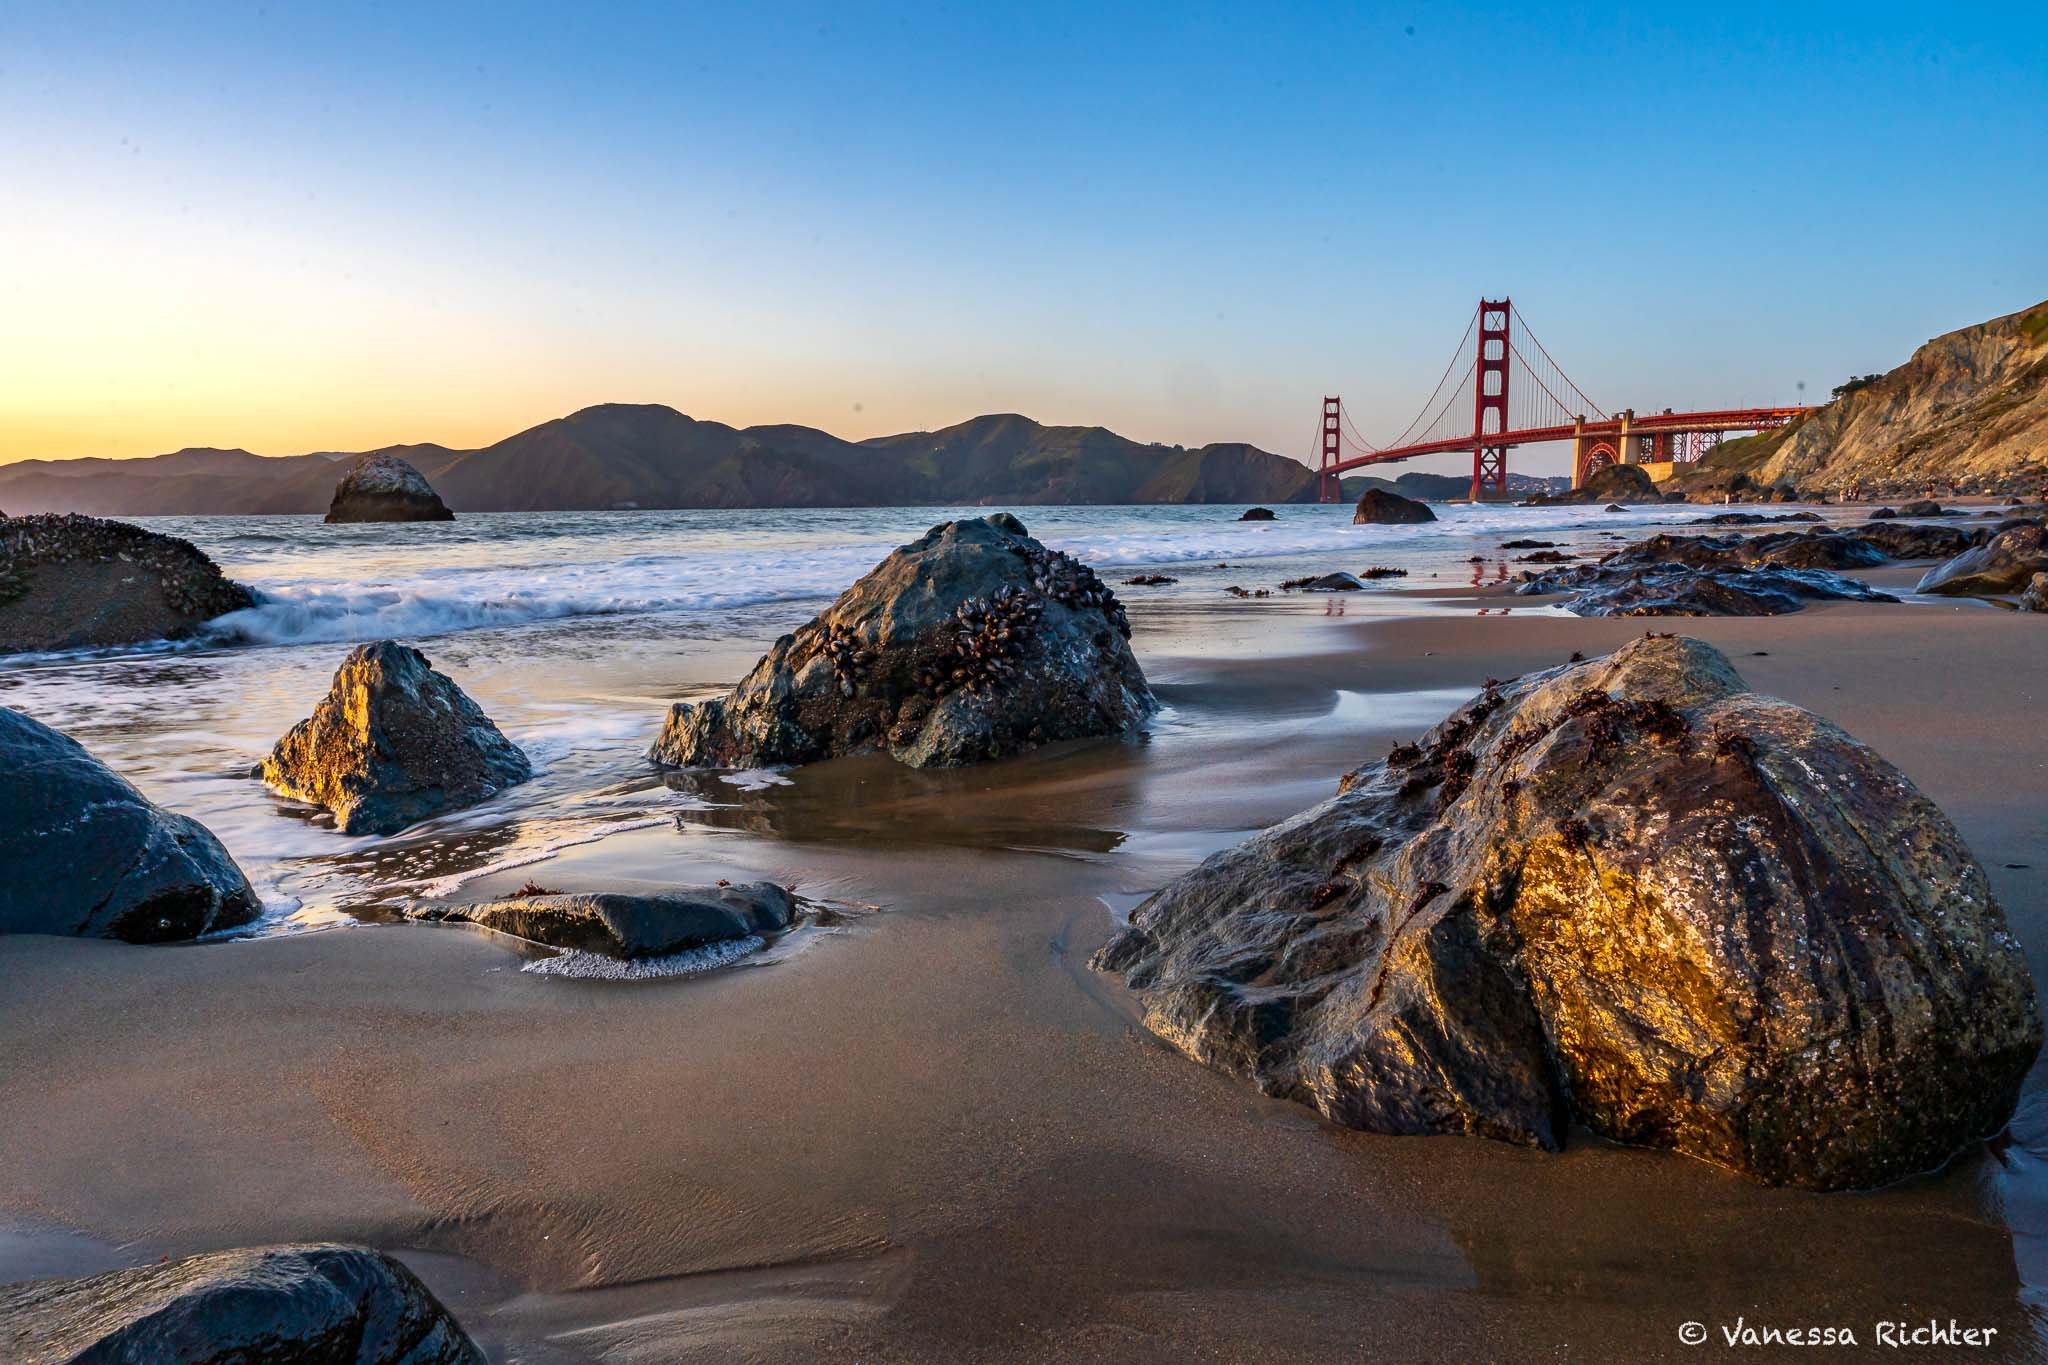
Most Awe-Inspiring Hike: Batteries to bluffs Trail (San Francisco)
Even within San Francisco's city limits, you’ll find gorgeous hiking trails with incredible views that truly make you feel like you’re in nature—not in a city!
My absolute favorite is the Batteries to Bluffs Trail, which offers stunning views of the rugged coastline, the ocean, and the Golden Gate Bridge—all at once. If you're looking to extend your hike, consider adding Lands End to your route. This trail features fascinating history, a scenic forested walk, and great views—though not quite as spectacular as Batteries to Bluffs.
If you choose to do both, start with Lands End and continue onto Batteries to Bluffs for the best experience.
For more on why this direction works best and what else you can discover on these hikes, check out my post below.
Best Hike During Wildflower Season: Mori Point (Pacifica)
Mori Point in Pacifica is a stunning spot to take in breathtaking views of the Pacific Ocean on a short hike just outside San Francisco. This rugged stretch of California’s coastline is truly spectacular—and a great example of how habitat restoration efforts can transform a landscape.
If you visit around between late March and early May (peak bloom is usually in April), you’ll have a good chance of seeing vibrant blooms of native wildflowers. And don’t forget to scan the ocean while wandering the bluffs—depending on the time of year, you might spot humpback whales (typically from spring through fall), gray whales (during their winter and spring migration), or even dolphins and sea lions, which can be seen year-round. With a bit of luck, you may also catch a glimpse of blue whales in late summer or early fall!
Check out my article below to learn more about Mori Point’s history and what makes it so special.

Best Hikes for Wildlife Viewing (Point Reyes National Seashore)
A little further from San Francisco (about 1–2 hours, depending on your specific destination) lies Point Reyes National Seashore, offering countless hiking trails and a chance to experience the raw beauty of the California coast. It’s a fantastic place to immerse yourself in the coastal breeze while spotting Tule elk, coyotes, and elephant seals (winter is pupping season for seals).
One of my favorite day hikes is the Tomales Point Trail, a stunning out-and-back route where you’ll be rewarded with breathtaking ocean views and a high chance of encountering a herd of Tule elk that roams freely in this area year-round.
Point Reyes also offers several hike-in and even boat-in campgrounds, if you’re up to staying a bit longer. One of the most easily accessible spots is the Coast Campground, where you’ll also have the chance to go tide pooling at the nearby Santa Maria Beach during low tide.
Learn more in my nature-focused guide to Point Reyes National Seashore, or dive deeper into some of my favorite hikes, including Tomales Point, Alamere Falls and backpacking to the Coast Campground. Linked below.


Zion National Park
Our first major highlight after leaving California was Zion National Park. It wasn’t our first visit there on this trip, so we already had an idea of the breathtaking beauty that awaited us. I’d argue that Zion is one of the most diverse and stunning national parks in North America. From towering red rock formations with intricate layers and patterns to deep canyons, rugged mountains, rushing streams, lush greenery, and fascinating desert flora, there’s no shortage of awe-inspiring sights—not to mention the incredible panoramic views. What more could you ask for?
Of course, Zion’s beauty is no secret, and the park is often crowded. While the main canyon undoubtedly offers some of the most jaw-dropping landscapes and unique experiences, don’t overlook the eastern or northwestern section—it’s stunning too, yet significantly less crowded.
Most awe-inspiring Hike: Scout Lookout via West Rim Trail
📍 Distance: 3.6 mi (5.8 km)
⛰ Elevation Gain: 1,122 ft (342.0 m)
🔙 Route Type: Out & Back
The hike to Scout Lookout offers some of the best views in Zion National Park. You’ll follow the river and navigate numerous switchbacks to reach one of the most awe-inspiring places you may ever experience.
If you have a permit, are sure-footed, and free from vertigo, you can continue the hike to Angels Landing. This extremely popular trail is renowned for the thrill of walking along a narrow ridge with thousand-foot drops on either side, offering the promise of the very best views in the park.
However, the hike to Scout Lookout on the West Rim Trail is breathtaking on its own, with sweeping views of the canyon, so don’t miss out on this part if you can’t or don’t want to go all the way to Angels Landing!


Avoid the Crowds Hike: Double Arch via Middle Fork Taylor Creek Trail
📍 Distance: 5 mi (8.0 km)
⛰ Elevation Gain: 620 ft (189 m)
🔙 Route Type: Out & Back
If you're looking to escape the bustling crowds of Zion National Park, the Taylor Creek Trail in the Kolob Canyons section is a great way to experience Zion’s landscape. The hike takes you through a beautiful, shaded canyon, following the Middle Fork of Taylor Creek.
Along the way, you'll encounter two historic cabins from the early 20th century and cross many, many streams. The trail ends at the Double Arch Alcove, where natural forces have sculpted openings and striking patterns into the Navajo sandstone walls. It's also a perfect spot to pause, soak in the serene beauty, and snap some photos.


Tips: Zion National Park
Zion is a VERY popular park, so plan ahead. During the peak months (March to late November), expect to use the shuttle system to access popular sites like the Zion Canyon Scenic Drive. The shuttle helps manage traffic and reduces congestion.
Check the official Zion National Park website for current conditions and more detailed information.
Find More Unique Experiences In Zion & Beyond
Arches National Park
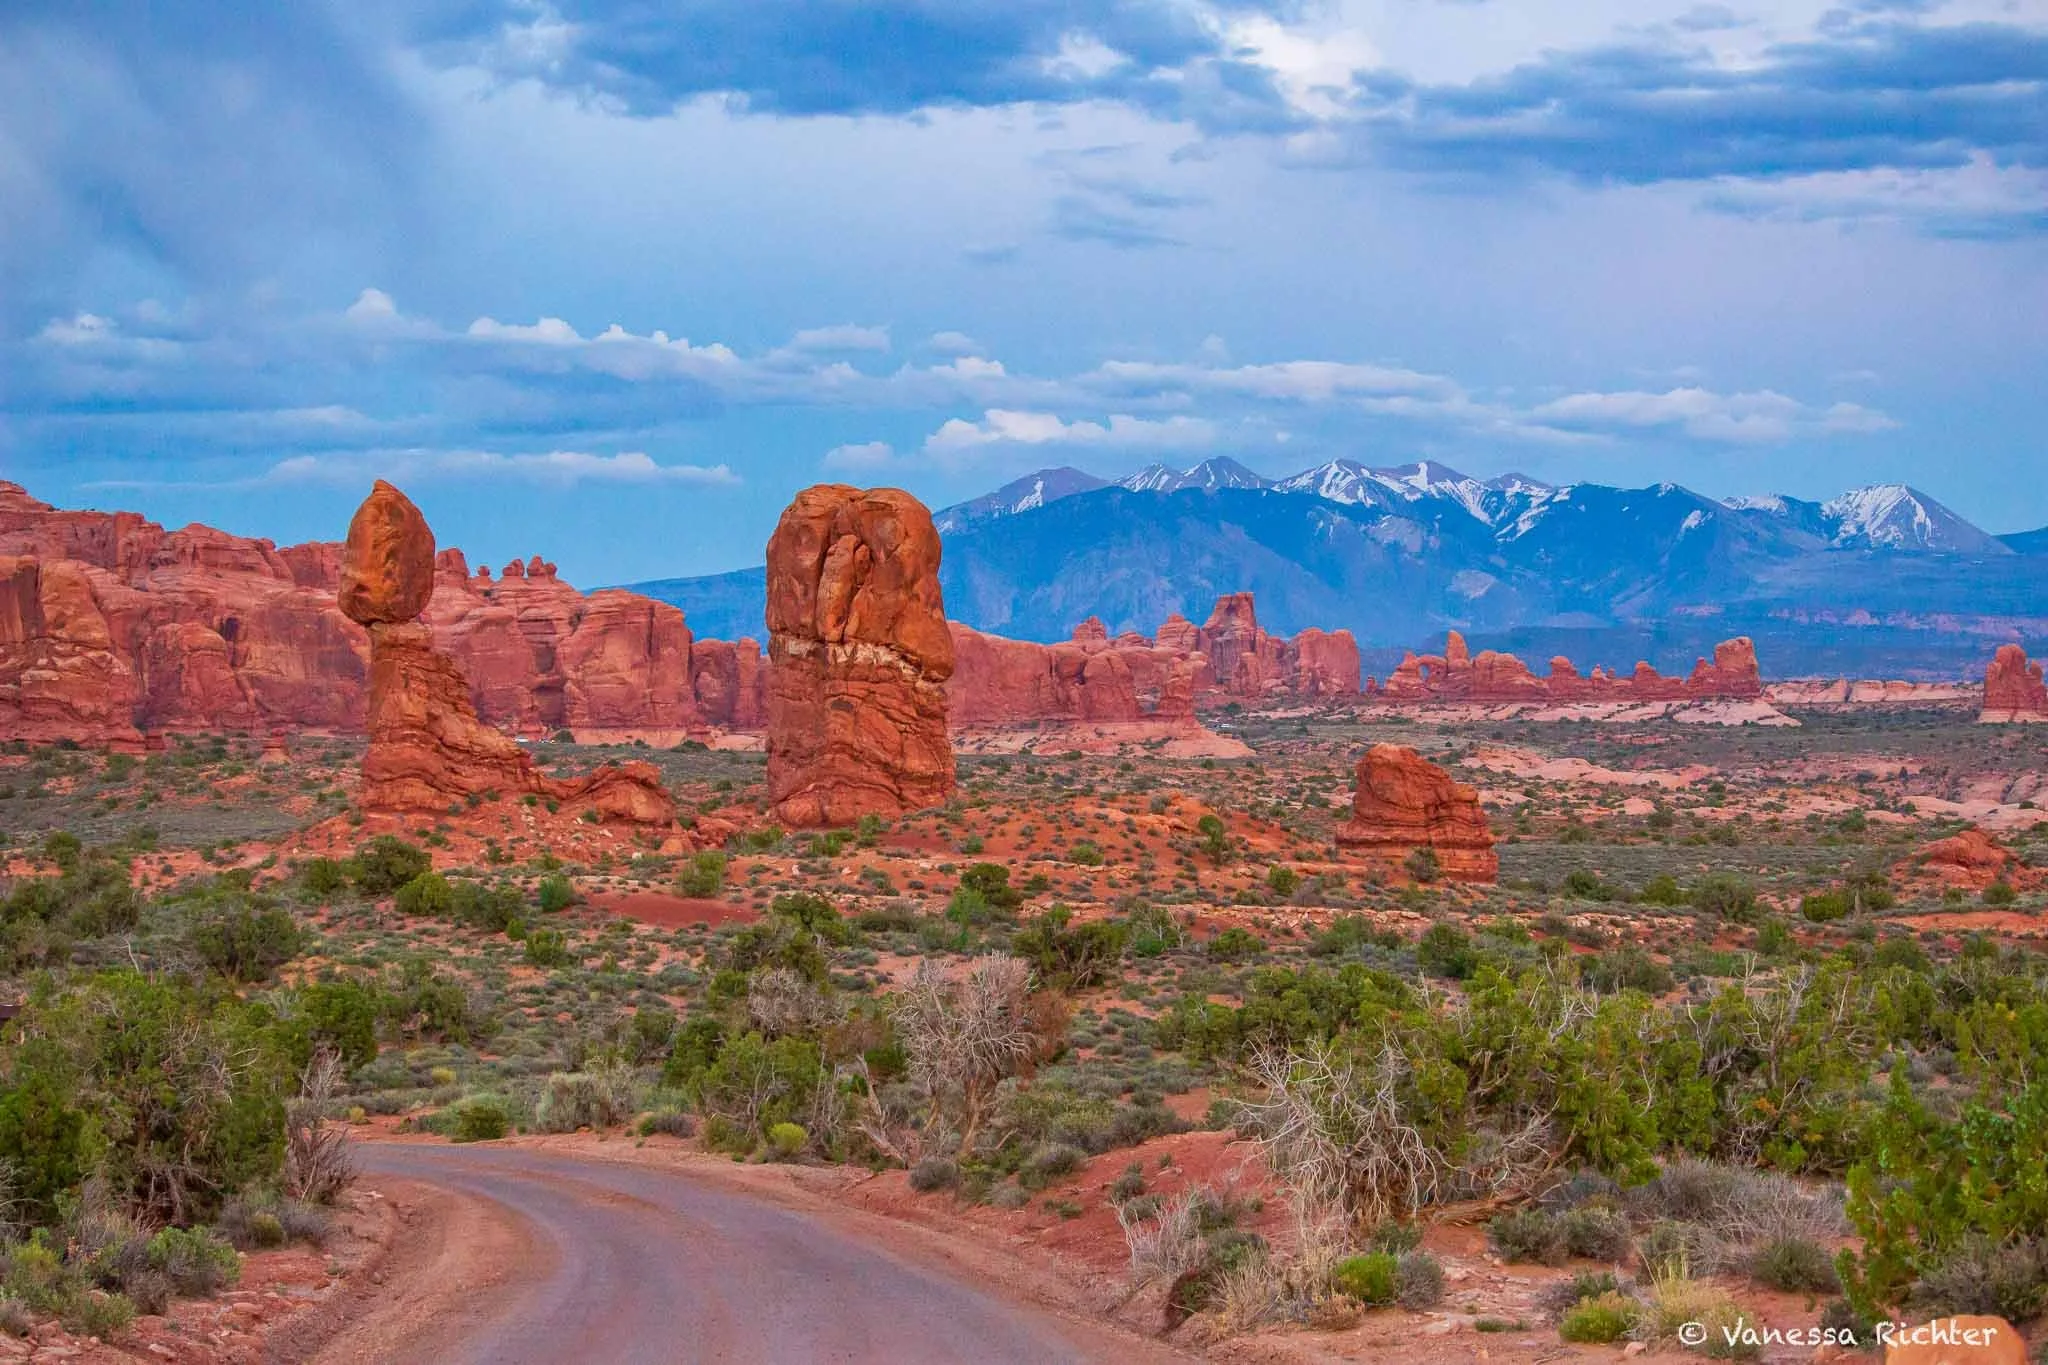
Surprise, surprise — Arches National Park gets its name from the incredible number of natural stone arches found within its boundaries. With over 2,000 documented arches, it boasts the highest concentration of natural stone arches in the world.
Though it’s one of the smaller national parks, it’s absolutely worth a visit. The hiking trails and viewpoints revolve around these stunning formations, each one uniquely shaped and simply awe-inspiring.
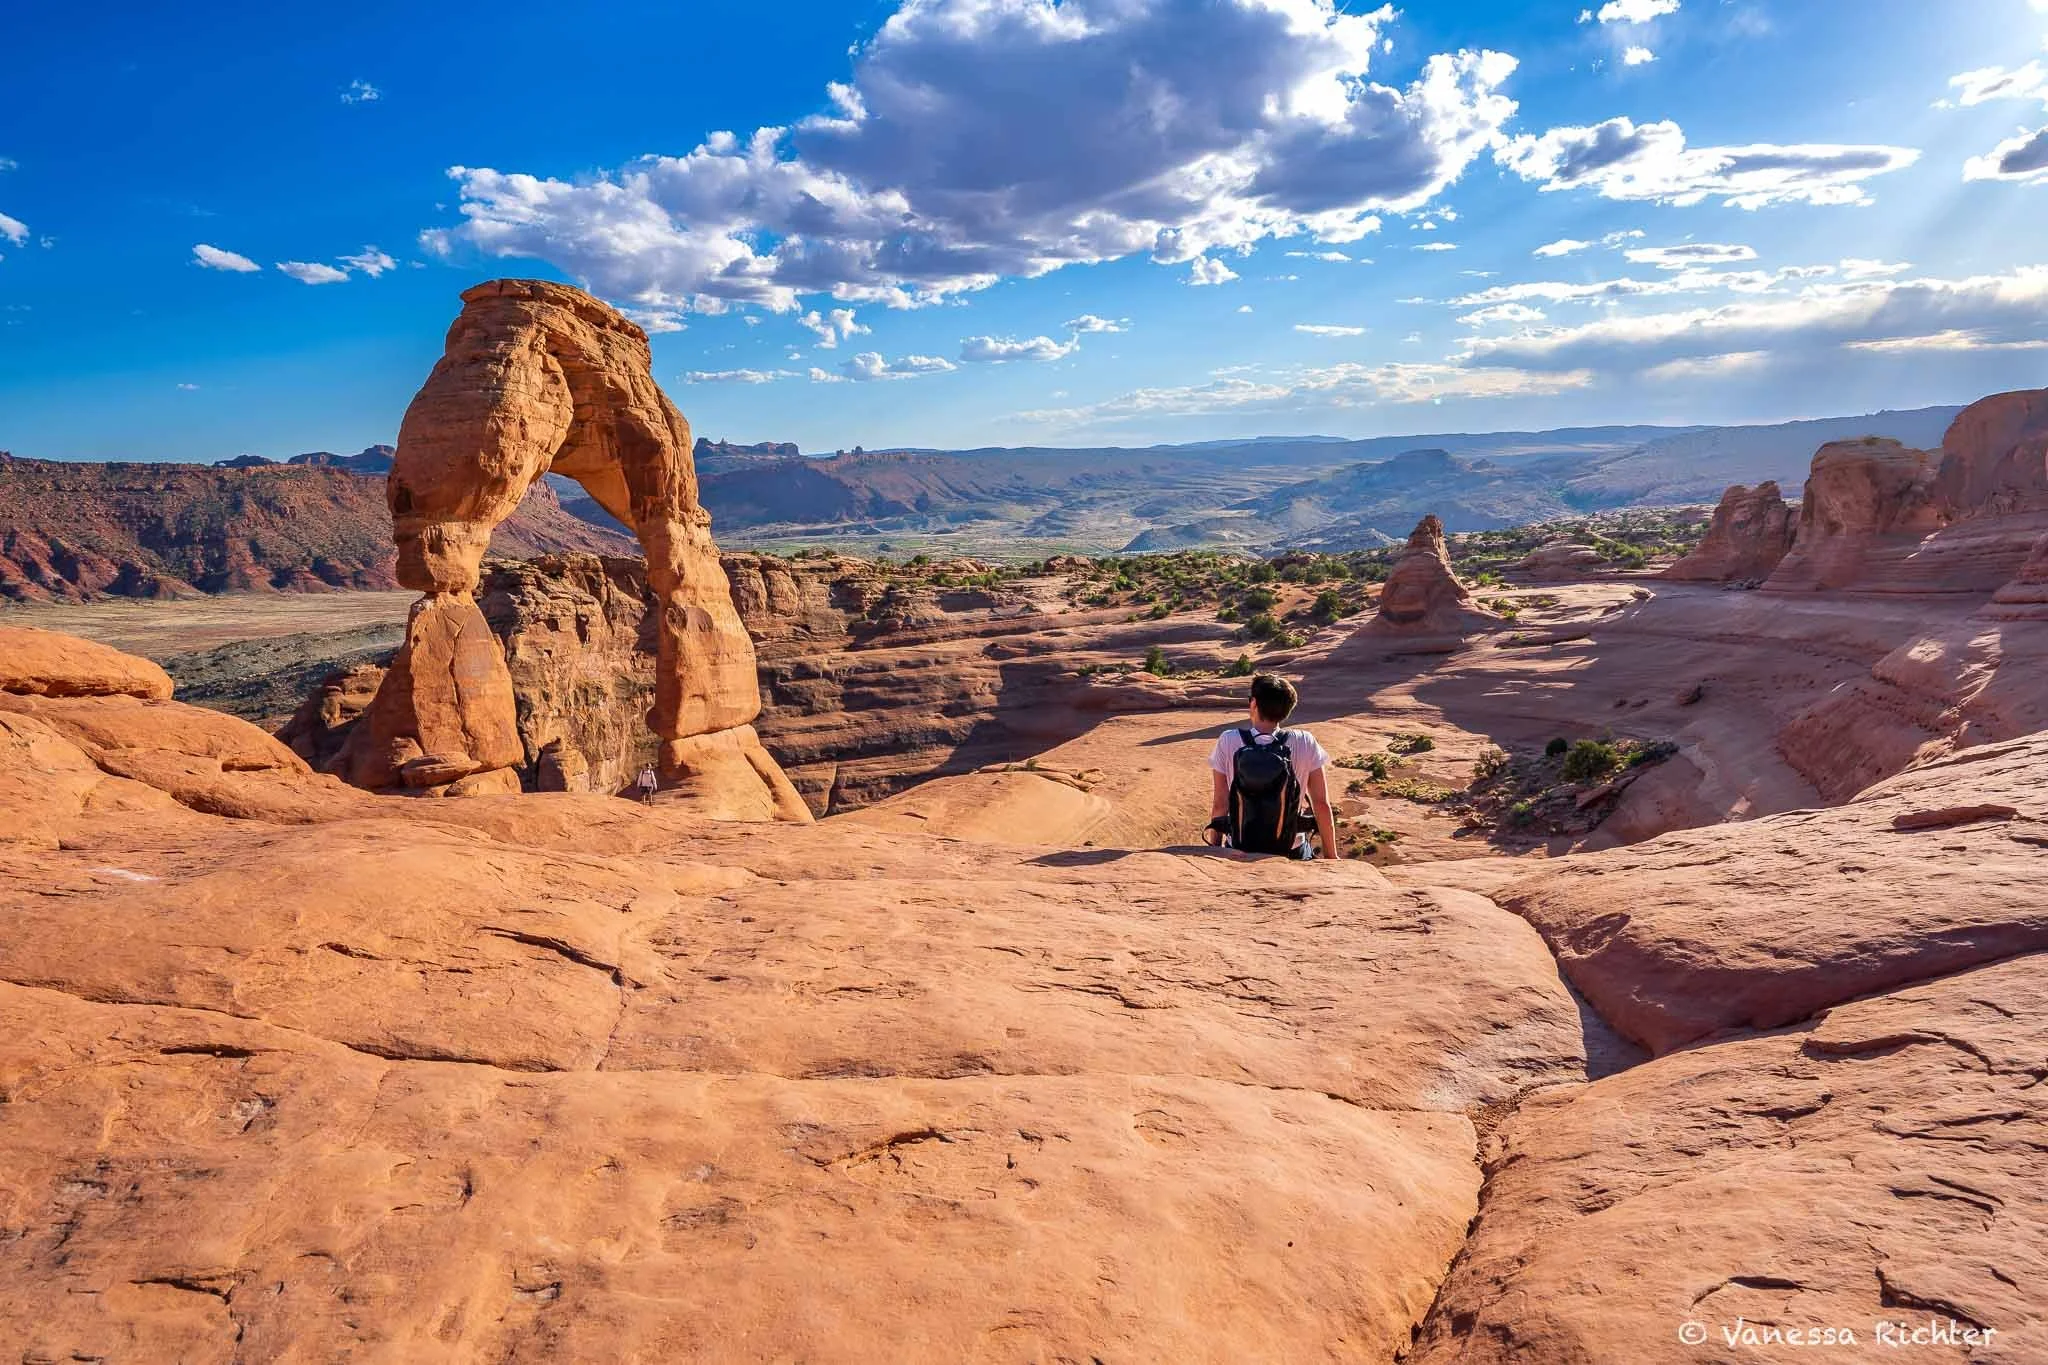
Essential Hike: Delicate Arch Trail
📍 Distance: 3.2 mi (5.1 km)
⛰ Elevation Gain: 629 ft (191.7 m)
🔙 Route Type: Out & Back
This is an absolute must-see and arguably the most famous arch in the park—possibly even in the world. Delicate Arch, standing at 52 feet (16 m) tall, has become an iconic symbol of Utah, even appearing on the state’s license plates. Its freestanding structure and dramatic backdrop of the La Sal Mountains make it one of the most photographed natural landmarks in the United States.
It’s practically impossible to have this arch to yourself (unless —maybe — you visit in the middle of the night or during bad weather in the off-season), but it’s absolutely worth seeing!

Favorite Hike: Devils Garden Trail
📍 Distance: 7.9 mi (12.7 km)
⛰ Elevation Gain: 1,085 ft (330.7 m)
🔙 Route Type: Out & Back
For a longer hike with stunning arches and fewer crowds the farther you go, the Devils Garden Trail is an excellent choice. The first part of the trail leads to the iconic Landscape Arch, one of the park's most famous formations—and the longest natural arch in North America, stretching an incredible 306 feet (93.4 m)*.
While the area around Landscape Arch can be busy, it’s absolutely worth the visit. Its fragile structure means it could collapse at any time. In fact, several large slabs of rock fell from the arch in the 1990s, prompting the closure of the trail beneath it for safety reasons. Today, visitors can only admire it from a designated viewing area, making it all the more special to see while it still stands.
Beyond Landscape Arch, the Devils Garden Trail continues to more breathtaking arch formations, and the further you hike, the fewer people you’ll encounter, making this one of the most rewarding trails in Arches National Park.
In the second half of the hike, be prepared for some scrambling on slickrock and occasional exposure to heights. While it’s nothing super extreme, it does require caution and should be avoided entirely when the rock is wet or icy. I also highly recommend downloading trail navigation before heading out. We had some difficulty finding the trail at one point, and without navigation, continuing the hike would have been quite challenging—we might have ended up turning back instead.
This hike isn’t for those seeking a leisurely "walk in the park," but if you’re up for some adventure, you’ll be rewarded with a stunning variety of uniquely shaped arches and breathtaking views, all with fewer people around.
*I found varying numbers, but this is the one provided by the National Park Service.


Avoid the Crowds Hike (outside the National Park): Corona Arch Trail
📍 Distance: 2.3 miles (3.7 km)
⛰ Elevation Gain: 463 ft (141 m)
🔙 Route Type: Out & Back
If you're looking to see arches without the heavy crowds of Arches National Park or couldn’t snag a park reservation, the surrounding area offers great alternatives. One of my favorite hikes is the trail to the stunning Bowtie and Corona Arches, located outside the park.
The Corona Arch stands an impressive 105 ft (32 m) tall, making it twice the height of the iconic Delicate Arch, which is 52 ft (16 m) tall. Standing beneath Corona Arch, you'll feel tiny—and look like an ant from a distance!
While this trail is generally less crowded than those within Arches National Park, it’s still popular, especially on weekends during the peak seasons (spring and fall).
Do note that this trail briefly exposes you to heights. There is a small section of the trail that includes ladders and safety cables.

Tips: Arches National Park
Unlike previous years, in 2026, no timed entry ticket is required to enter Arches National Park, but on the NPS website it says that “Vehicles may be diverted from park entrances when areas become too congested”. For more information, check here.
Check the official Arches National Park website for current conditions.
Find More Unique Experiences In Arches & Beyond
Canyonlands National Park
Canyonlands National Park is divided into four distinct districts: Island in the Sky, The Needles, The Maze, and the rivers (Colorado and Green). Of these, Island in the Sky and The Needles are the most accessible. For a short visit, I recommend focusing on Island in the Sky, which offers breathtaking views from a high mesa, perched over 1,000 feet (304 m) above the surrounding landscape. You’ll find plenty of short hikes along the paved scenic drive, each offering stunning vistas.
Best Sunset Hike: White Rim Overlook Trail (Island in the Sky)
📍 Distance: 1.8 mi (2.9 km)
⛰ Elevation Gain: 174 ft (53 m)
🔙 Route Type: Out & Back
This is a short and easy, but super sweet, hike to an overlook of the canyon with views of the Colorado River, Monument Basin, and La Sal Mountains. I recommend starting in the late afternoon to catch the sunset, which is simply stunning from the overlook.


Best Geologic Wonder Hike: Upheaval Dome via Crater View Trail (Island in the Sky)
📍 Distance: 1.3 mi (2.1 km)
⛰ Elevation Gain: 226 ft (69 m)
🔙 Route Type: Out & Back
Canyonlands is a place of relative geologic order. Layers of sedimentary deposits systematically record chapters in the park's past. With some exceptions, these layers have not been altered, tilted or folded significantly in the millions of years since they were laid down by ancient seas, rivers or winds.
Upheaval Dome is quite a different story. In an area approximately three miles (5 km) across, rock layers are dramatically deformed. In the center, the rocks are pushed up into a circular structure called a dome, or an anticline. Surrounding this dome is a downwarp in the rock layers called a syncline.
The Upheaval Dome Overlook Trail takes you to a unique geological formation—a mile-wide crater that was long shrouded in mystery, and it is still not entirely certain what caused it. As you hike, you’ll notice how the rocks tilt away from the dome, a stark contrast to the surrounding landscape shaped by gradual erosion. So, what caused this anomaly? Theories include a meteorite strike 60 million years ago, and the salt dome theory.

Tips: Canyonlands National Park
Canyonlands is located in southeastern Utah, near Moab. The park has four districts, with Island in the Sky and The Needles being the most accessible, which I’d recommend for a short or first visit.
Check the official Canyonlands National Park website for current conditions and more detailed information.
Explore Arches & Canyonlands National Park In One Day
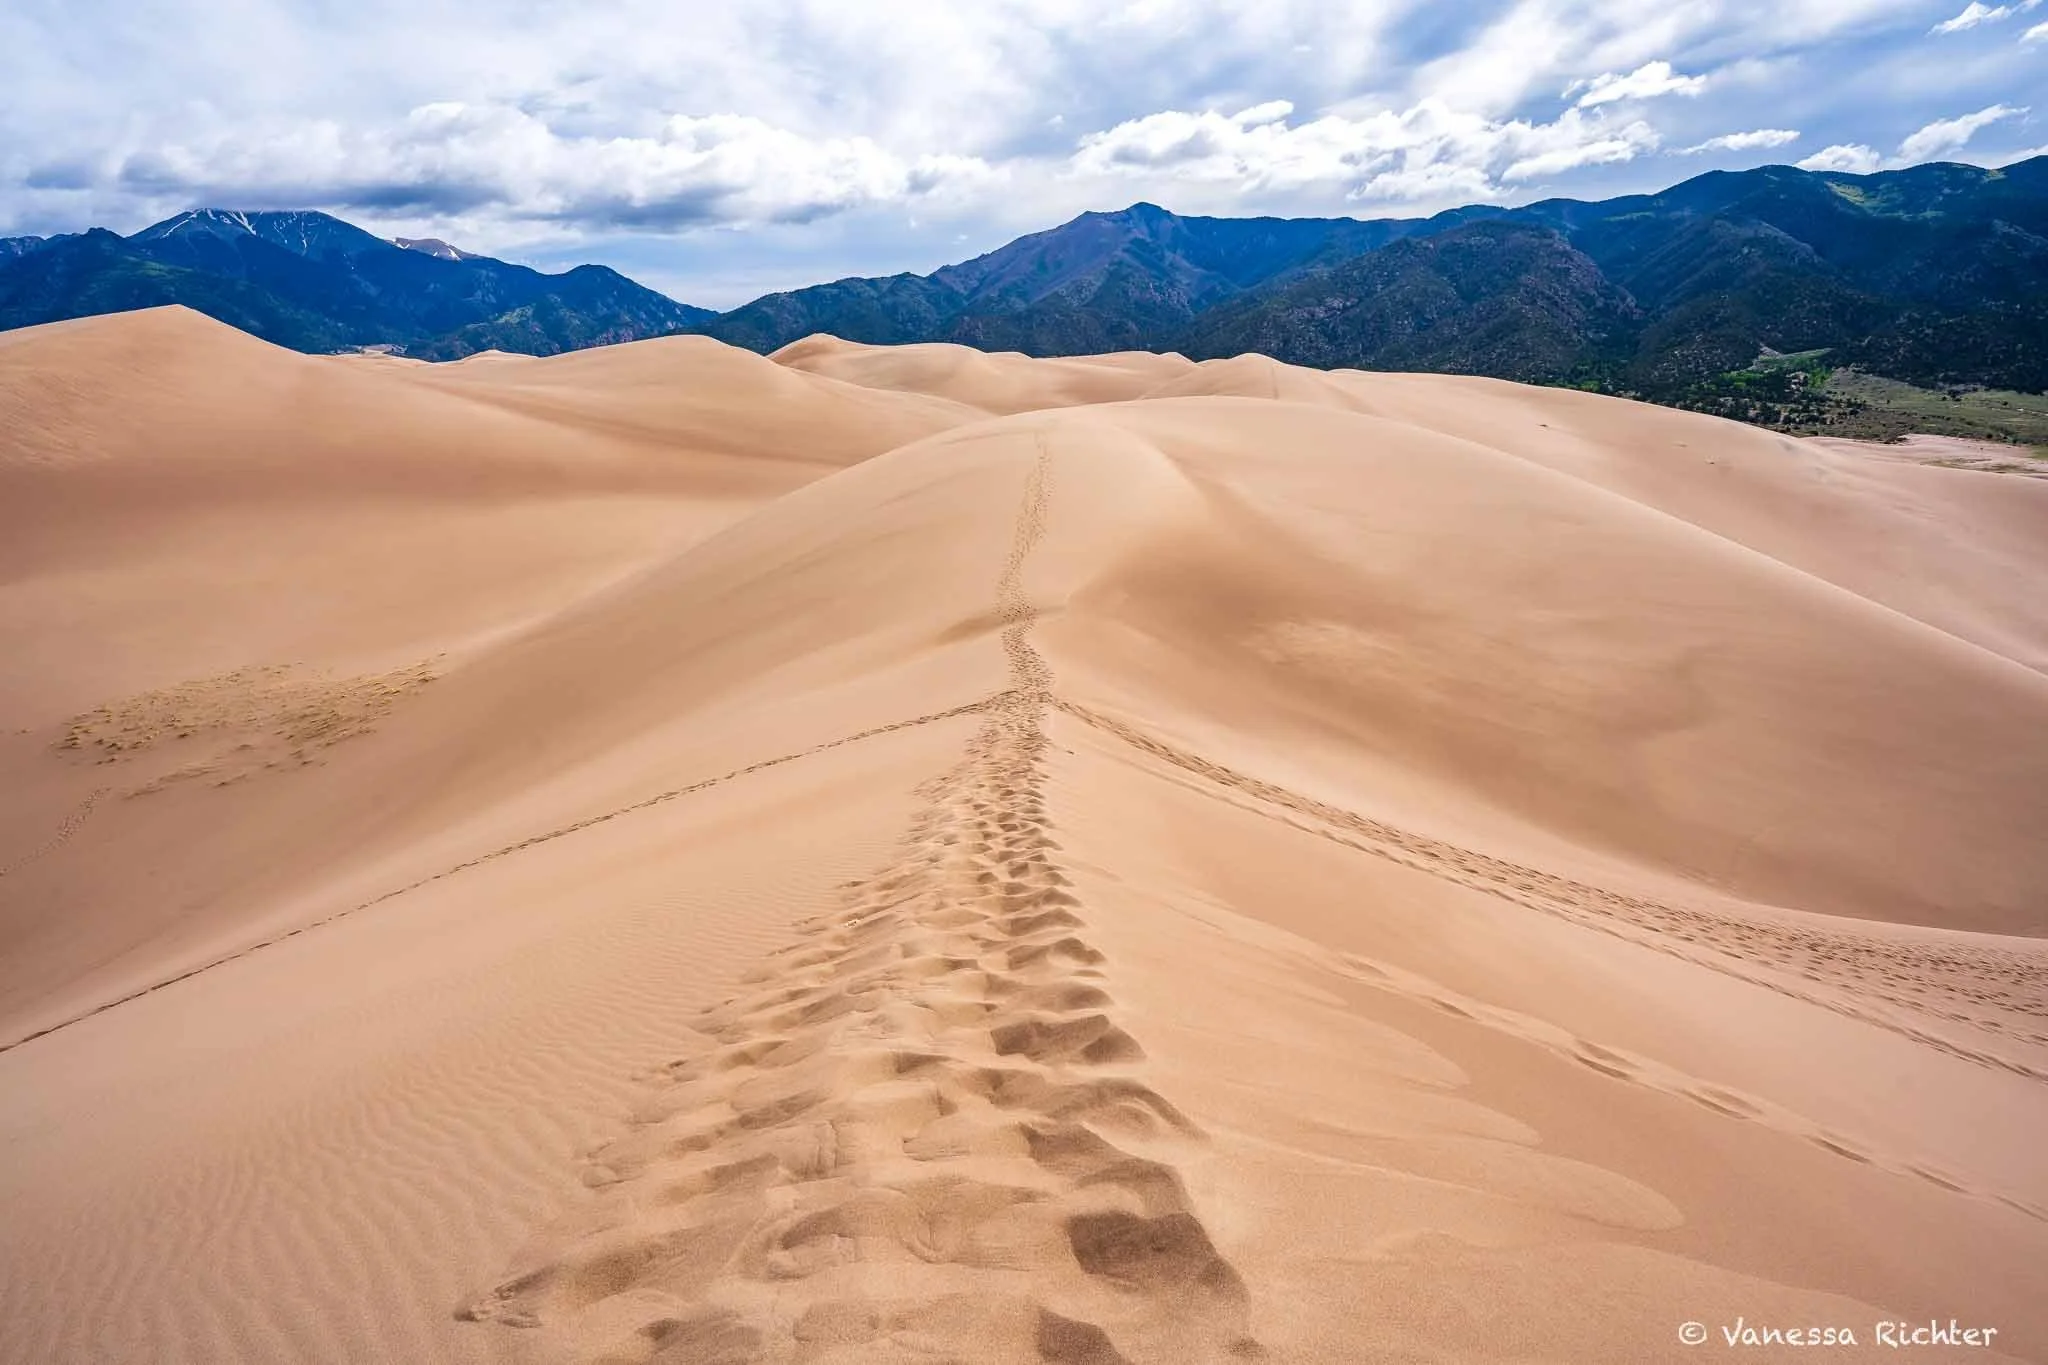
Great Sand Dunes National Park
Great Sand Dunes National Park is one of the most surreal places on Earth. Crossing Medano Creek, formed by snowmelt, then hiking up a sand dune while gazing at the greenery at the foot of towering mountain peaks is a truly unique experience. Medano Creek typically flows from late April through early June, with peak flow occurring in late May.
The dunes themselves are full of fascinating features. For instance, seven species of insects found here are endemic, meaning they exist nowhere else in the world. These unique creatures have adapted to survive in the harsh environment of the dunes. Surprisingly, despite the constant movement of the sand, the overall appearance of the dunefield has remained relatively unchanged for at least 138 years.
Explore more about the dunes' geology and see comparison photos here.
Immersing yourself in the dunefield is an essential experience, and here’s the best hike to do it:
Essential Hike: High Dune on First Ridge
📍 Distance: 3.0 mi (4.8 km)
⛰ Elevation Gain: 603 ft (184 m)
🔙 Route Type: Out & Back
High Dune stands out—not as the tallest or highest in elevation, but for its breathtaking views, accessibility, and the illusion of towering above the rest when viewed from the main parking lot. Rising about 692 feet (210 m) from base to top, reaching the first ridge rewards hikers with stunning panoramas of the dunefield and the surrounding landscape.
While navigation apps can provide a rough idea of where to walk, there’s no set trail on the dunes. Footprints quickly vanish in the wind. However, the paths most people take serve as good indicators of the most reasonable routes.
We stayed at the Piñon Flats Campground and hiked directly from our campsite. When we visited in late May, the seasonal stream of Medano Creek was still flowing. It was fascinating to see glacial meltwater running at the base of the sand dunes, with snow-capped mountains as a backdrop!


Tips: Great Sand Dunes National Park
Start Early for Cooler Sand
Head out early when the sand is still cool.
The sand heats up quickly in the sun, and by midday, it can get too hot to walk without shoes.
I personally love hiking barefoot—no shoes full of sand, and it’s nice to feel the soft sand beneath your feet.
Staying at the Piñon Flats Campground provides the easiest access to the dunes—you can hike directly from the campground without needing to move your car.
Hiking up a sand dune is strenuous, especially for your calves, so don’t underestimate the distances.
If you want to dive deeper into the trail vibes, I have a full article on the high dune hike:
Rocky Mountain National Park
Rocky Mountain National Park is a place where rugged peaks, alpine lakes, and endless skies meet. Whether you’re hiking to a glacier-fed lake, trying to spot moose, elk, or marmots, or just soaking in the crisp mountain air, this park is a dream for outdoor lovers. And with Trail Ridge Road—one of the most scenic drives in the United States—there’s no shortage of jaw-dropping views.
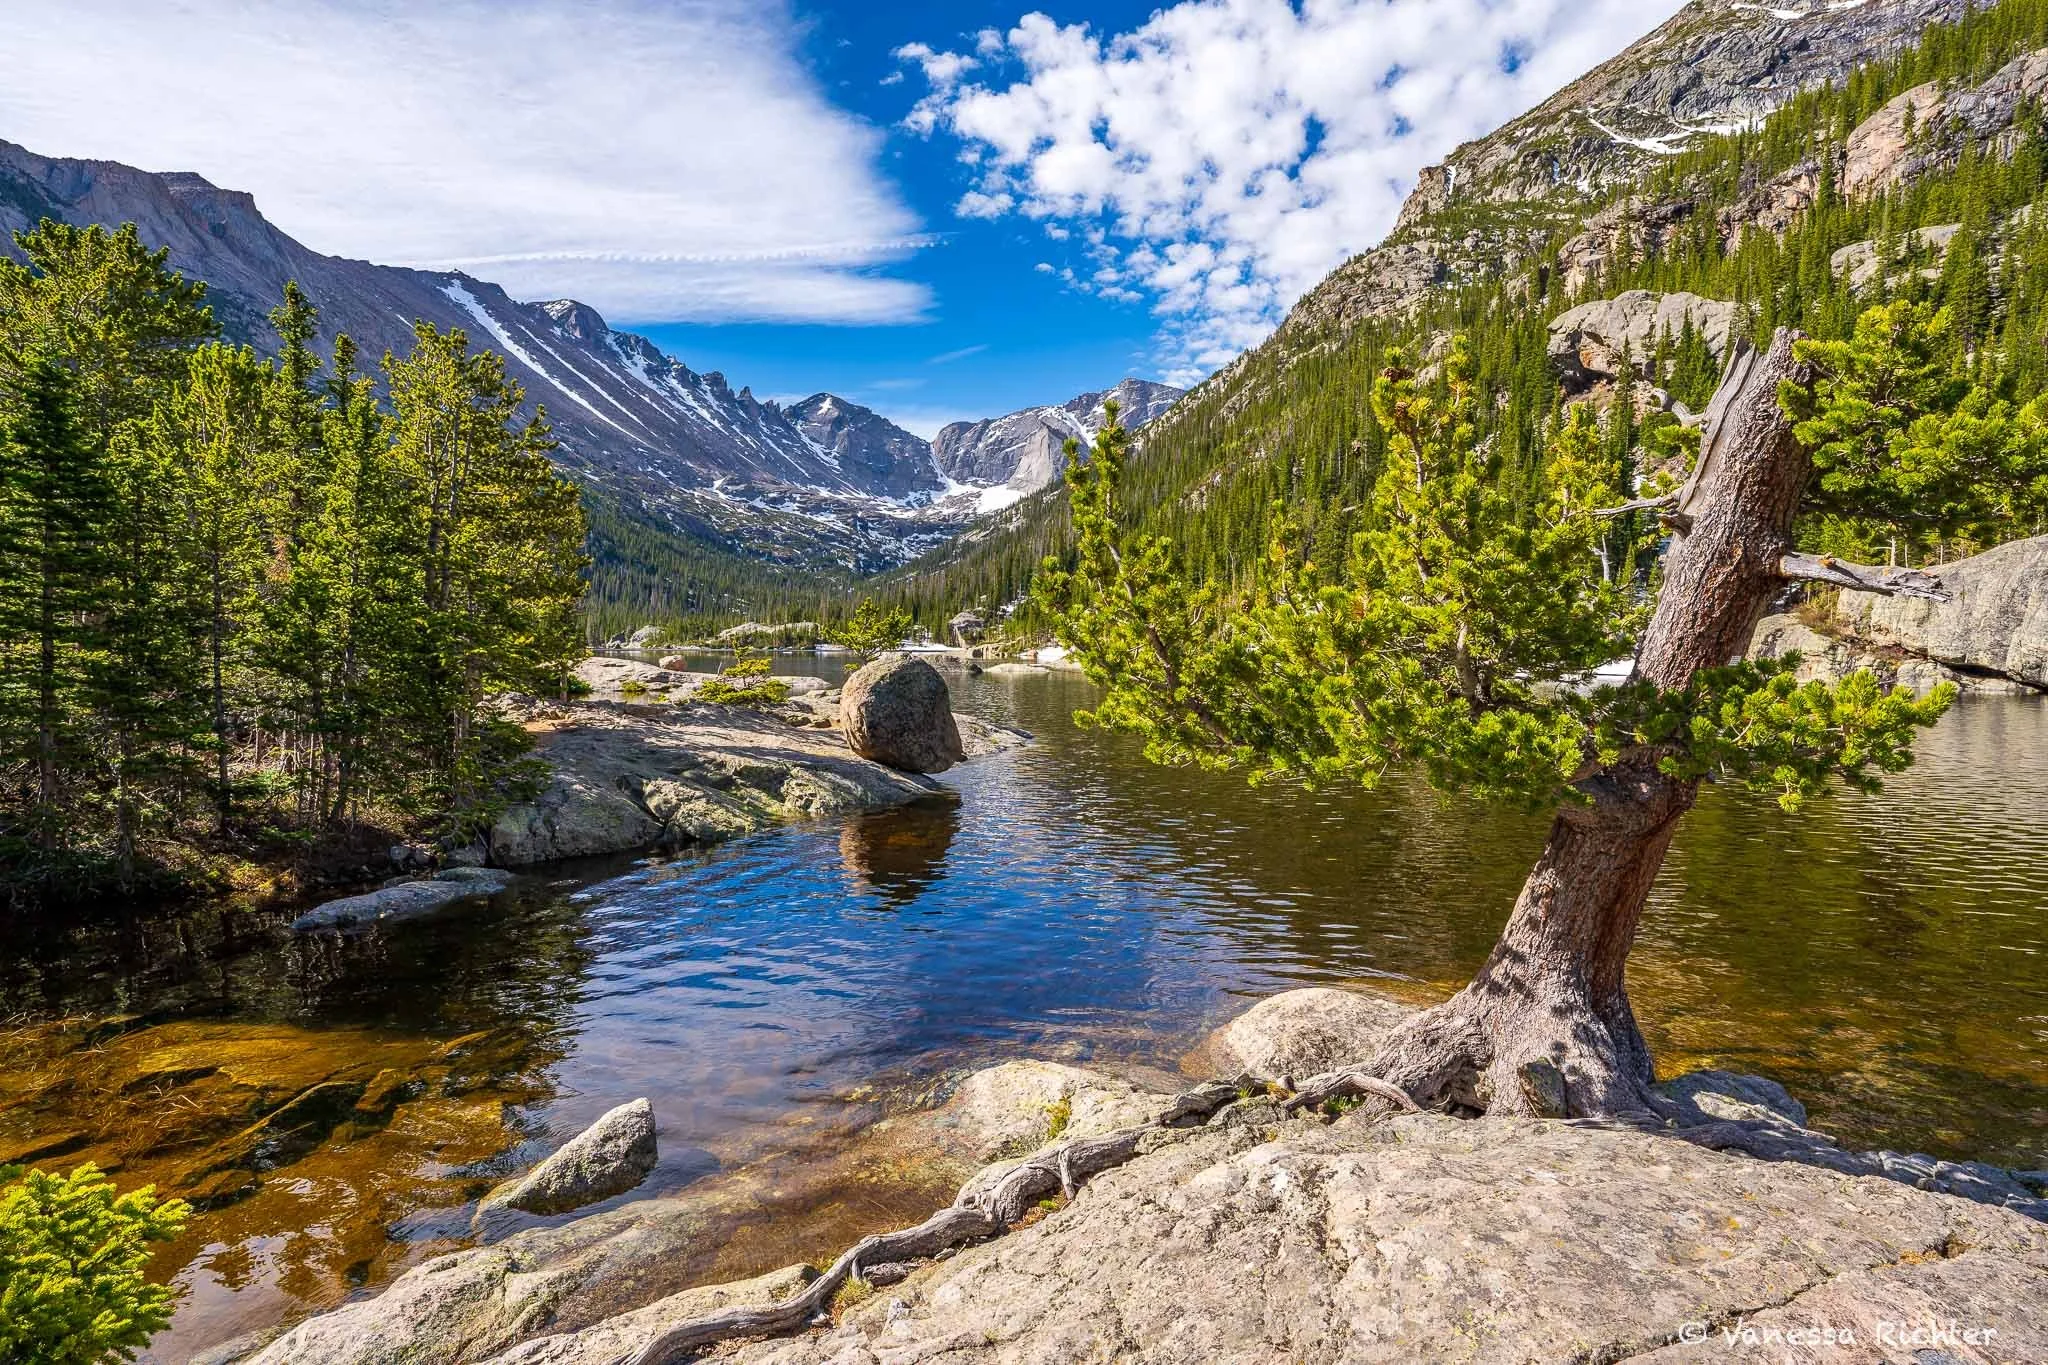
Favorite Late Spring Alpine Lake Hike: Mills Lake & The Loch via Glacier Gorge Trail
📍 Distance: 6.6 mi (10.6 km)
⛰ Elevation Gain: 1,236 ft (377 m)
🔙 Route Type: Out & Back
On a chilly but clear morning in early June, we woke up much earlier than usual to drive from Estes Park to Rocky Mountain National Park, eager to see awe-inspiring alpine lakes, waterfalls, and wildlife. Due to the park’s high elevation, some snow still lingered on the trail to Mills Lake and The Loch at this time of year.
This hike takes you through lush forests, past cascading waterfalls, and opens up to stunning views of both lakes. The trail forms a ‘Y’ shape, with one branch leading to Mills Lake and the other to The Loch. You can start with either lake, but if you’re hiking early, I’d recommend heading to the one that interests you most first to experience that lake with fewer people around.
Keep an eye out for wildlife! We saw and heard plenty of birds and were lucky to spot a snowshoe hare along the trail. The skittish little guy, still transitioning from winter to summer fur, seemed surprised to see humans so early in his home and disappeared almost too fast for my camera to snap a photo.
Any of the lakes makes for a great breakfast or lunch spot. Mills Lake has more large rocks and areas to sit on, making it a perfect choice for a peaceful morning meal. We were glad we headed there first and were able to enjoy the serene early morning atmosphere before more hikers arrived!


Best Area to Spot Moose: Kawuneeche Valley
If you've ever wanted to observe these majestic animals, Rocky Mountain National Park is an excellent place to do so. Most visitors, including us, enter the park from Estes Park on the east side. However, moose are more commonly found at lower elevations and in wide-open meadows on the western side, particularly in Kawuneeche Valley.
The drive from Estes Park along Trail Ridge Road (U.S. Highway 34)* to the western side is incredibly scenic, with stops along the way, such as the Continental Divide, where water on the western side flows toward the Pacific Ocean, while water from the eastern side flows toward the Atlantic Ocean. Trail Ridge Road spans 48 miles and reaches elevations of up to 12,183 feet, offering breathtaking views.
On the western side, several hikes follow streams and lakes, where you might spot moose, or you may even see them right from the roadside. We were fortunate to observe several moose, including a mother and her calf on different days, grazing in a meadow just a short distance from the road.
*Please note that Trail Ridge Road is typically open from late May through October, depending on weather conditions.


Tips: Rocky Mountain National Park
Timed Entry Reservations: You'll need a timed entry reservation to access the park for most of the day during peak season (May–October). Access to Bear Lake Road is even more regulated due to the large popularity of the area. For a hike in the Bear Lake Road corridor, we reserved a slot between 5 and 7 a.m. and were so glad we did. Hiking so early was peaceful, but by the time we came down the trail, the crowds were already overwhelming even with the limited access. Learn more about the timed entry permit system on the NPS website.
Arrive Early: I highly recommend starting VERY early. As mentioned above, the park has a reservation system to help manage crowds, but it can still be super busy, even during the off-season!
Many lakes remain frozen well into late spring, and trails are often still covered in ice and snow at this time of the year. We visited in early June and encountered some snowy patches on the trails we chose, but we only needed crampons in one spot. Check individual trail conditions — depending on elevation and sun exposure, some trails may have more snow and ice than others at this time of year!
Trail Ridge Road typically opens between late May and early June, depending on snow conditions.
Check the official Rocky Mountain National Park website for current conditions and more detailed information.
For concrete itinerary tips, check out my guide to Rocky Mountain National Park:
Dinosaur National Monument

Ever wanted to see an actual quarry site with real dinosaur bones that you can even touch?
Then, you should visit the Quarry Hall at Dinosaur National Monument! Located on the border between Colorado and Utah, this unique monument offers a glimpse into the ancient past, showcasing over 1,500 exposed dinosaur fossils in their original location.
The Quarry Exhibit Hall offers visitors a chance to marvel at an impressive wall of dinosaur fossils and learn about the paleontologists who uncovered these ancient giants. In some areas, you can even touch real fossilized bones. It was truly awe-inspiring to see and touch these million-year-old bones and imagine a time when these giant creatures roamed a world so different from ours.
Beyond the dinosaur fossils, Dinosaur National Monument also features ancient petroglyphs, scenic hiking trails, and opportunities for rafting and camping. You could easily spend several days exploring all it has to offer. We would definitely love to come back and explore more of the park!

Tips: Dinosaur National Monument
Dinosaur National Monument has an entrance fee, exploring the Quarry Exhibit Hall is included.
The Quarry Exhibit Hall is located about 0.25 miles (0.4 km) from the Quarry Visitor Center, accessible by road.
Access to the Quarry Exhibit Hall can change depending on the season and weather conditions. When we visited in early June, we were able to drive directly to the Exhibit Hall.
Check the official Dinosaur National Monument website for current conditions and more detailed information.
The Loneliest Road in America

In July of 1986, Life magazine named the U.S. 50 portion in Nevada The Loneliest Road in America.
While I am confident that there are lonelier roads in the vast wilderness areas of Alaska, it absolutely deserves the adjective "lonely." It is the kind of lonely where you can see for miles ahead — just desert sand and mountains on either side, yet no other cars in sight. This solitude gives you the rare opportunity to step out of the car and take pictures in the middle of the highway, surrounded only by silence.
There are dozens of ghost towns in this part of the country, some that are called "ghost towns" but are still alive. And then there is Ely, where you can feel the old days meeting the present. It’s a place where time seems to have stood still. While modern conveniences have arrived, you might still get a handwritten receipt when buying your fridge magnet.
Ely —Where The Old Days meet the Present
Ely is the largest town along the highway, rich in history dating back to the gold rush era. A must-see is the Renaissance Village, created by locals with a passion to preserve their history. Each cabin tells the story of a different group of settlers who came to Ely during the mining boom, showing how they lived back in the day.
Nearby, you’ll find Garnet Hill, where visitors can hunt for garnets and keep what they find. We weren’t lucky enough to find one, but it was still a fun experience!
Tips: The Loneliest Road in America
Gas stations and charging stations are rare, so plan ahead & take every opportunity to fuel up.
EV Driver’s Advice on the Loneliest Road in America
It is absolutely possible to travel with an EV that has a good range (ours reaches about 350 miles when fully charged). However, please keep the following in mind:
Plan ahead & have alternatives: Check PlugShare for real-time updates on charger availability and maintenance issues. Be sure to have backup charging options and plan accordingly.
Charging challenges: If fast chargers are out of order, you may need to rely on slower chargers, which are more abundant and reliable on this route. You may need an extra night or two if the only working options are slow chargers.
Take elevation into account: Most of the route is flat, but areas like Great Basin National Park will use more of your range.
Everything worked perfectly for us, but we also had several days in a cabin near Baker, where we could charge using a regular outdoor household outlet. Also, the fast(er) chargers were mostly working well, and we had strategically planned motels along the route for overnight charging opportunities. If you would like more info on this, please let me know (in the comments below, or just shoot me a message)!
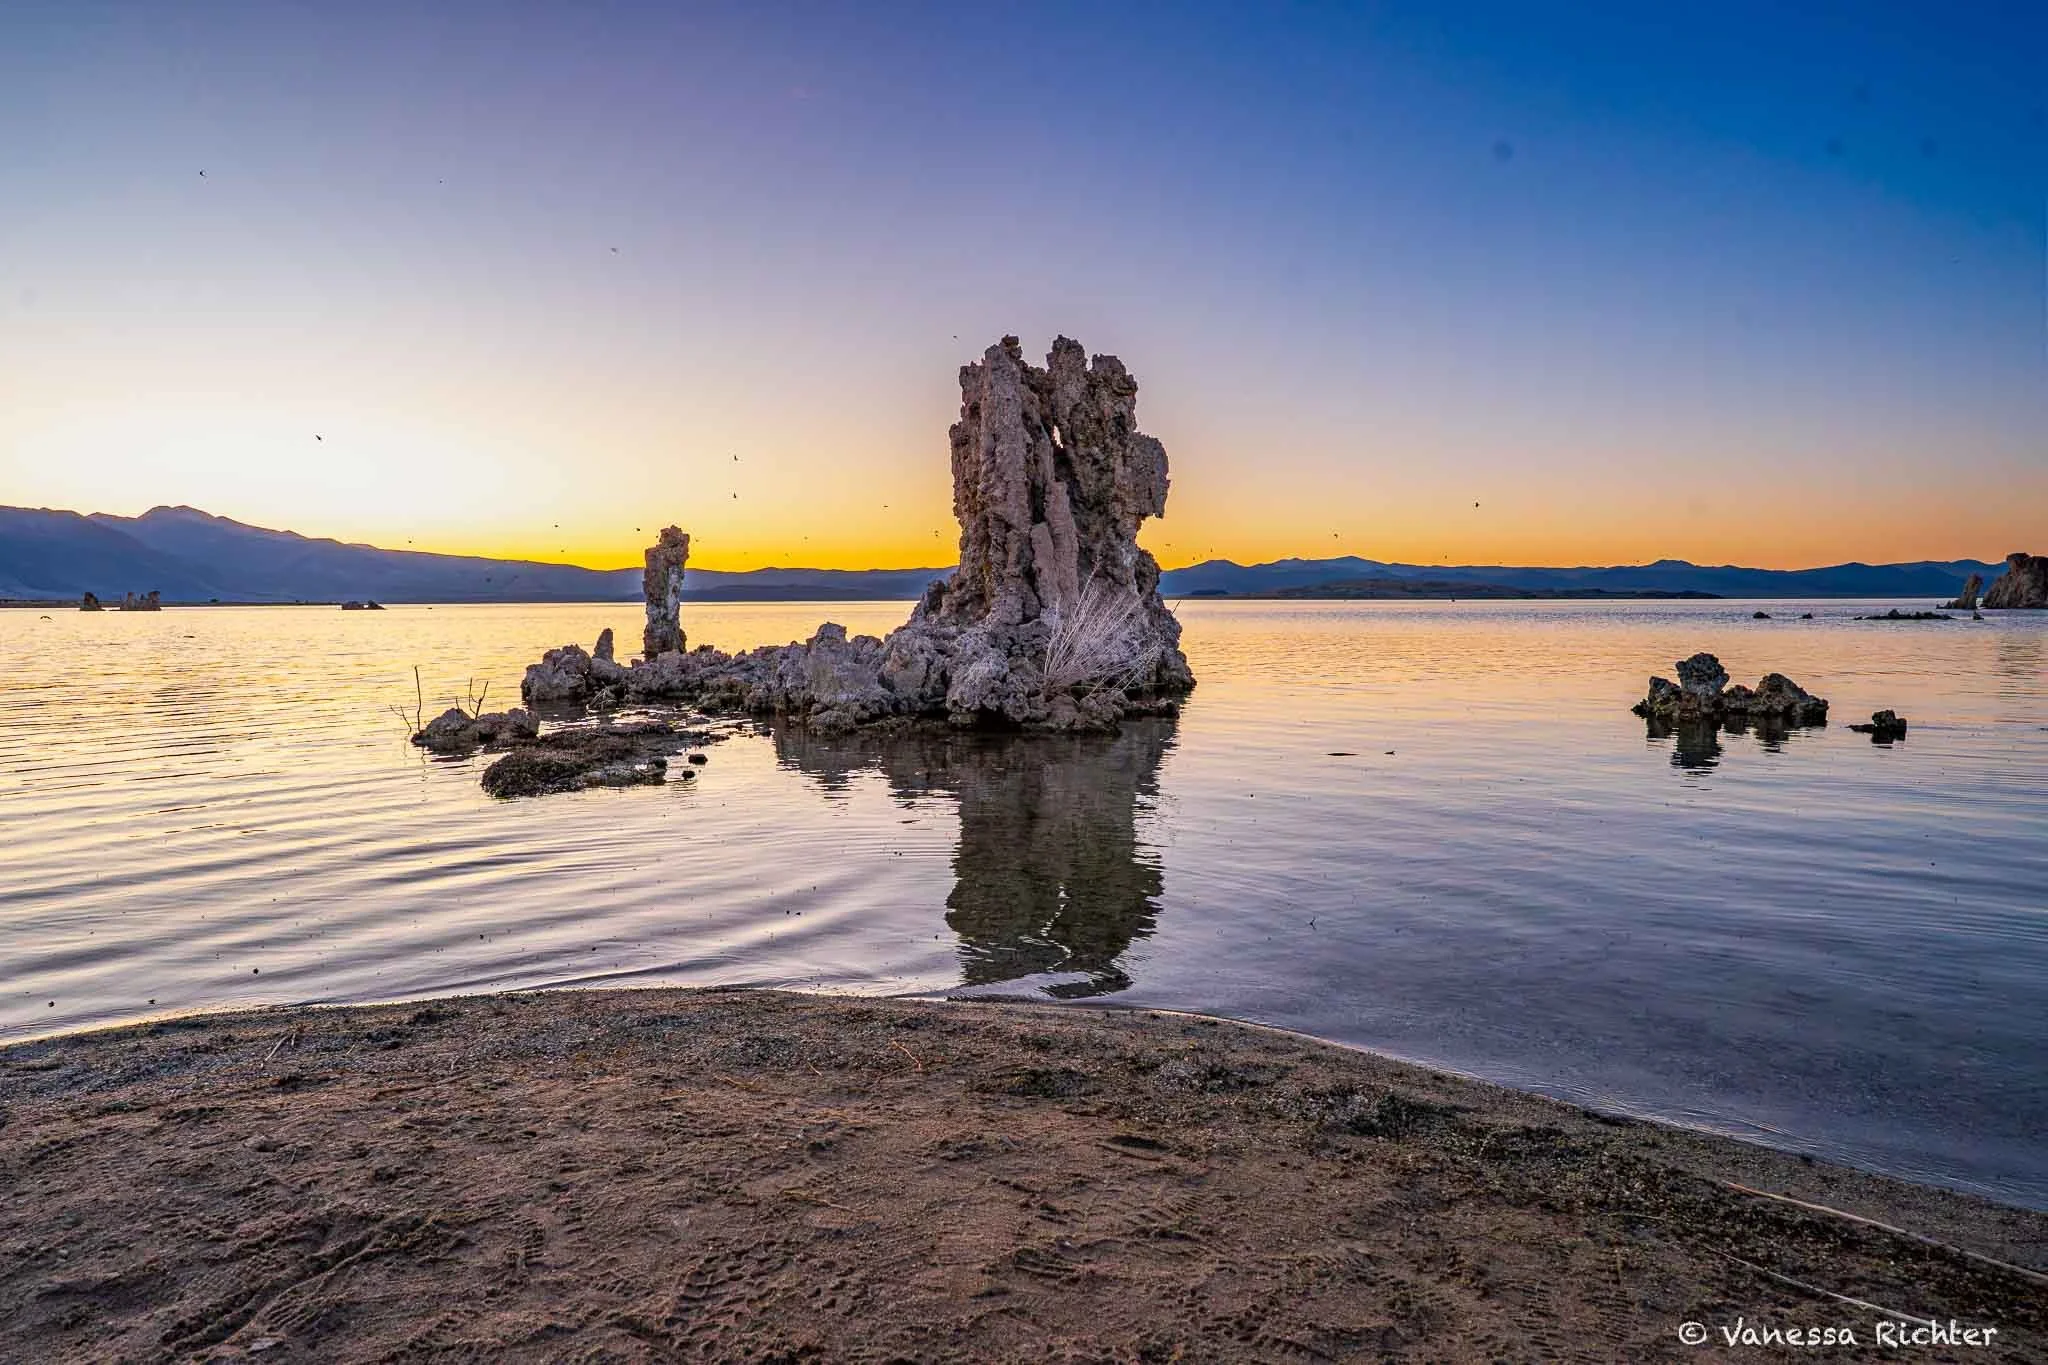
Stargazing
Many places along the loneliest road in America and the surrounding area are among the darkest places on Earth, so brace yourself for an incredible night-time display of stars. Gaze into the Milky Way — our home galaxy — while shooting stars cross the sky every once in a while. Stargazing at a TRULY dark place with zero light pollution was a highlight among the highlights of our trip. We had never seen such an incredible view of the night sky. Many places in this part of Nevada are SO amazingly remote that there is really not the slightest light pollution. And late spring is also a great time to see the impressive core of the Milky Way!
Tips: stargazing
“Milky Way Season”: The Milky Way core is visible in the Northern Hemisphere from roughly late February to October, with the best visibility from May to August when it is visible above the horizon during dark hours.
Aim for the new moon or check the moonset times.
To keep light pollution at a minimum, including on a very local level, I highly recommend staying in a remote cabin surrounded by nature, or camping!
Stargazing apps like Sky Guide, Stellarium, and Night Sky help you track the Milky Way and other celestial bodies for better viewing.
Capturing the Milky Way With Your Camera & More Detailed Info
If you would like to learn more about when it is a good time to see the Milky Way or you are interested in capturing a stunning photo of it with your camera, check out my in-depth guide below that will provide you with all you need to know.

Great Basin National Park
Imagine being in the mountains, hiking through snow to a glacier. On your way, you pass the oldest trees on Earth and turquoise lakes. After your hike, you drive down the mountain, lined with deep green trees, and nature feels lush and vibrant. But then you reach a point where you can look down into the valley, and all you can see is the color beige — showing off sand and bare rocks. The pale green sagebrush hides in this monotony of nude tones, but from above, you see only an ocean of sand.
This is exactly what you can experience at Great Basin National Park. It’s such a unique place with so many features that make the park extremely diverse and almost surreal.
Great Basin National Park is one of the most remote national parks in the US and, because of this, also one of the least visited.
Must-Do Hike: Bristlecone & Alpine Lakes Loop
📍 Distance: 6.0 miles (9.7 kilometers)
⛰ Elevation Gain: 1,217 feet (370.9 meters)
🔙 Route Type: Loop
This trail takes you along some of the most stunning natural features of the park: 3,000-year-old trees, turquoise alpine lakes, and Wheeler Peak Glacier—the only glacier in Nevada and one of the southernmost glaciers in the entire United States!
For this hike, you’ll drive from the desert to high altitudes of Great Basin National Park and start hiking near Wheeler Peak Campground. At an elevation of around 10,000 feet, you’ll hike through a peaceful forest, passing stunning turquoise lakes on the Alpine Lakes Loop Trail, until you reach the Bristlecone Pine Trail, where you can marvel at the hardy and often barren-looking trees.
Here, you’ll also find informational signs about the Bristlecone Pines. From there, you’ll continue on the Glacier Trail, where the terrain becomes rockier with basically no vegetation except for the occasional wildflower in late spring, as you approach Wheeler Peak Glacier.
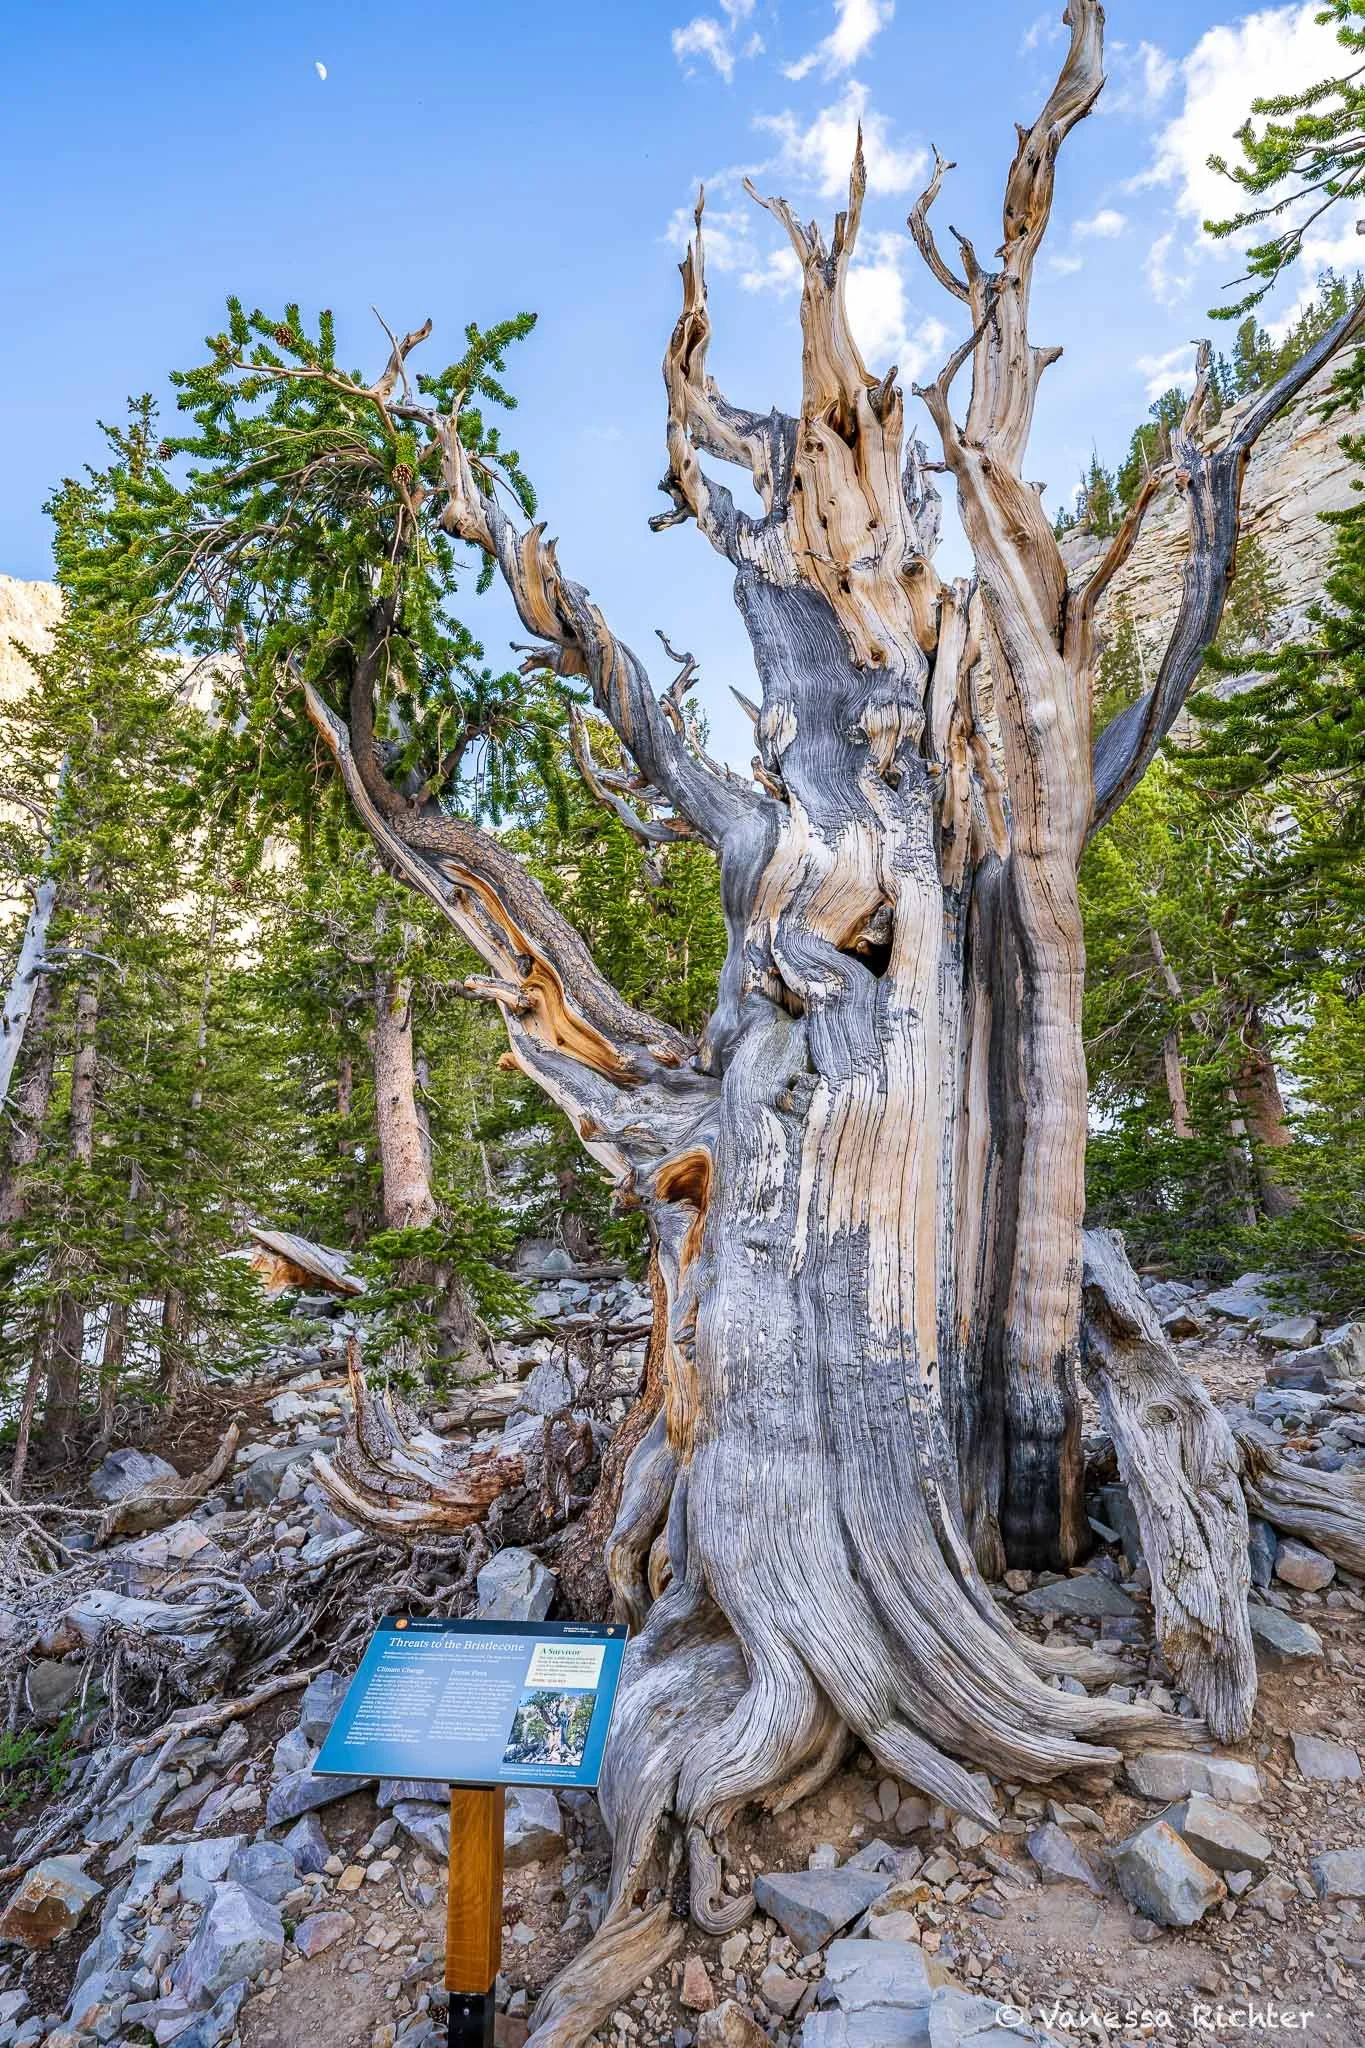
This Bristlecone Pine is estimated to be an incredible 3,200 years old!


Tips: Great Basin National Park
The scenic drive to Wheeler Peak is steep and winding, and closed during the winter season — usually opens around Memorial Day weekend depending on snow conditions, so check road conditions in spring before heading out.
Beware of altitude sickness: Many trails, including the Bristlecone and Alpine Lakes Loop, start around 10,000 feet—be prepared for thinner air and possible altitude sickness.
Limited Services: Expect little to no cell reception in most areas of the park. Download maps in advance. There are no gas stations or convenience stores inside the park.
Wildlife Awareness: Be on the lookout for wildlife on the roads, especially at dawn and dusk. We saw hares and a rattlesnake on the road—drive slowly and stay alert! On trails and in campgrounds, always keep a safe distance—for both your safety and the animal’s.
Check out the official Great Basin National Park website for more detailed info and current conditions before heading out.
Dispersed Camping
The allure of the American West lies not just in its stunning landscapes, but in its vast, open spaces where you can truly get away from it all. Dispersed camping offers the perfect opportunity to immerse yourself in nature without the crowds. Across Nevada, Utah, and Colorado, you’ll find an abundance of BLM and National Forest lands, where undeveloped campsites allow you to experience the wilderness. Whether you're seeking solitude beneath towering mountains or a quiet spot overlooking a desert, — in my view, dispersed camping is perfect for those looking to venture off the beaten path, embrace the freedom of camping away from developed campgrounds and amenities, and find peace in nature.


Tips: Dispersed Camping
Where
BLM Land (Bureau of Land Management): Public lands managed by the U.S. government.
National Forests: Public lands managed by the U.S. Forest Service.
Regulations & Permits
Some Public Lands require a free permit, especially in high-use areas.
No camping near water sources: Stay at least 200 feet from lakes, streams, and rivers to protect wildlife and water quality.
Campfire restrictions: Many areas have seasonal fire bans. Check for restrictions before you go, and always follow Leave No Trace principles (see below for more).
Typically, it is allowed to stay up to 14 days in one spot.
Safety
These areas are undeveloped and lack services, with limited or no cell reception, so it's important to be self-reliant and well-prepared. Here are some essentials:
Check the weather forecast and road conditions before heading out.
Carry plenty of water and food.
Bring a first aid kit and tools in case of injury or if you get stuck.
Share your plans with someone.
How to Find a Spot
BLM Land & National Forest Websites: Check these sites first for regulations and permits. Typically, they also provide useful information on specific roads with dispersed camping options and conditions.
iOverlander: An app for finding dispersed camping spots, campgrounds, and other outdoor locations. It features user reviews on campsites, covering conditions, photos, and accessibility, helping you determine if a spot is suitable.
Gaia GPS: Ideal for getting an overview of BLM and National Forest public lands, as well as saving your spots.
Google Maps: The satellite view is great for finding pullouts along roads and larger areas without vegetation that are suitable for setting up camp.
>> My typical approach is to obtain information from BLM and National Forest websites first, focusing on areas I’m interested in. Once I’ve identified specific roads that may be suitable for dispersed camping, I usually use Google Maps alongside Gaia GPS to track public land boundaries (on Gaia GPS) while searching for spots using satellite view (on Google Maps). The brown areas off the road typically indicate minimal vegetation, which may have been used for camping. In parallel, I often use iOverlander to research spots I may have missed or to see if there’s any additional information available on spots I’ve already looked into. I always try to find multiple options in case someone else has already taken a spot, or if it's not accessible for other reasons.
Leave No Trace
There are rules and guidelines for dispersed camping that vary slightly across National Forests and Bureau of Land Management (BLM) land, so always check them before heading out. However, some general guidelines apply everywhere:
Pack in what you pack out—leave no trash behind.
Camp in previously used spots to minimize impact on nature.
Check campfire regulations and always exercise caution when having one.
Stay limit: You can camp in one spot for up to 14 days before moving.
MOST IMPORTANT: Share your location with close friends only, but please do not share on social media. Avoid publicly posting camping spots or coordinates on social media. When remote locations go viral, they often get overrun and damaged. This is not gate-keeping: Public lands are for everyone and everyone is free to do their own research, but they require a certain preparedness, self-reliance, and understanding of Leave No Trace principles — not the kind of visit you plan based on an out-of-context Instagram reel. Part of the fun is finding spots yourself. A great method (see above) is to search for roads within BLM land or National Forests, then use Google Maps satellite view to find pullouts or open areas without vegetation. Let’s keep the adventure spirit alive!
Following these guidelines helps keep these lands open for public use and everyone to enjoy. Irresponsible actions—such as littering, off-roading into vegetation, and illegal firearm use—ultimately lead to more restrictions.
Let’s be stewards of these places and leave them better than we found them.
Know Before You Go
Park Fees
Most national parks charge an entrance fee of $30 per vehicle. If you plan to visit at least three national parks within 12 months, consider purchasing the America the Beautiful Pass, which is a more cost-effective option.
Leave No Trace
Practice Leave No Trace principles by packing out all trash, staying on designated trails, and respecting wildlife; including, but not limited to:
Stay on designated trails and avoid shortcuts to prevent injuries and environmental damage. Hiking off-trail can cause erosion and irreversible damage to fragile ecosystems — especially in the desert where new growth is often tiny, fragile and easy to overlook.
Enjoy wildlife from a distance—disturbing them can throw off the delicate balance of the ecosystem, and large, wild animals such as bears accustomed to human food are often killed when they continue getting too close. If an animal notices you, you’re too close. Store food properly to avoid attracting wildlife.
Wildlife Awareness When Driving: Be on the lookout for wildlife on the roads, especially at dawn and dusk. Drive slowly and stay alert!
Safety
Altitude (sickness): Most of Colorado sits at high elevations, so take it easy if you're not used to the altitude.
Weather: Be prepared for rapidly changing weather conditions, especially at higher elevations. Bring layers and check the forecast before heading out.
Climate: Be prepared for varying climates, as this trip will cross different climate zones, from hot and dry deserts to mountainous regions.
Still Looking For Places To Stay Along The Way?
I hope you enjoyed this article — by a real human for real humans. If you liked this guide, you can help me continue creating free resources like it.
Buy me a coffee
Follow the Adventure
Latest on the Blog
Search
📌 Pin for later