
How to Spend 2 Days In Joshua Tree National Park
This post contains affiliate links. If you book through them, I may earn a small commission at no extra cost to you — thank you for supporting this blog.
Joshua Tree National Park is not just bare desert — it is a place of surprising diversity and full of wonder. While I admittedly do have a thing for deserts, Joshua Tree can also convince those of this incredible ecosystem who find deserts generally boring and lifeless! It is one of my favorite national parks in the U.S., which I have visited many times, and I’d love to share what I have learned about how to best spend your time there, especially as a first time visitor. Two days is a good amount of time to discover different features of the park. While you can also check out a full guide on Joshua Tree National Park on my blog (see link at the end of the article), this post focuses on which hikes and places I’d recommend to pick for just two days in the park which allow you to get a good overview of the natural features that Joshua Tree is home to.
Alright — Grab a cozy beverage and let’s dive in!
First Day
On the first day, I recommend starting on the western side of the park — it's the most popular area of Joshua Tree, and for good reason. In case you didn’t know, Joshua Tree is home to not just one, but two deserts. Roughly speaking, the Mojave Desert makes up the western half of the park, while the Colorado Desert covers the eastern side. So, if you travel from west to east, you’ll notice a dramatic change in vegetation!
The western part is where you'll find the highest density of Joshua trees, which is why I suggest starting there. There are two short but sweet hikes that serve as a perfect introduction to the park: Hidden Valley and Barker Dam. Their trailheads are just a five-minute drive apart.
🥾 Desert Hiking Demands the Right Gear
Desert trails are unforgiving — exposed sun, extreme heat, zero shade, and terrain that can shift from hardpacked rock to loose scree without warning. Hydration is everything out here, and I never head out without a full (water) bladder. I've put together a full list of what I bring: the lightweight shoes that handle technical desert terrain, the pack with ventilation that actually makes a difference in the heat, eco-conscious sun protection, and the small things that I genuinely wouldn't leave without.
→ Explore My Tried-and-True Hiking GearHidden Valley
📍 Distance: 1.0 mi (1.6 km)
⛰ Elevation Gain: 118 ft (36 m)
🔁 Route Type: Loop
Hidden Valley is a short and scenic 1-mile (1.6 km) loop with minimal elevation gain (roughly 118 ft or 36 m). It’s one of the most popular hikes in Joshua Tree — and for good reason. The trail leads you through a rock-enclosed valley once believed to have been used by cattle rustlers. Along the way, you’ll pass striking rock formations, plenty of Joshua Trees, and other desert plant life. It’s a great introduction to the park’s landscape, especially for first-time visitors or those short on time. It can get busy during peak hours, so I recommend going early for a quieter experience.
Barker Dam
📍 Distance: 1.1 mi (1.8 km)
⛰ Elevation Gain: 50 ft (15 m)
🔁 Route Type: Loop
Barker Dam is a nice 1.1 mile (1.8 km) short hike/ walk with very little elevation gain (50 ft or 15.2 m), where you will see a variety of things: many Joshua Trees, Native American rock carvings and the historic dam, which is also a good spot for bird watching (in particular if it has water at your time of visit). Beware though that it gets crowded quickly during the cooler peak season, so I’d recommend going there early.
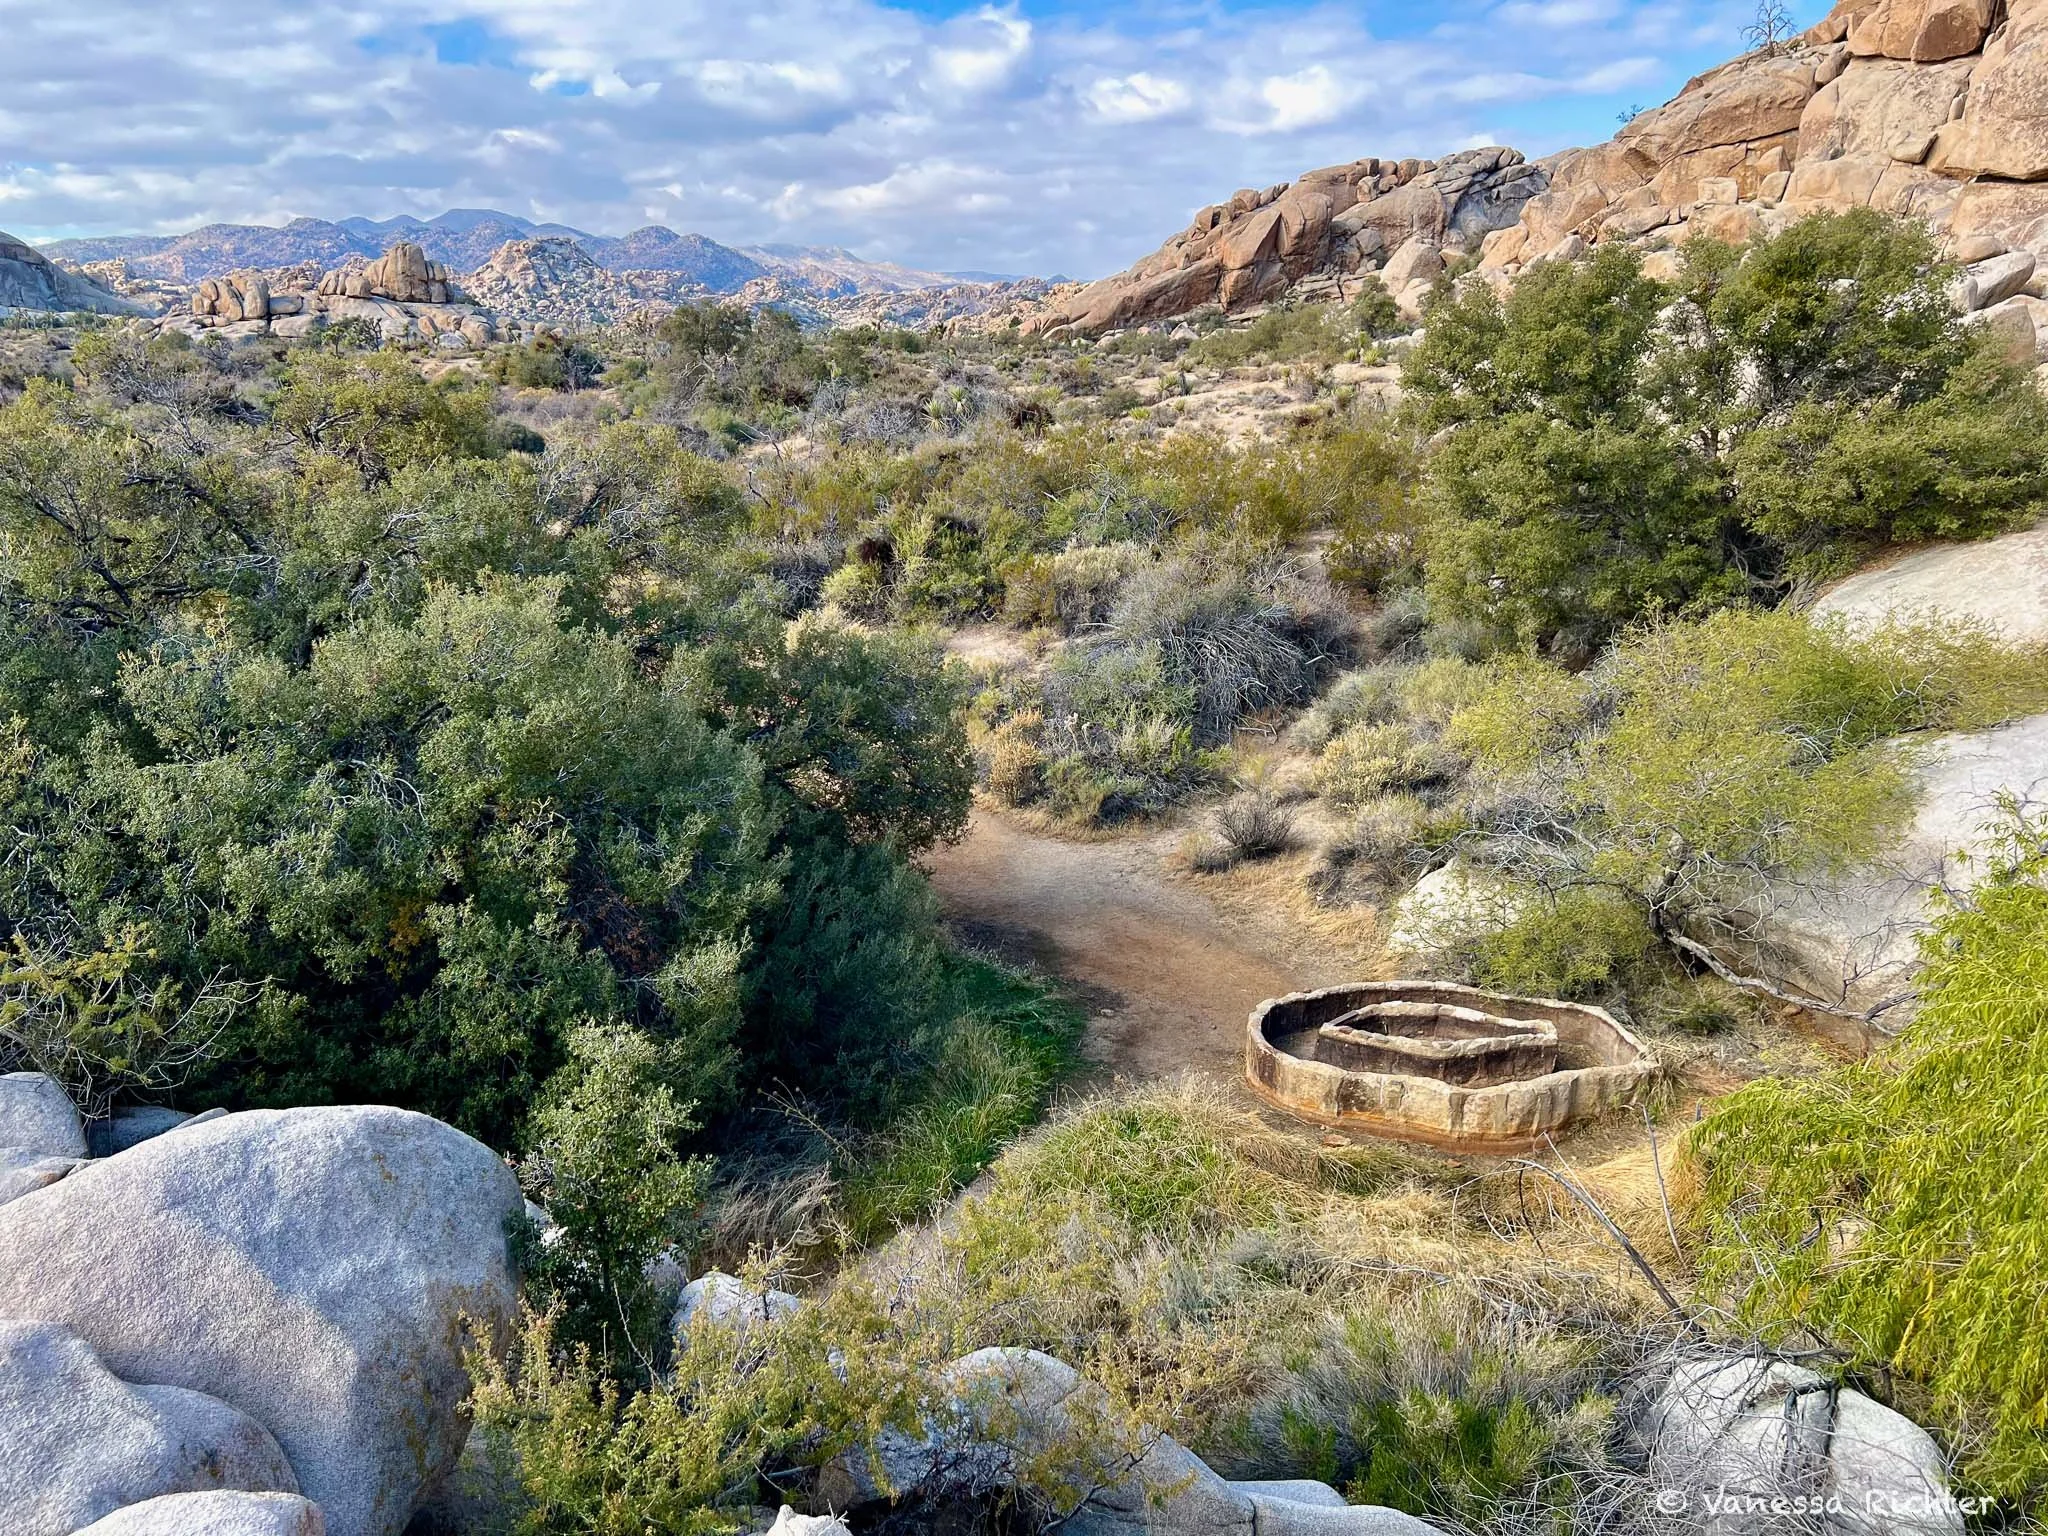
This picture was taken directly behind the Barker Dam. I believe that the round rock structure is a cistern. (If anyone knows better, please let me know!)
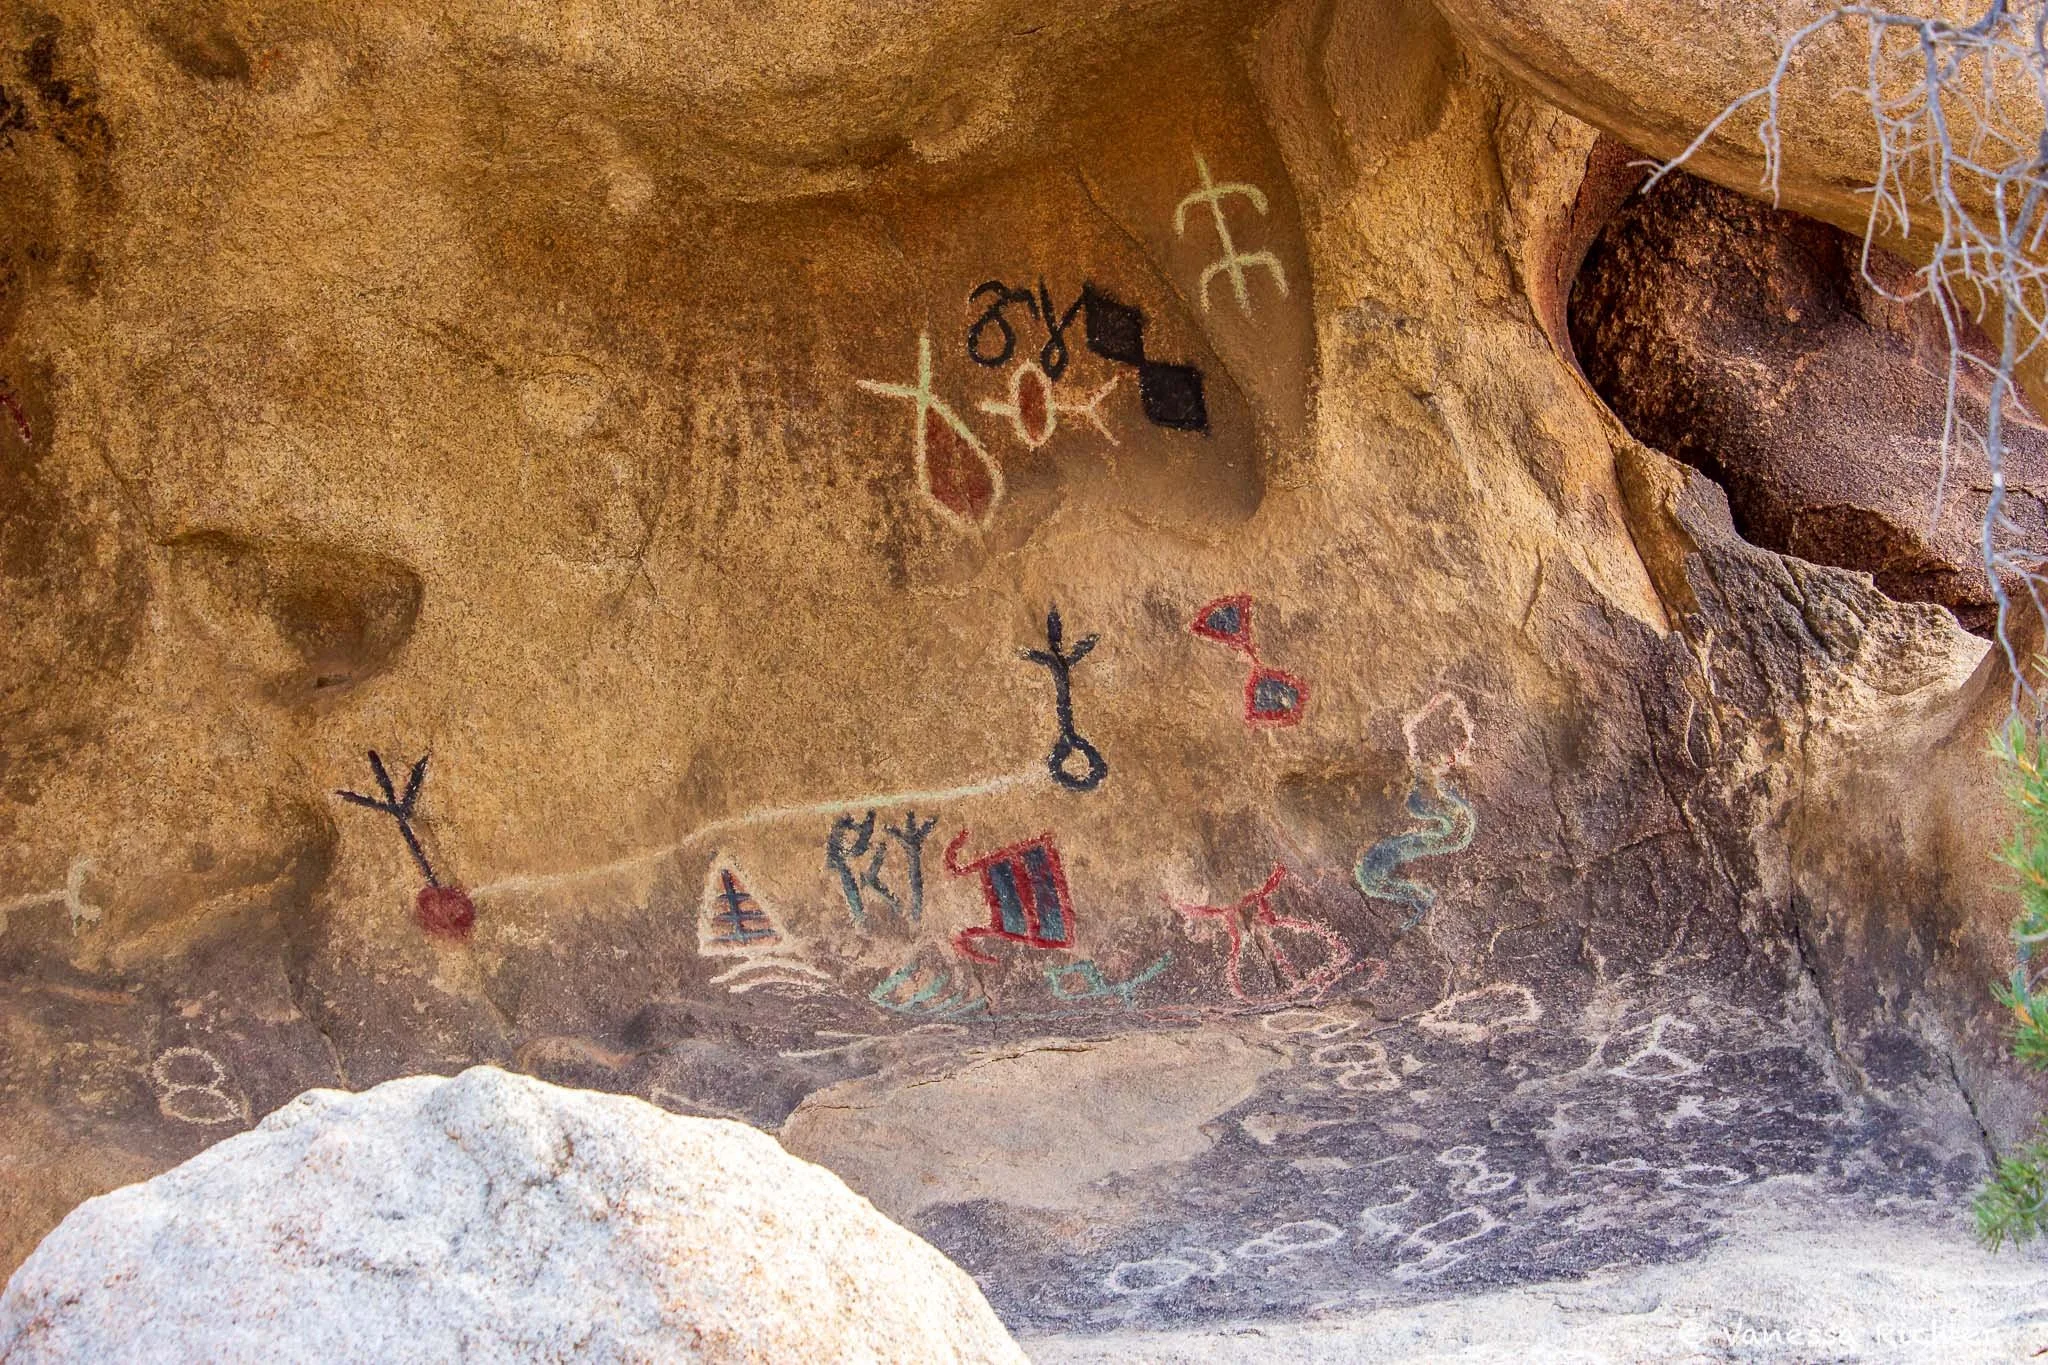
Rock carvings are relicts of Native American activities, some of which date back thousands of years.
Eastern Side (Colorado Desert) with Cholla Cactus Garden
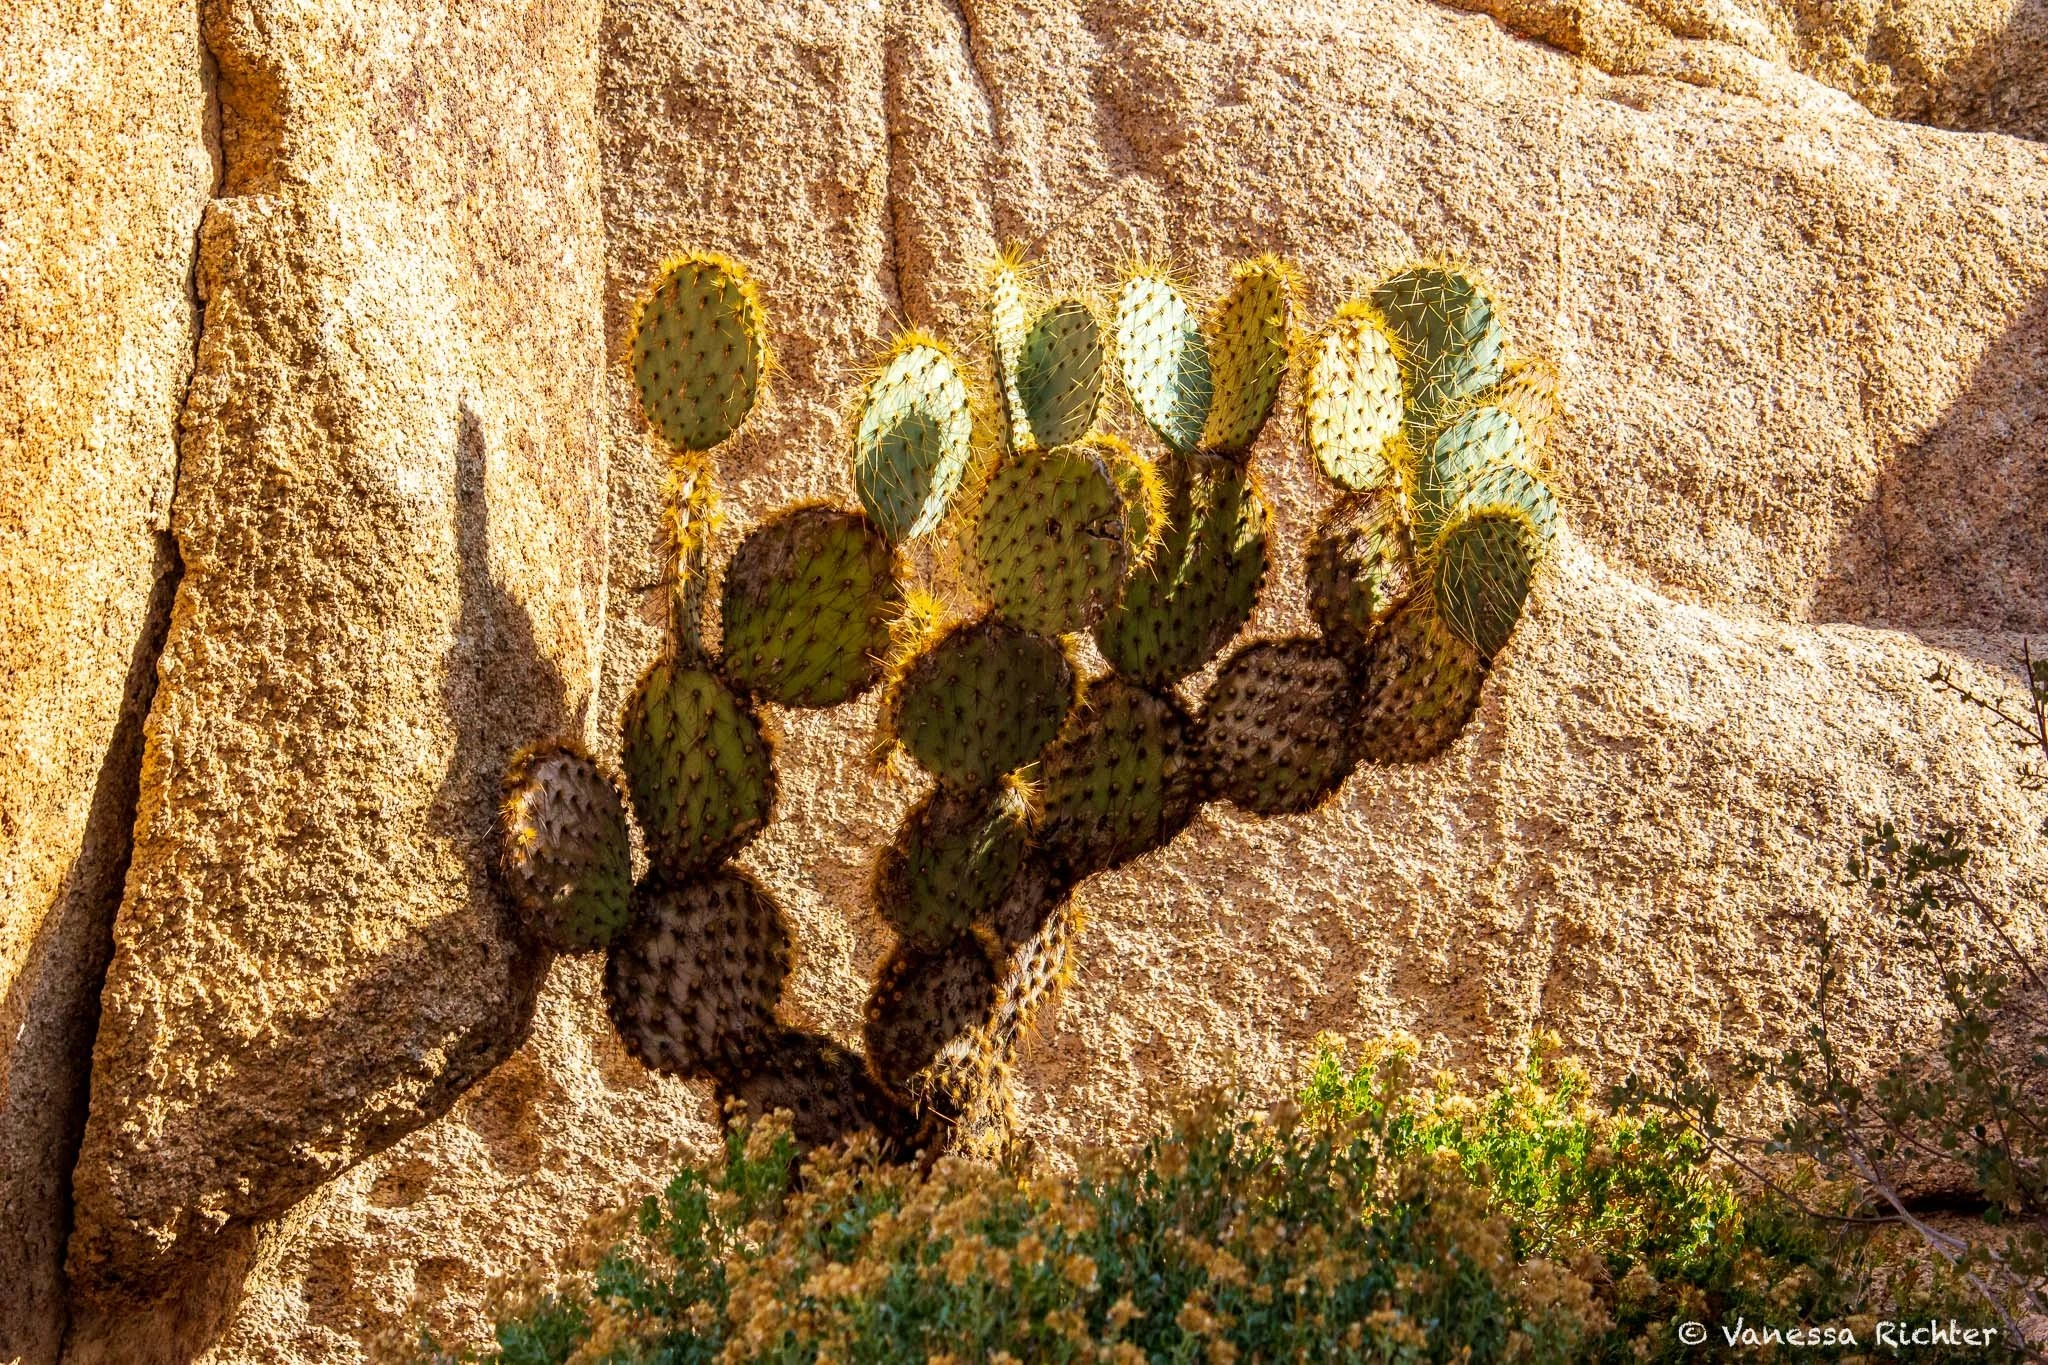
Below 3,000 feet, the Colorado Desert spreads out in the eastern part of Joshua Tree National Park. This area is different regarding vegetation from the more western parts encompassing the Mojave Desert. You won’t see many Joshua trees here; instead, you’ll find creosote bush scrub, ocotillo, cholla cactus, and other xeric shrubs.
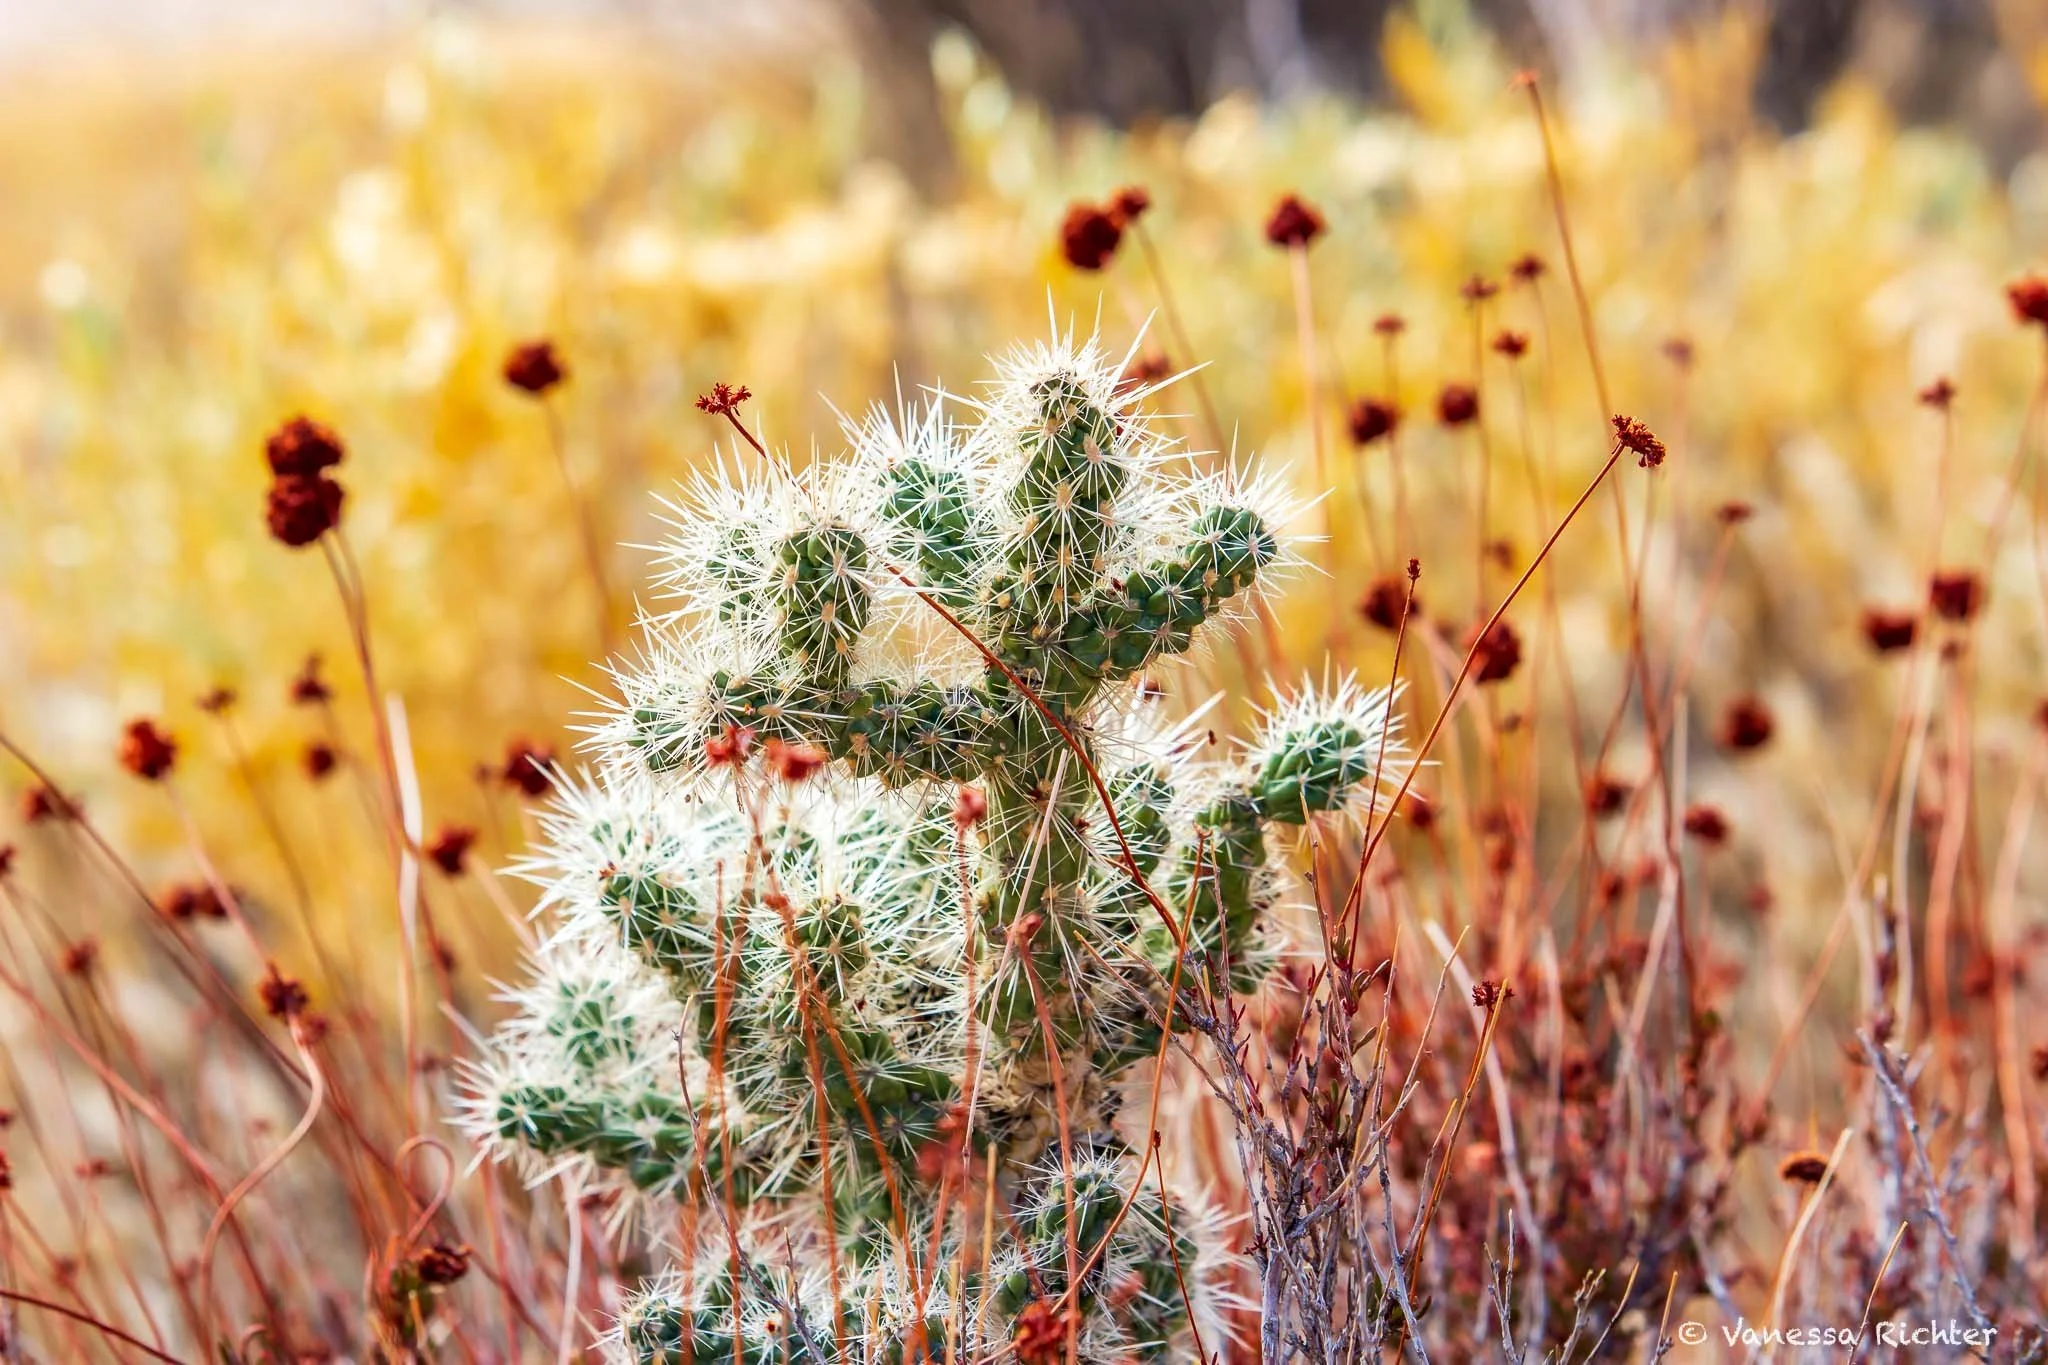
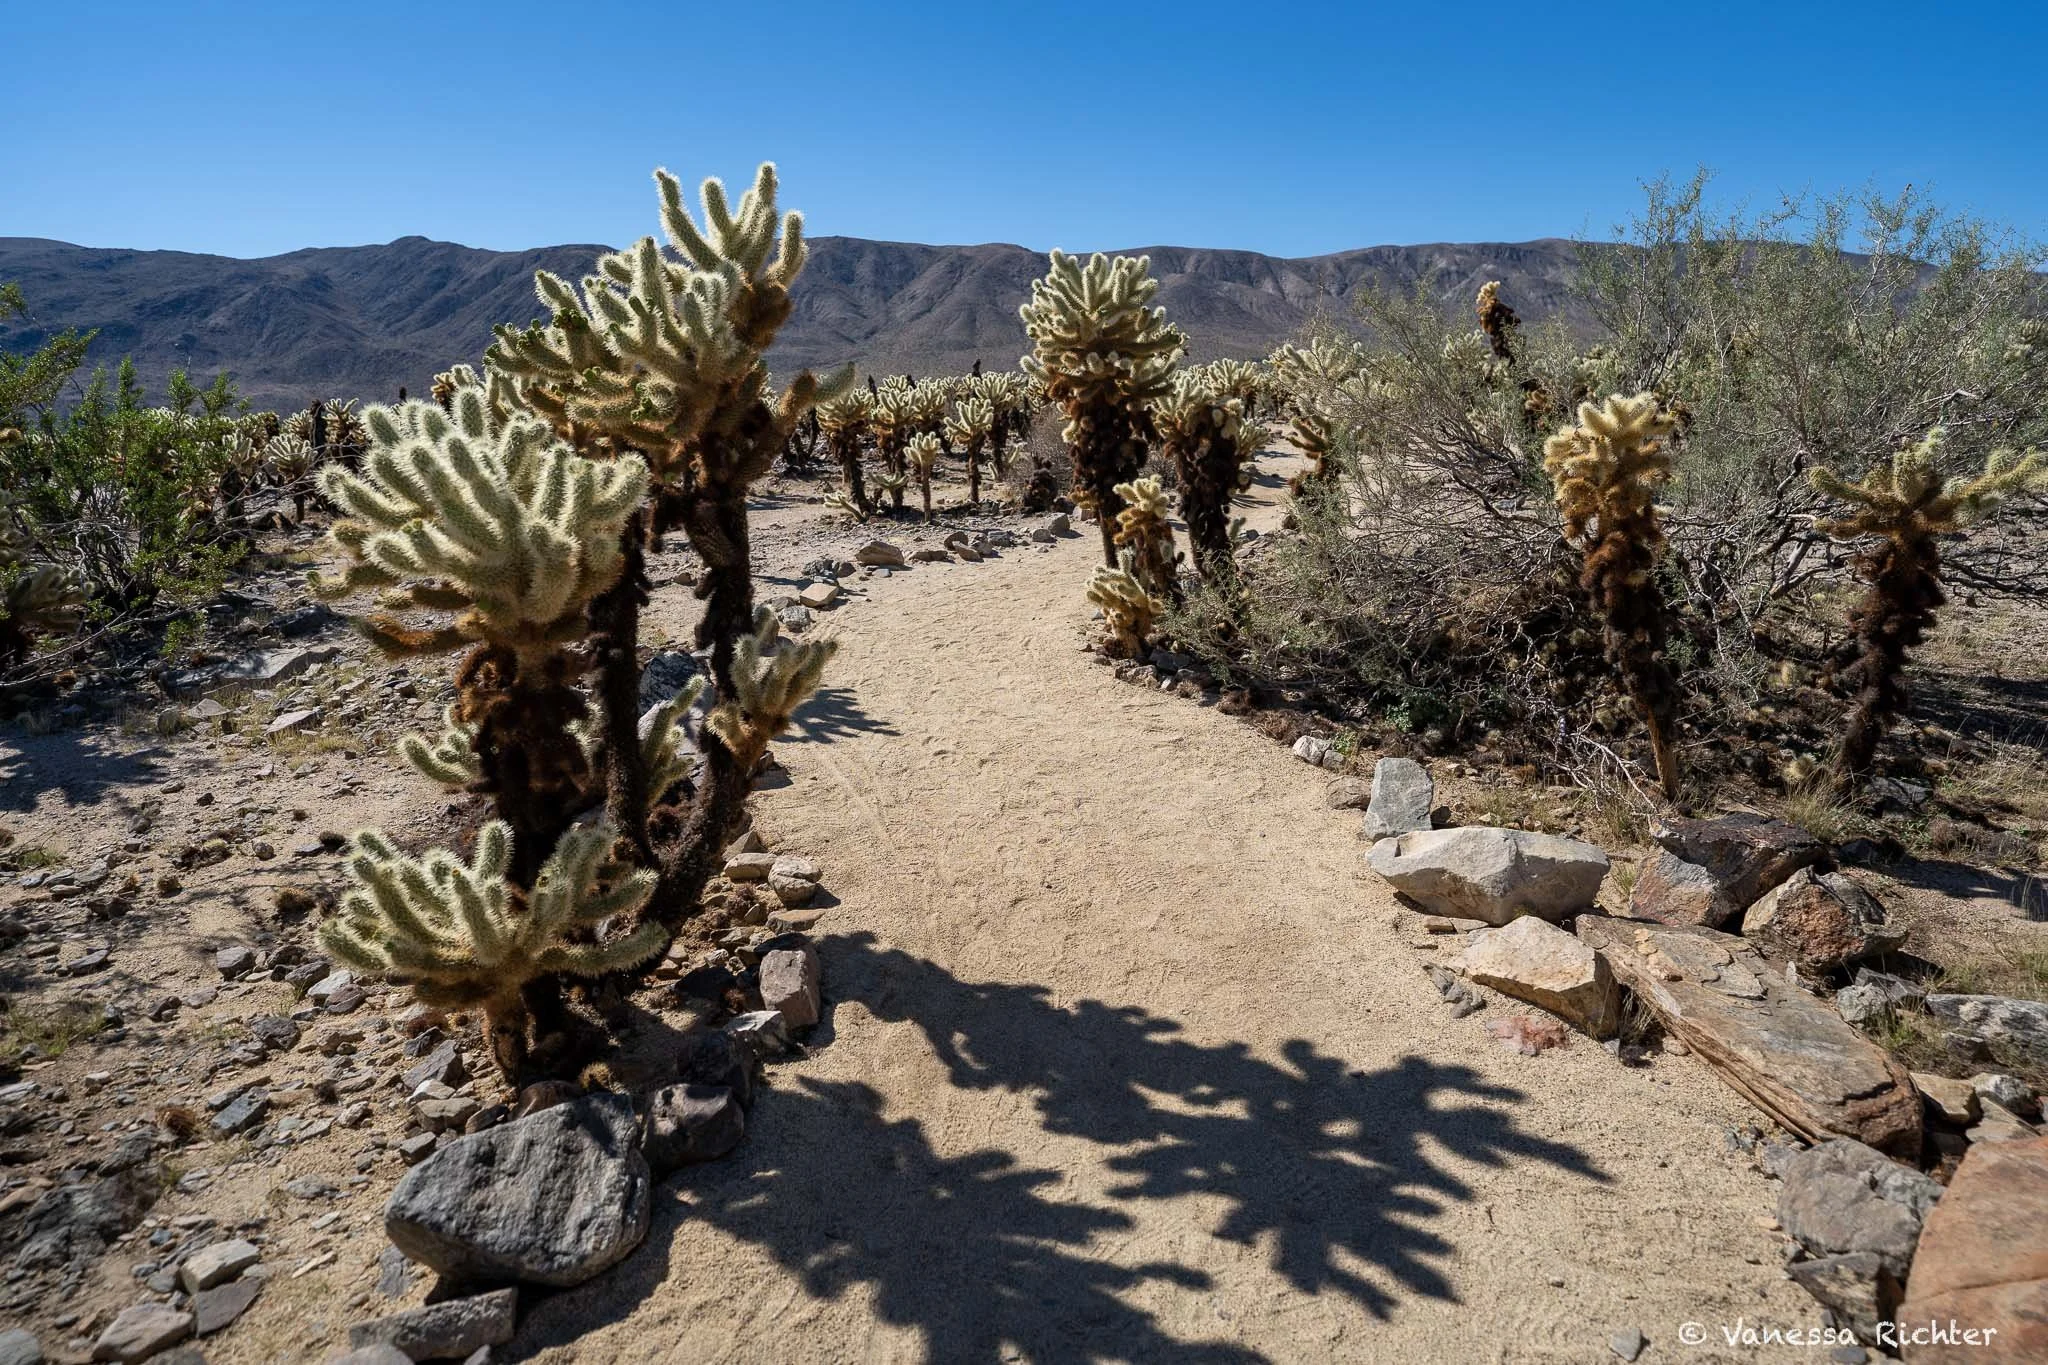
Drive down Pinto Basin Road and watch the vegetation gradually change as you leave the Mojave behind. My favorite feature in this part of the national park is the Cholla Cactus garden. I find these cacti so fascinating! I particularly love when the sun illuminates them perfectly.
Watch out though: Their spiny segments easily break off during a storm, or when disturbed by animals. This is also why one needs to pay close attention when coming close to the cactus. As easy as the spines detach from the cactus, they attach to a person. Even if they do not touch your skin, you may have to put in a lot of tedious work to remove each single spike from your shoes, clothes or whatever it attached to.
If you continue driving south just a bit further, you’ll come across a patch of Ocotillos—an interesting cactus-like plant (it is technically not a cactus though) that’s characteristic of the Colorado Desert side of the park.
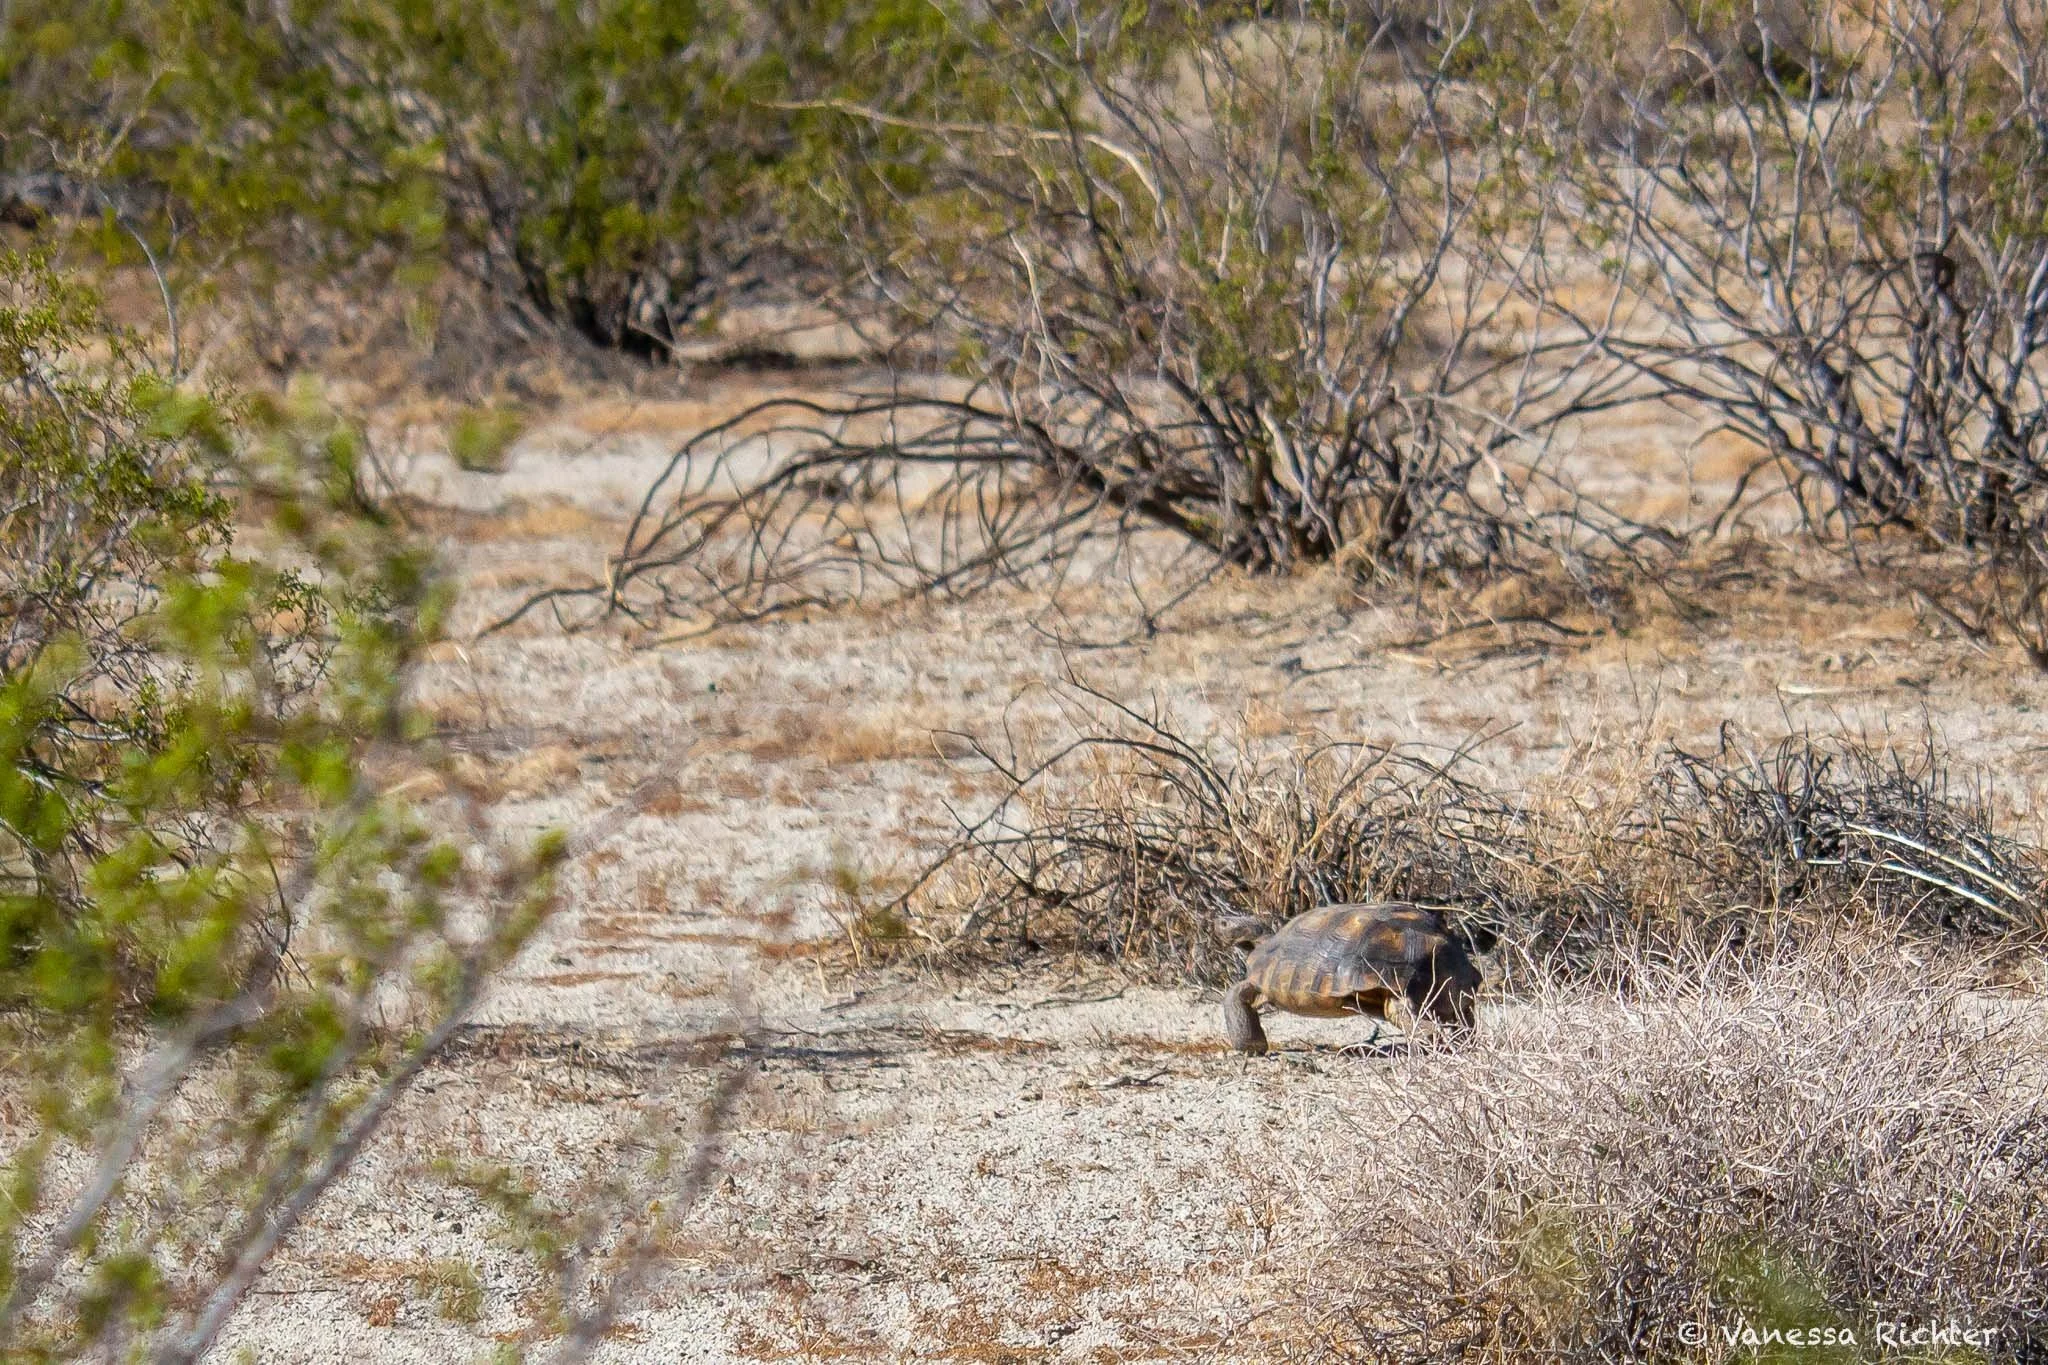
Since this area is generally flatter and has sparser vegetation, I also recommend keeping an eye out for wildlife. We were lucky enough to spot a desert tortoise from the road once. It wasn’t super close, but thanks to the open landscape, we were still able to see it clearly.
Beautiful Cholla Cactus Garden: A walk that you should not miss out on!
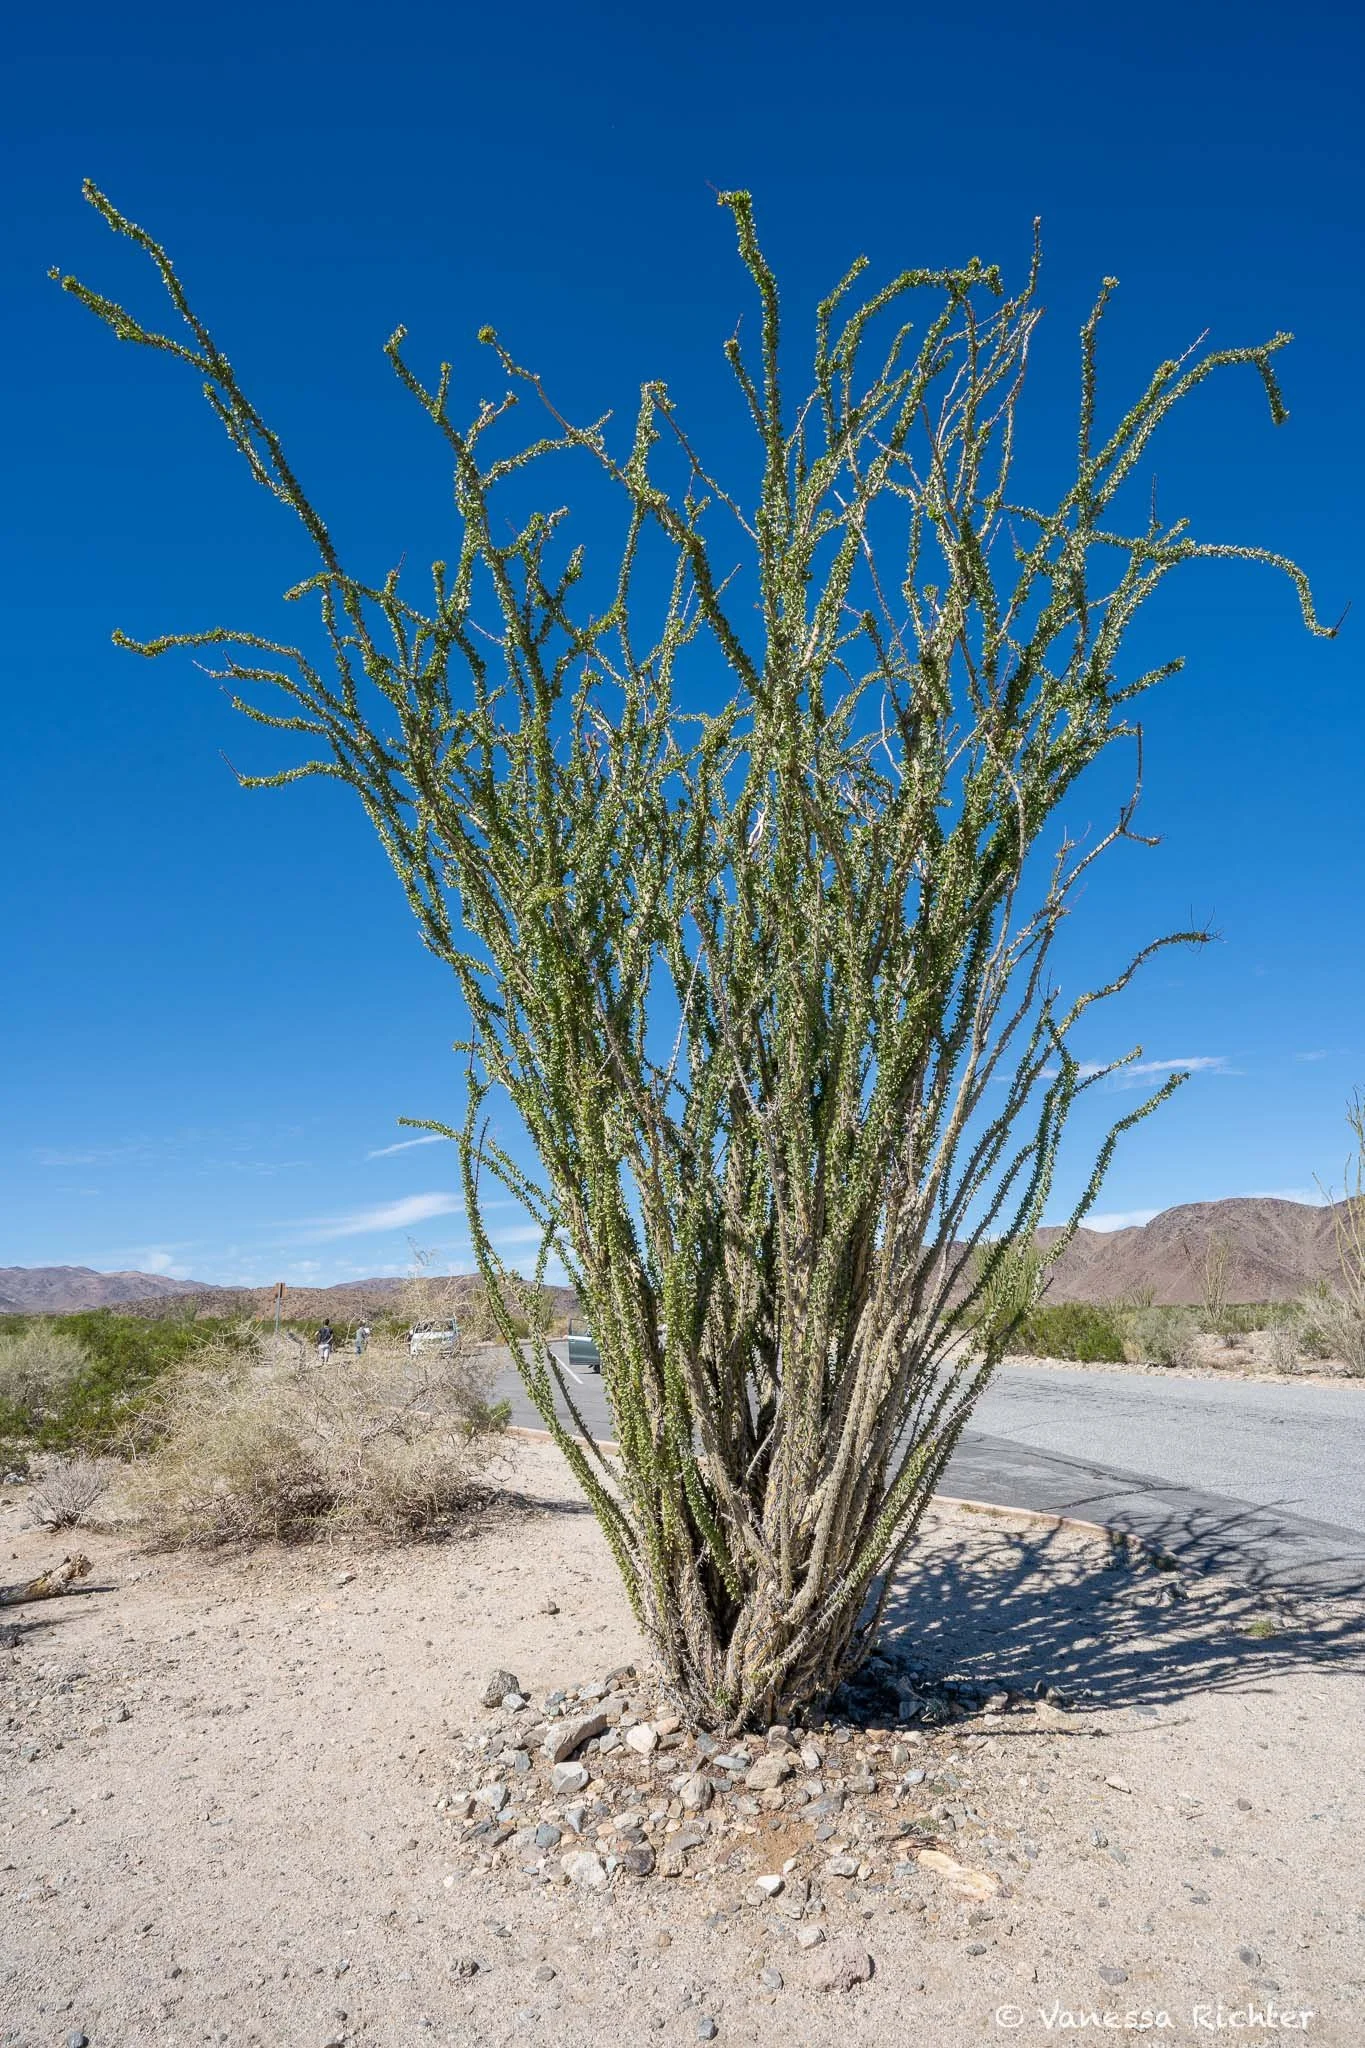
Ocotillos are native to the Colorado Desert, which spans the eastern section of Joshua Tree National Park.
Second Day
Watch The Sunrise
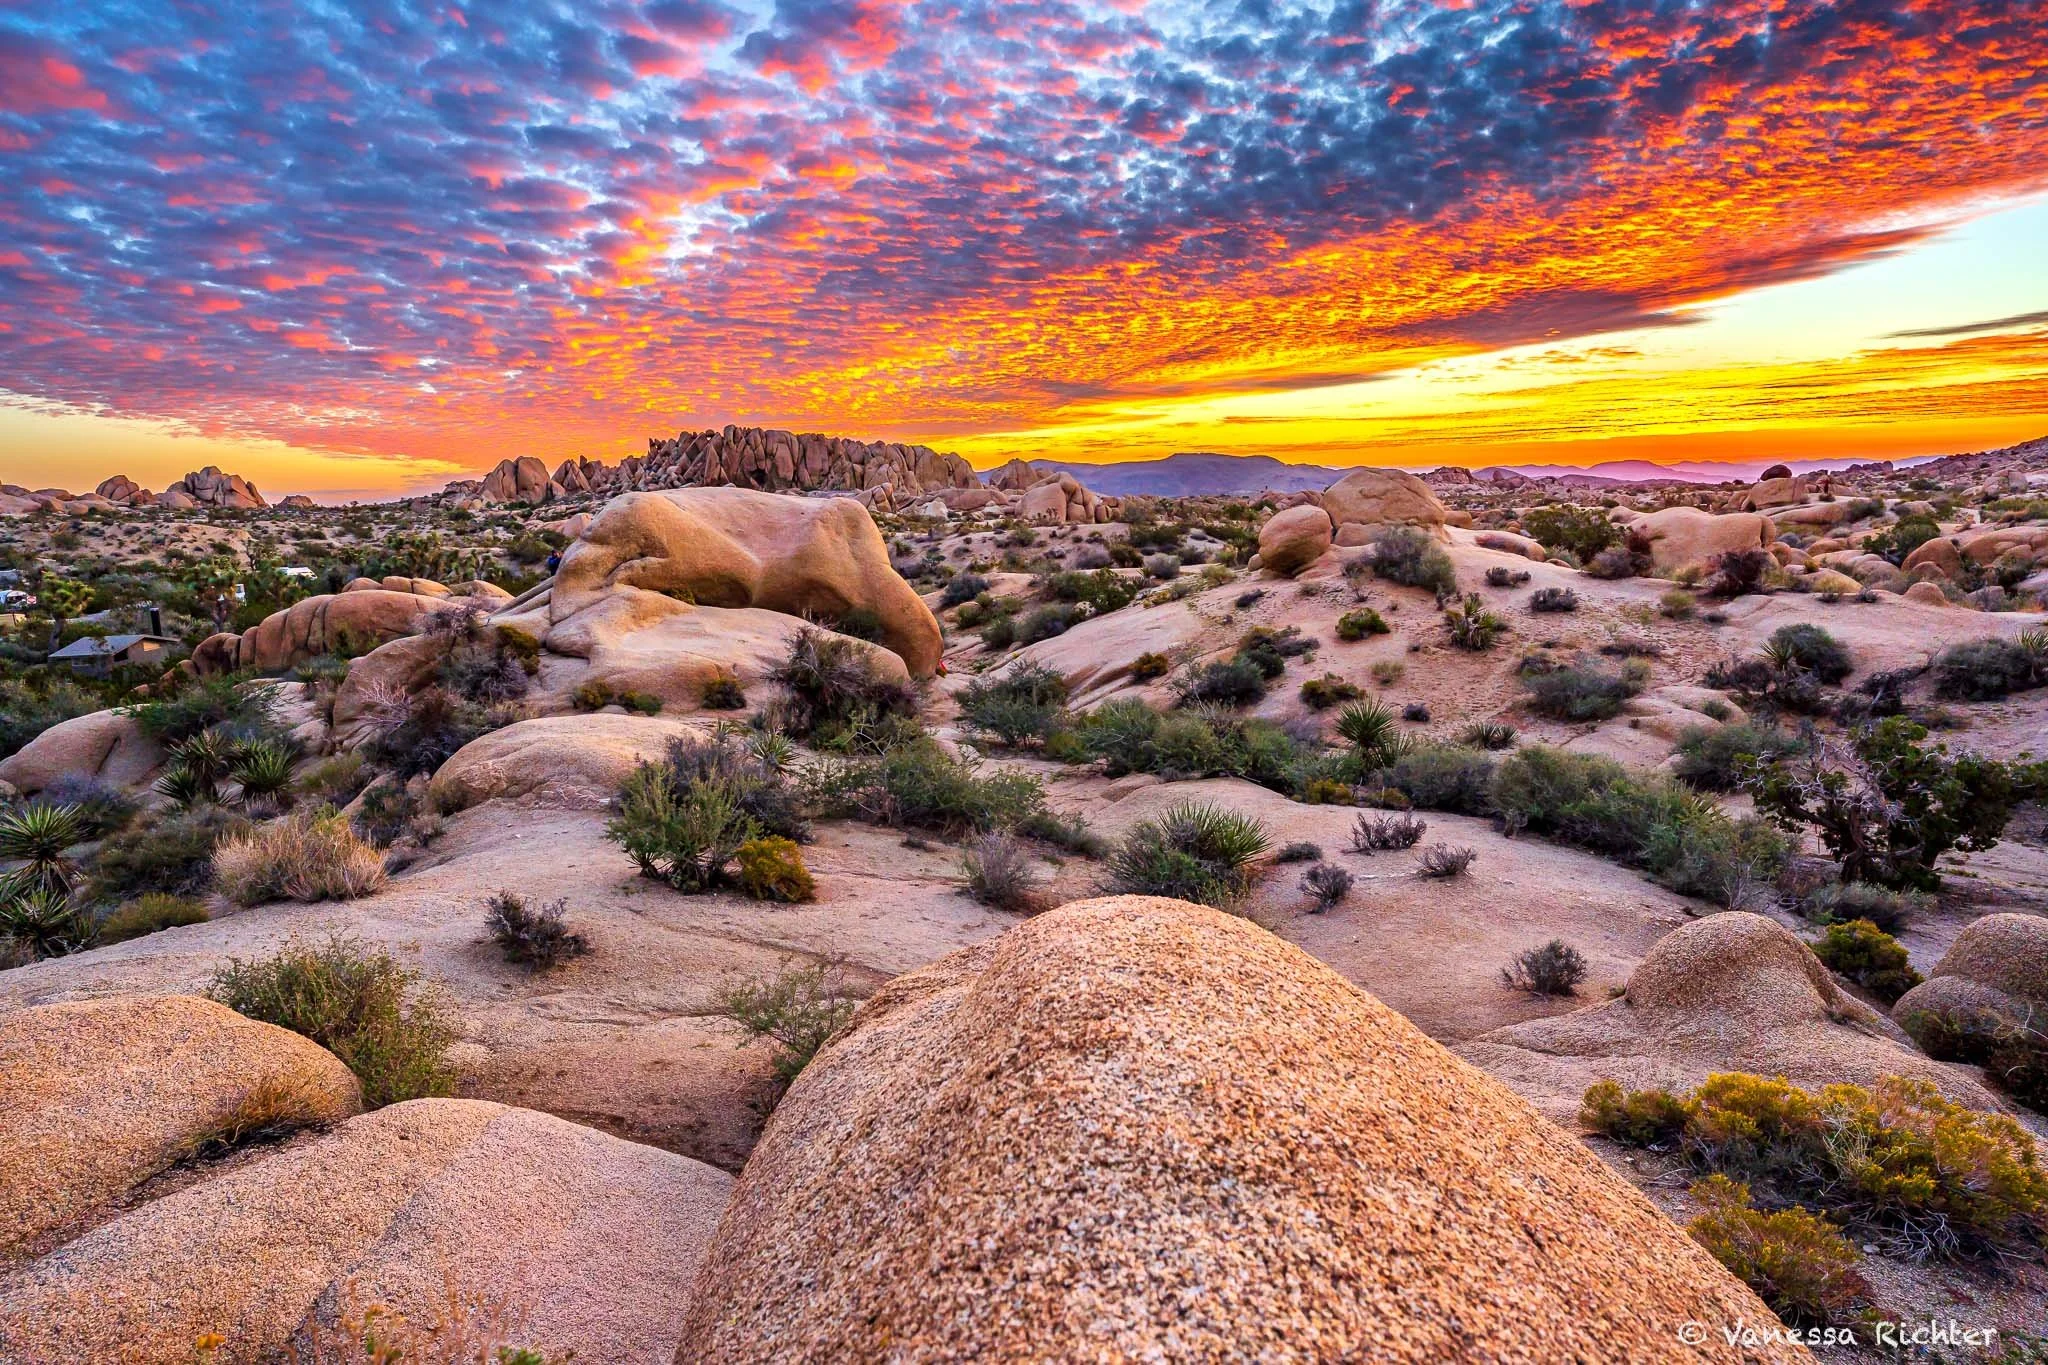
Desert sunrises are simply magical — especially with a stunning backdrop like the one at Jumbo Rocks Campground, where giant boulders and elevated rock formations offer panoramic views of the landscape. Just find a smooth rock perched slightly above the terrain, preferably with a warm cup of coffee or tea in hand, and watch as the tranquil desert slowly transforms into a glowing canvas of reds and oranges.
Even if you're not naturally an early riser, sunrise in the desert is absolutely worth the effort.
And if you’re staying outside the park, there’s many vacation rentals in the surrounding areas that also offer gorgeous sunrise views, especially those perched on hillsides or with open desert-facing patios.
Skull Rock Nature Trail
📍 Distance: 1.7 mi (2.7 km)
⛰ Elevation Gain: 120 ft (37 m)
🔁 Route Type: Loop
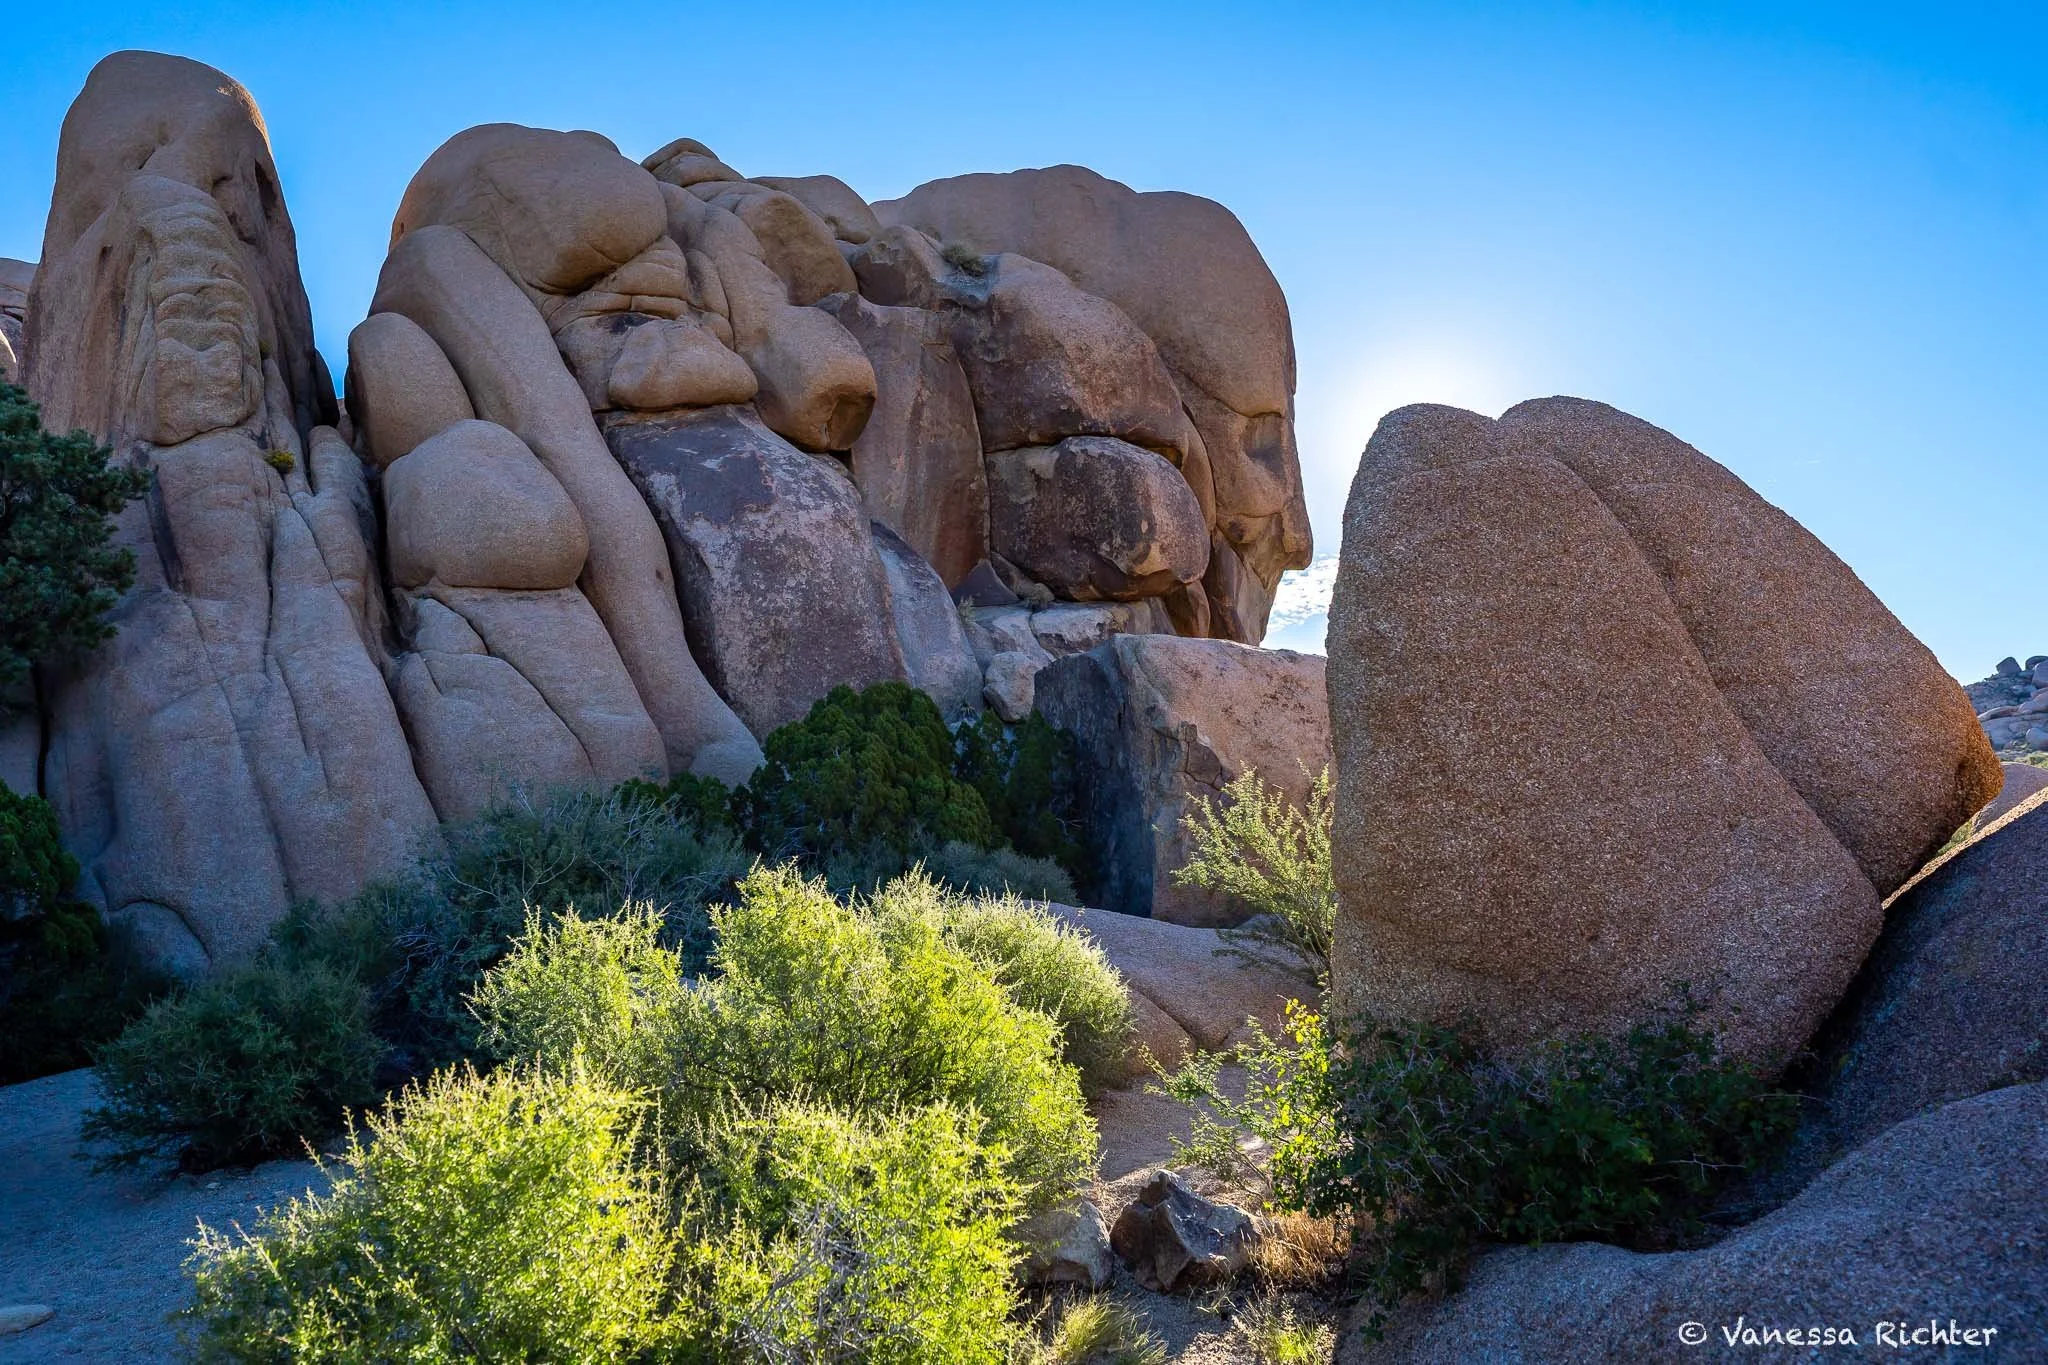
If you’re staying at the Jumbo Rocks Campground, there are amazing trails that you can start right off the spot. This area, which is part of the Colorado Desert, has fewer Joshua Trees, but instead you can admire oddly shaped gigantic rocks that dominate the landscape.
I recommend starting early in the morning, as the area can get crowded later in the day. Begin with a walk to Skull Rock on the Skull Rock Nature Trail (10-15 minutes from the campground). Cross the street and continue on the Face Rock Trail until you reach the Split Rock Trail.
Split Rock Loop
📍 Distance: 2.5 mi (4.0 km)
⛰ Elevation Gain: 150 ft (46 m)
🔁 Route Type: Loop
Follow this trail to complete a loop around the namesake split rock. Eventually, you'll return to the Face Rock Trail, from where you can hike back using the same trails you came in on. In total, this small adventure is about 4 miles (6.5 km) long and will take approximately 1.5 hours. There is very little elevation gain.
Interesting rock shapes: Do you spot the human face in this rock formation?
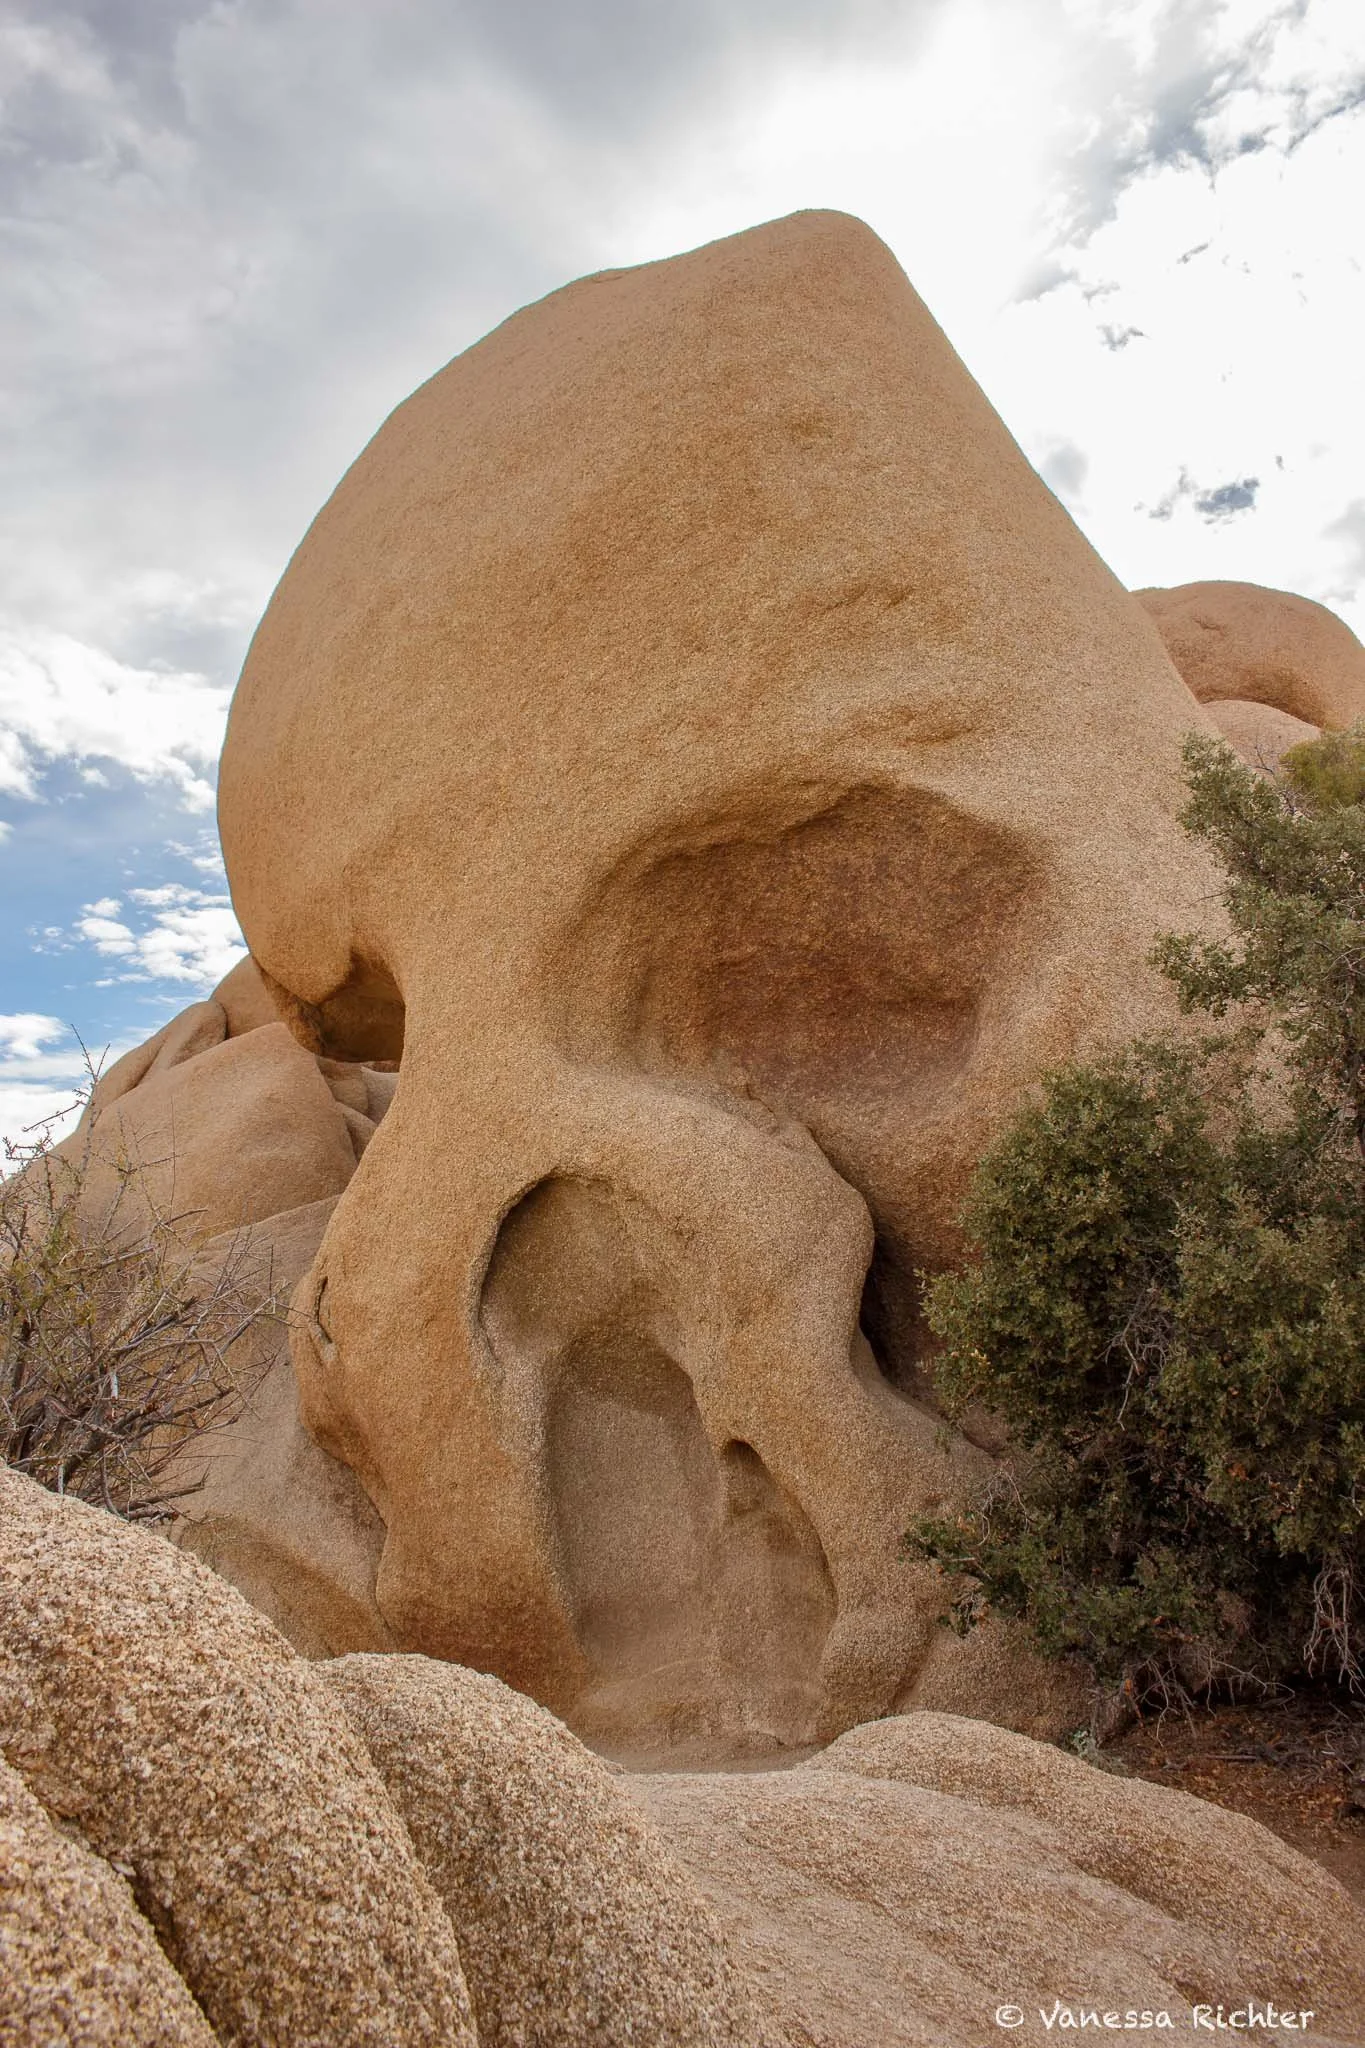
Only a short walk from the Jumbo Rocks Campground: the so-called Skull Rock.
Fortynine Palm Oasis
📍 Distance: 3.2 mi (5.1 km)
⛰ Elevation Gain: 633 ft (193 m)
🔙 Route Type: Out & Back
It was only on my fourth visit to the park that I actually hiked to one of the palm oases, and I really wasn’t sure why I hadn’t done that earlier already! I would definitely say that this is one of my favorite hikes as it almost feels surreal standing in the midst of a literal palm tree forest in the desert. The California fan palms (by the way, the only palm tree that is actually native to California!) grow very tightly together here, taking advantage of the rare occurrence of water in this spot. What was at least as fascinating as the greenery was hearing frogs in the desert. Yes, that’s right—frogs! They were happily croaking. We tried really hard to spot them in the water, but even with binoculars we weren’t lucky enough to get a glimpse of them. Hearing them was already a treat though!
Tip: The higher sections of the trail are quite exposed to the elements, so hiking on a calm day should be more pleasant. However, if you happen to go on a super windy day like we did, that can be fun too — just make sure to keep your hat secure and try not to fly away like a bird! The palm oasis itself, though, is very well sheltered from the wind.


Bonus Tip: See The Milky Way
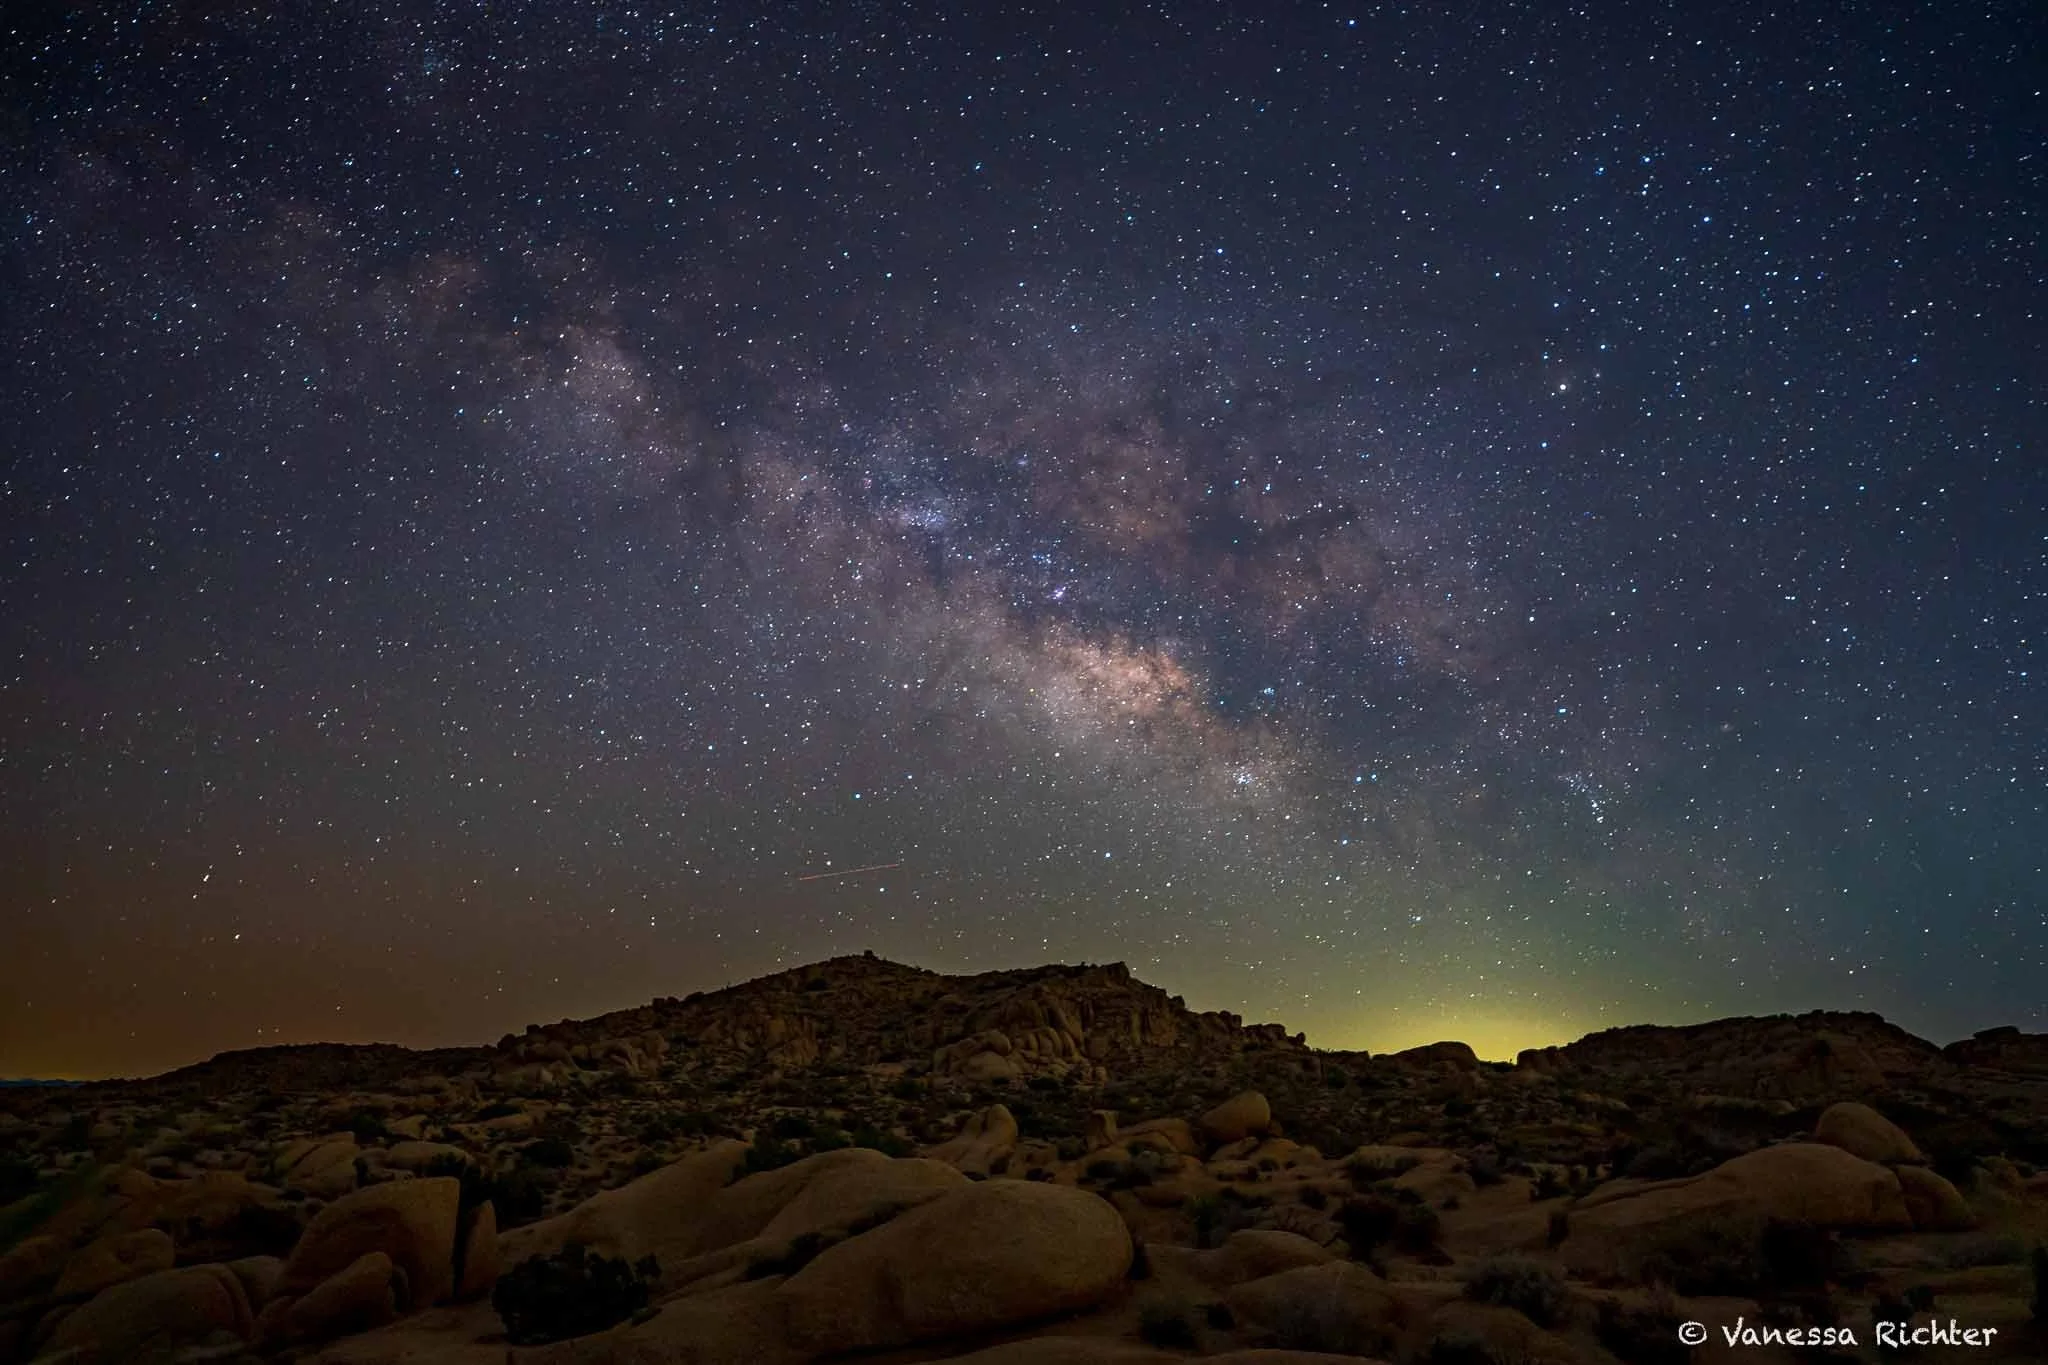
Milky Way in the early morning hours, about two hours before sunrise in late February. You can see the morning red on the left side. Since Joshua Tree isn’t completely free from light pollution, the camera also captured the glow from Palm Springs on the right.
Joshua Tree is an official International Dark Sky Park designated by the International Dark-Sky Association (IDA). The park has four designated stargazing areas: the parking lots at Quail Springs, Hidden Valley, Cap Rock, and Ryan Mountain — but you can stargaze in other places too! We captured the Milky Way right from our campsite at Jumbo Rocks Campground.
I have to say that Joshua Tree is a good place to see the Milky Way, but not the best, as there is some light pollution due to its proximity to Palm Springs and Los Angeles. However, I still found it worthwhile to get up in the very early morning hours to catch the core of the Milky Way (exact time when the core is visible depends on season).
If you want to know more about what to keep in mind for Milky Way viewing and how to capture the Milky Way with your camera, check out my full guide here or right below.
Where to Stay
Camping
- Jumbo Rocks Campground: The largest campground in the park and absolutely stunning — you’ll pitch your tent among huge boulders. No water, just pit toilets. I’d stay here again and again.
- Other Campgrounds: There are several other options inside the park, including Indian Cove, Black Rock, Hidden Valley, and White Tank.
Unique Desert Cabins, Glamping, Hotels & More
If you’re looking for a unique place to stay, you’ll be amazed by the incredible choices near Joshua Tree National Park. The towns of Twentynine Palms, Joshua Tree, and Yucca Valley all offer a mind-blowing variety of options close to the park entrances. You’ll find everything from retro trailers and glamping tents to secluded desert cabins with hot tubs, fire pits, or even outdoor showers—or just a simple place to sleep without all the extras. If I'm not camping, I’m a sucker for a secluded cabin with a hot tub. Nothing feels more meditative to me than gazing at the stars and breathing in the desert air while soaking in cozy hot water.
Know Before You Go
Essentials
- Bring your own water, food, and supplies — there are no services inside the park.
- Check current conditions before heading out; see the official park website below.
Best Seasons & Temperatures
- Spring, fall, and winter are the best seasons to visit the park. Summers are brutally hot, and it's not unheard of for temperatures to exceed 120°F (50°C).
- Nights in late fall through early spring can be chilly. If you’re camping, bring a warm sleeping bag and layers.
Leave No Trace
The park has a fragile desert ecosystem. Following Leave No Trace principles protects the land, wildlife, and the experience for future visitors. Some key points:
- Stay on trail: Prevent damage to fragile desert plants and soil.
- Don’t climb rock formations: These natural sculptures erode easily.
- Conserve water: Pack out all waste and don’t disturb water sources.
- Pack it in, pack it out: Even food scraps — they don’t decompose quickly here.
- Respect wildlife and plants: Keep your distance and leave things as you found them.
- No pets on trails: Pets must stay within 100 feet of roads and be leashed at all times.
Need More Detailed Info? Check out my longer guide below!

Find More Joshua Tree Adventures

Follow the Adventure
Latest on the Blog
Search
📌 Pin for later
If you enjoy my content, please consider supporting my work
Your support helps me to pour my time and soul into Venture Beyond The Picture while keeping it clutter free. Every little bit means a lot to me — monetarily, but also as an appreciation of my work. I am grateful for every contribution.
Observing the sparkling stars in the night sky at a truly dark place is an awe-inspiring experience. Most of us don’t have access to such dark night skies right outside our doors, but there are still many places in the world where one can gaze into a star-filled sky, with the Milky Way offering a glimpse into the beauty of the universe. In this article, I will cover everything you need to know to capture a great shot of our home galaxy. I’ll discuss the essential gear you’ll need to begin with, when and where to venture out to photograph it, and how to set up your camera to take a good shot once you have all your gear, the right place, and the right time.